
Thread to post day to day work

JMJ
![]()
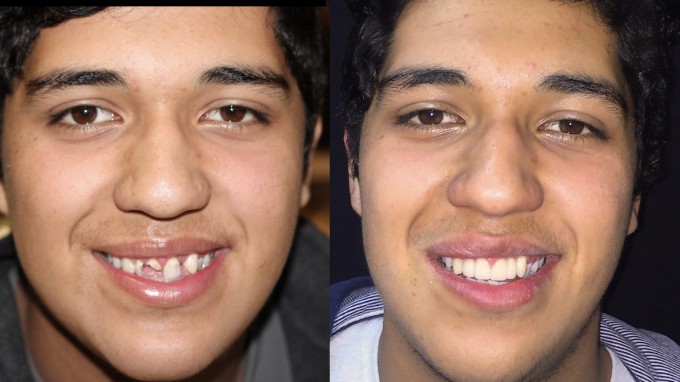
We do a lot of these. My patients travel a fair distance and sometimes aren't able to have regular exams. Often, the teeth need some major treatment by the time they get to the office. I remember learning this idea from a Chris Nix post. Now I get to work with an assistant who was trained in his office . . . coincidence?
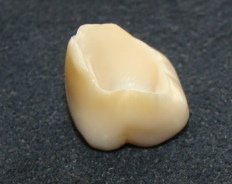
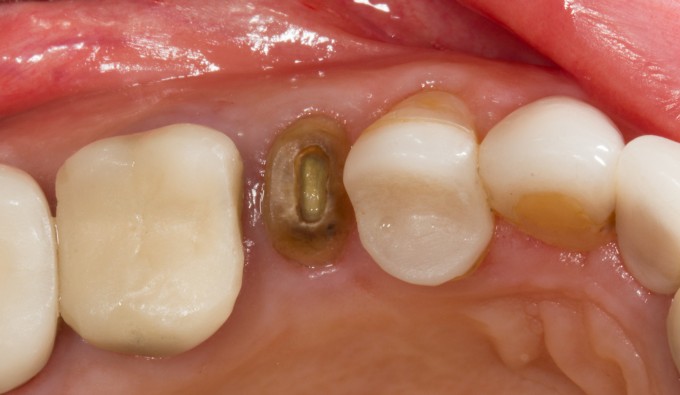
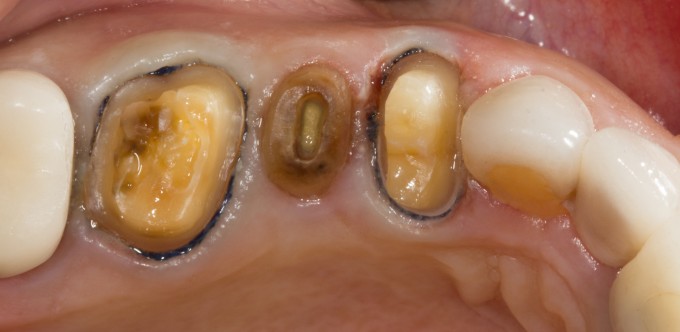
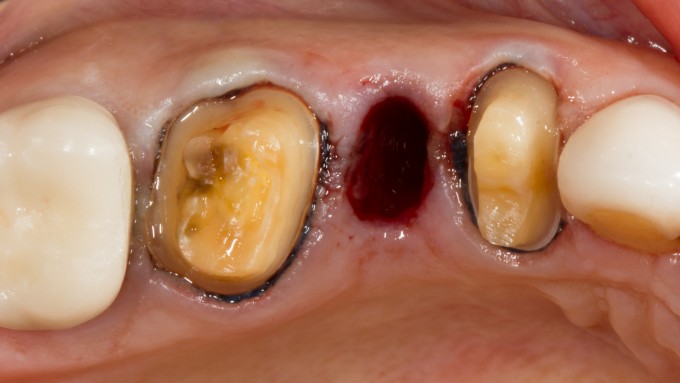
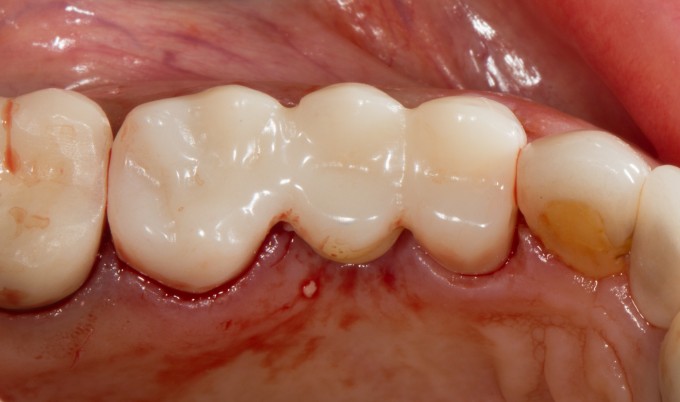
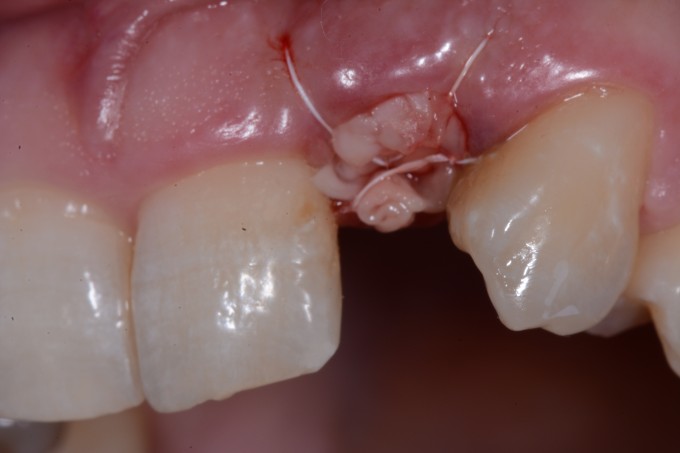
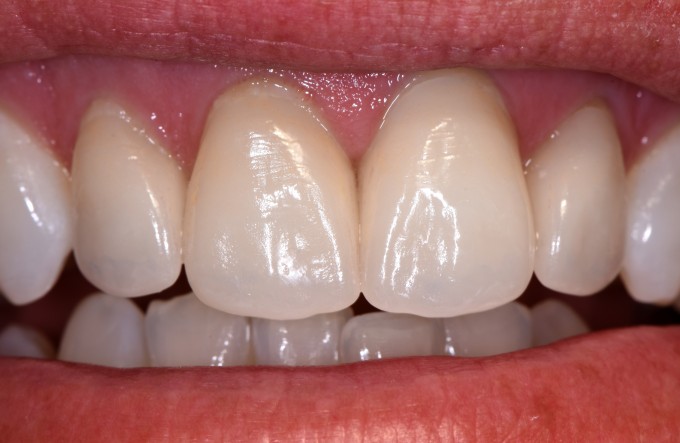
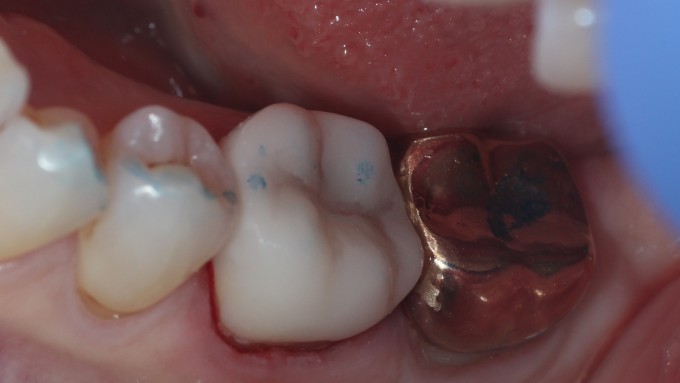
Preop
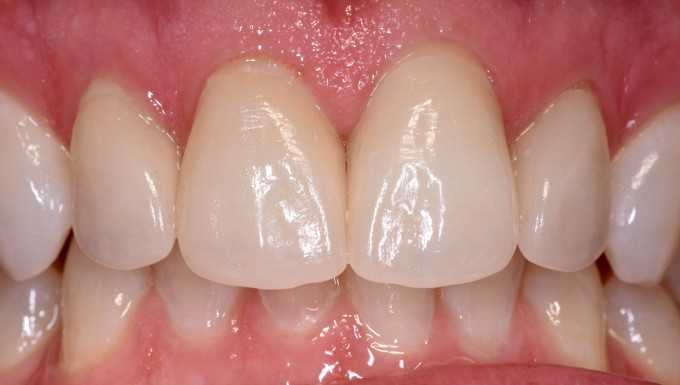
Post endo, ready to bond.
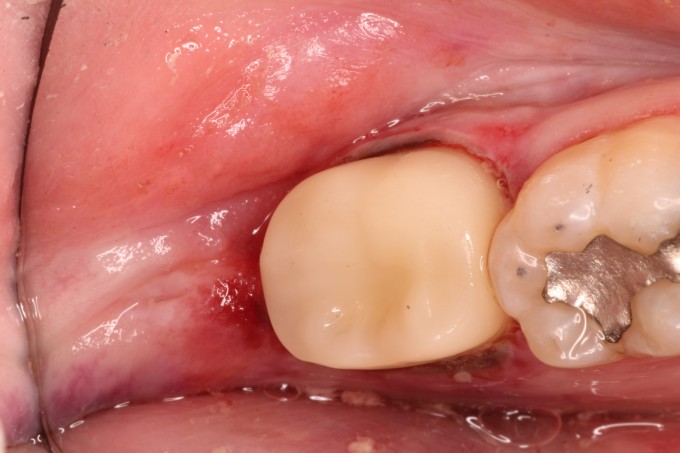
This process used to take 3 - 4 appointments. Thanks Sirona and Matthew Brown (introduced me to Wave One Gold).
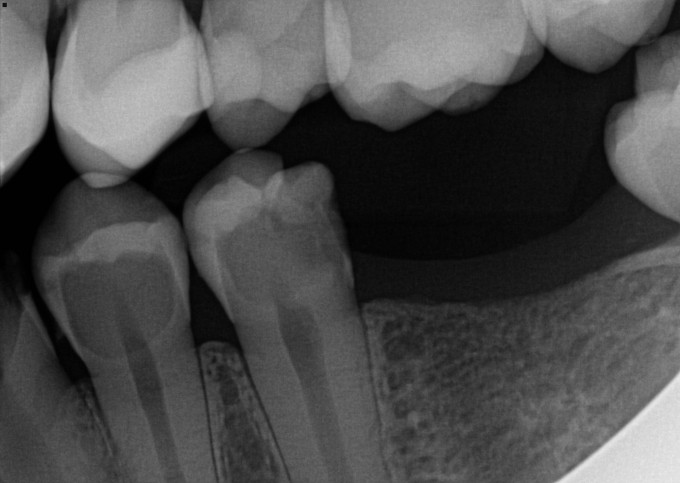
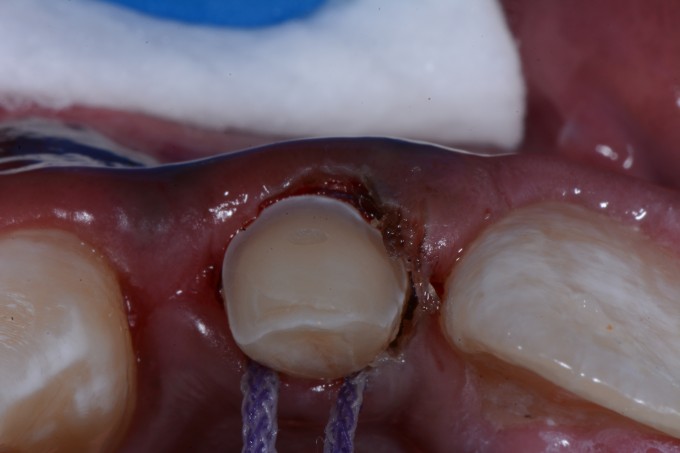
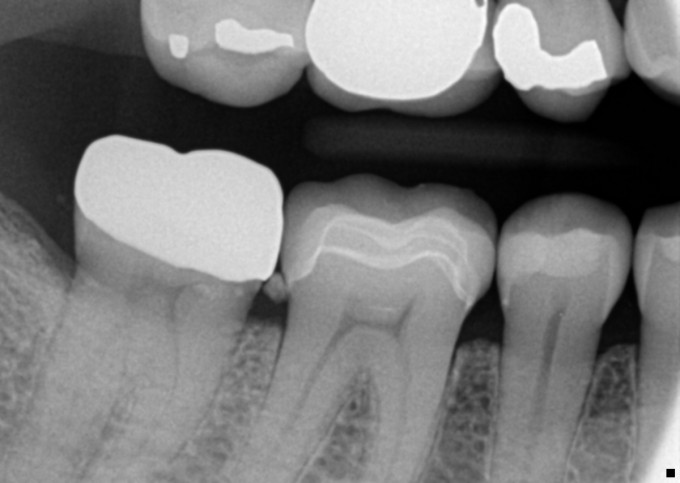
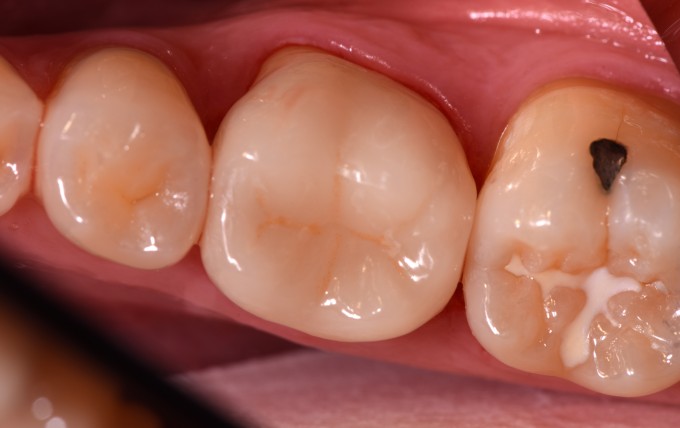
(We removed the alloy from #20 - pre-op and radiograph don't correspond - and placed a RMGI to see if the pulpal symptoms would resolve. No time for permanent restoration today.)
God Bless
matt

2 Anteriors done in about 2 hours this morning. I was really thrilled with everything except the bubbling from the glaze. Dont think I put enough on there or something. Obviously it was a big improvement...and I was hungry for lunch! 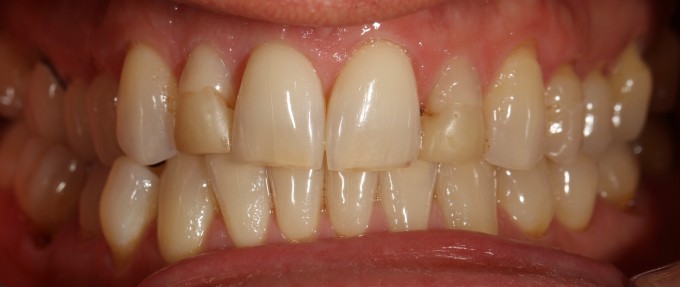

Likely used too much glaze liquid Sully...Can't evaporate fast enough and it bubbles. Just use a very tiny amount.


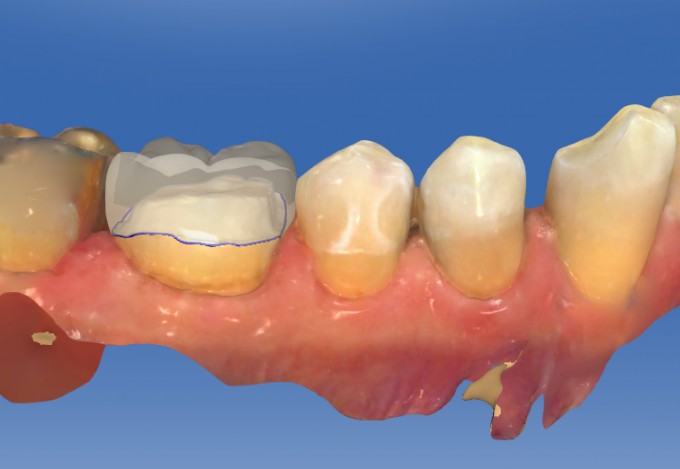
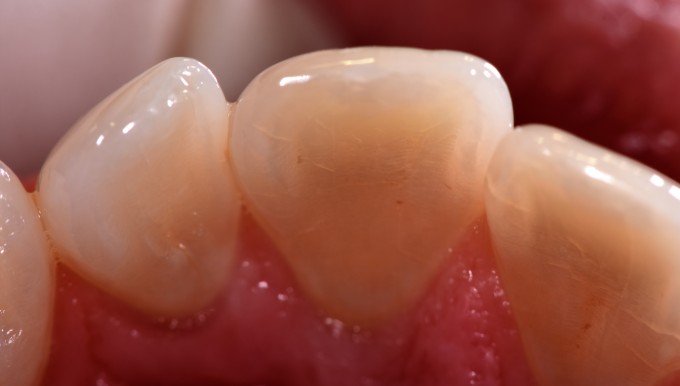
Single Zr, Sirona D3 with Dr. Skramstad's Vita infiltration technique (Vita Chroma A in fissures, Blue on cusps and perimeter carrying over to body, lightly infiltrated A2 on cervical) - 10 min mill to furnace.
JMJ
![]()
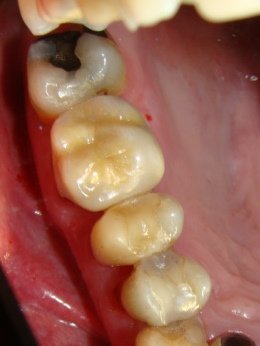
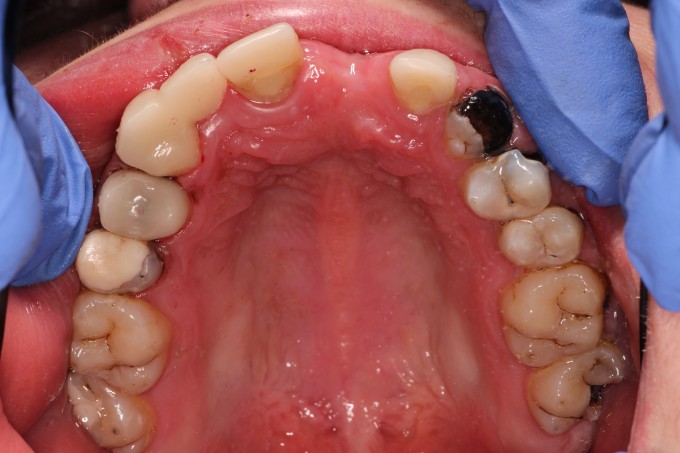
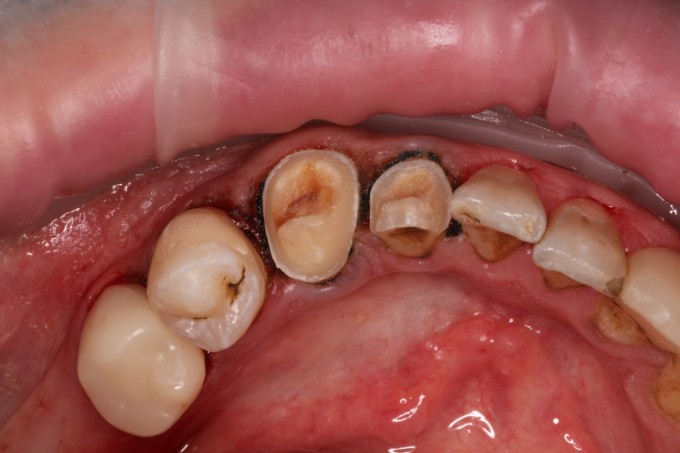
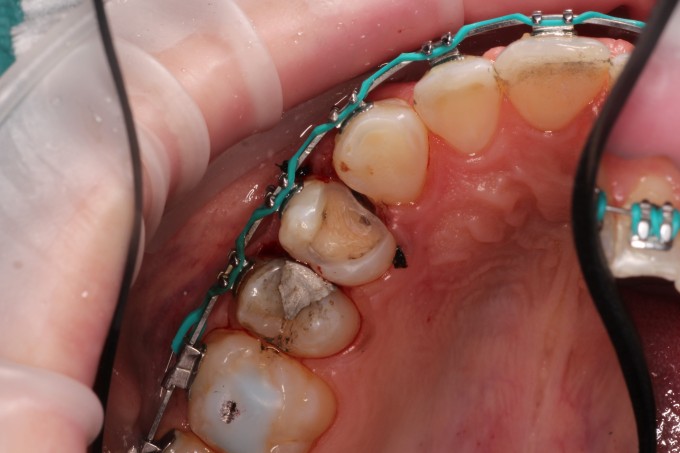
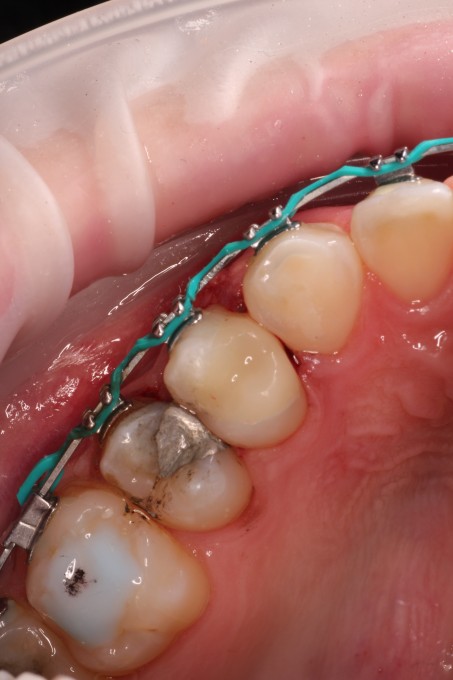
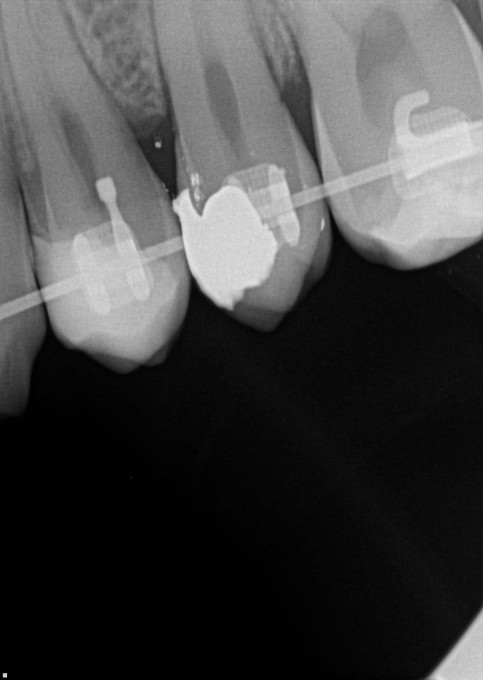
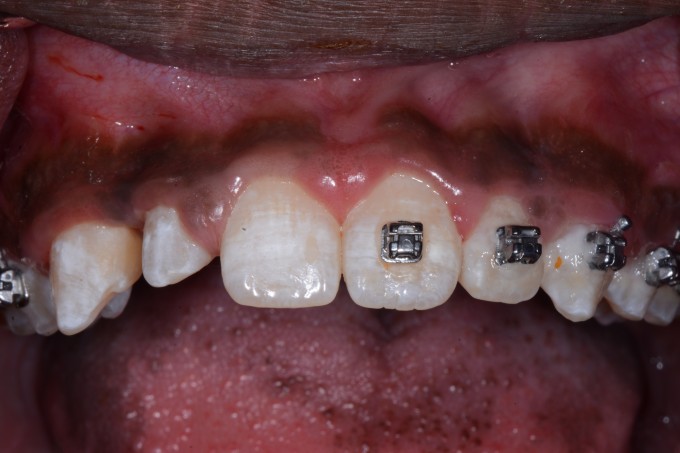
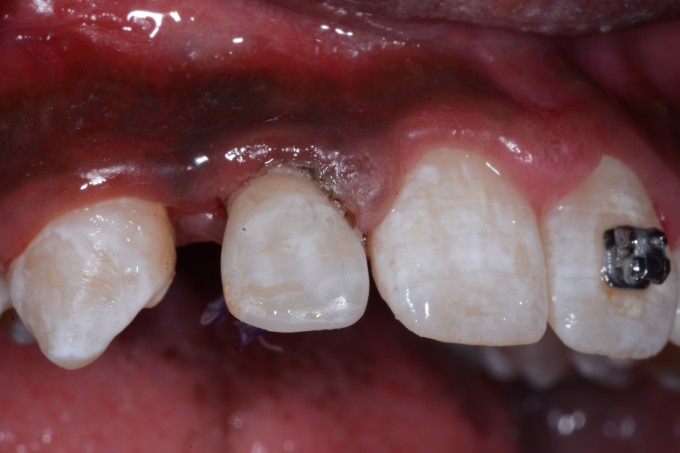
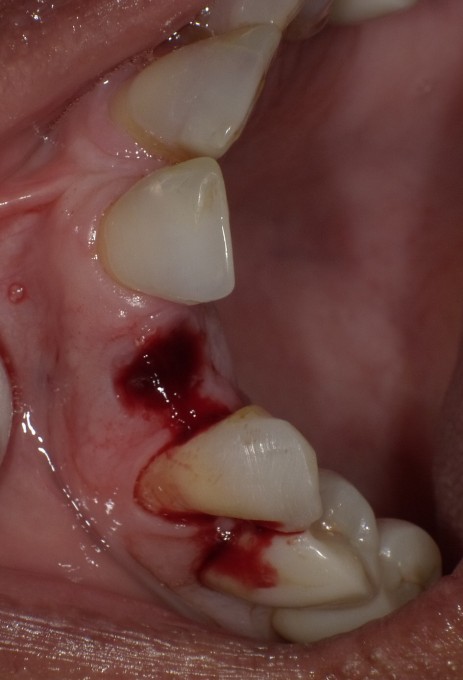
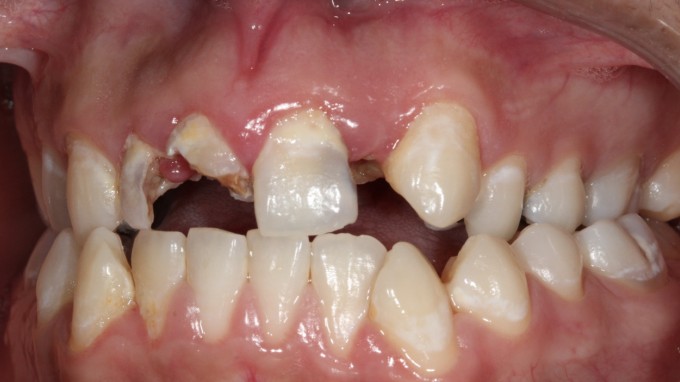
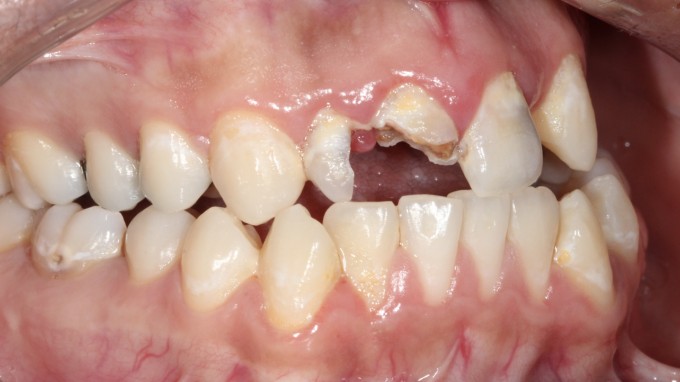
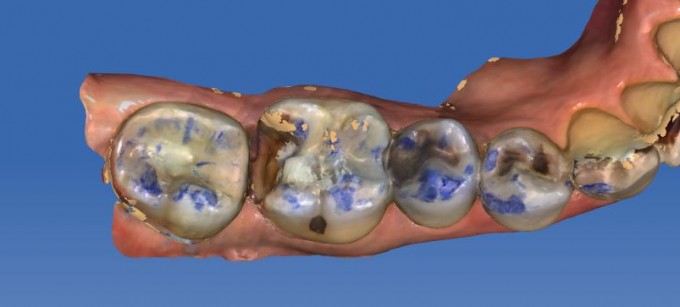
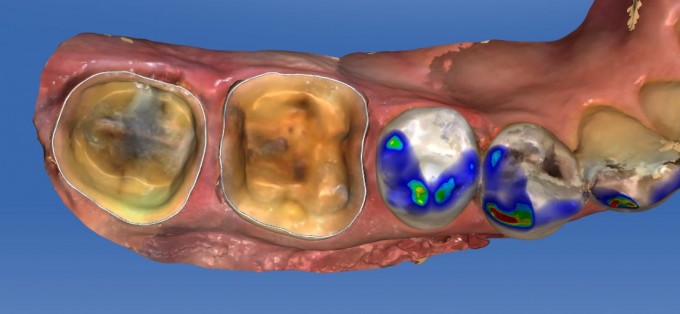
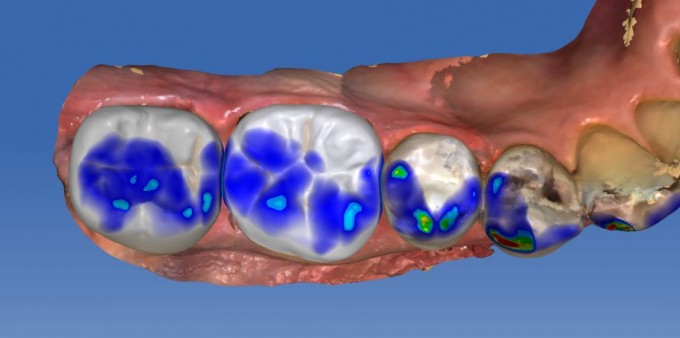
This is a young patient who left home early and is now incarcerated in a youth facility. Intelligent, fun to visit with, got caught in the wrong place at the wrong time. From his dentition, I think it's safe to say that the party was at his house.
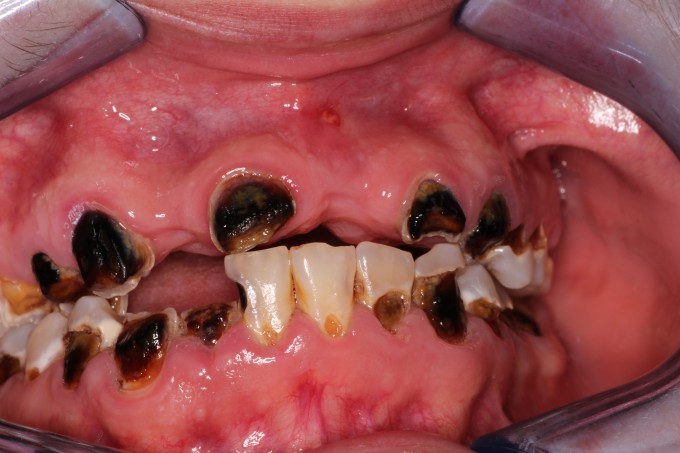
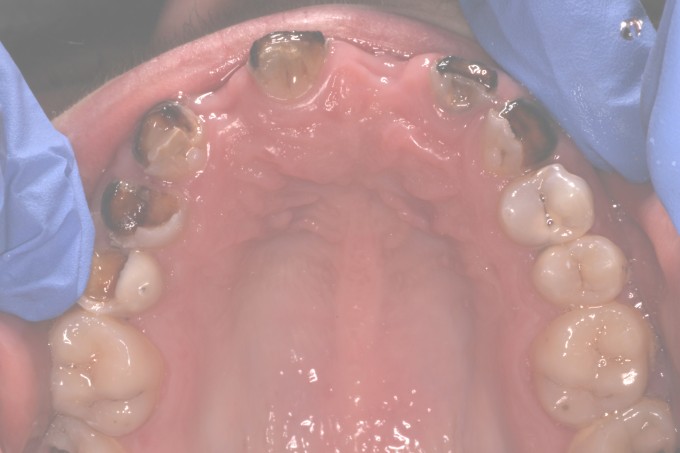
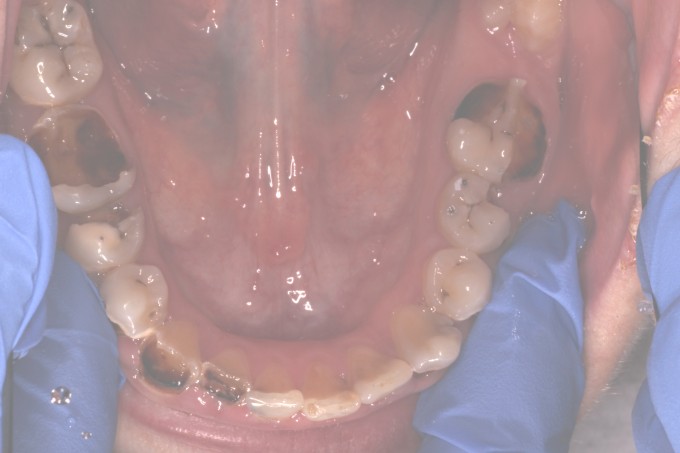
What to do? The authorities want him patched up. I want to stop the plaque trapping, remove the infection. We started with Silver Diamine Fluoride to stop the decay, then worked thru the restorative with RMGI where possible. Some of the teeth are too wrecked for direct restoration.
We needed a material for full to partial coverage that can be bonded and mills fast - Cerasmart.
Other temp materials would be fine, but to transport the fella just to recement would be frustrating.
This way, the patient gets a good deal, we get to help, the assistants get to train on designing rapidly in a half-mouth and quadrant-style approach. And this will be a long-lasting and great transition for him until he can straighten things out and move forward with a definitive [life] plan.
The SDF arrested the lesions and generated pulpal secondary healing very successfully; we did not have any endo save the anterior that was fistulated when he arrived.
We had four long appointments (3-4 hours) to address most of the issues.
Here are a few photos.
God Bless
matt
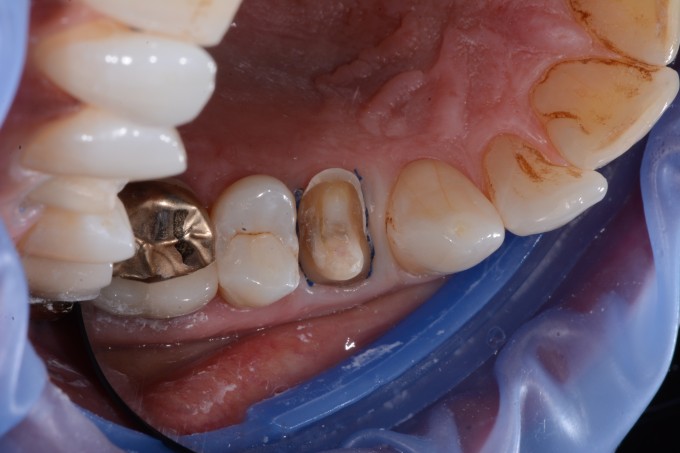
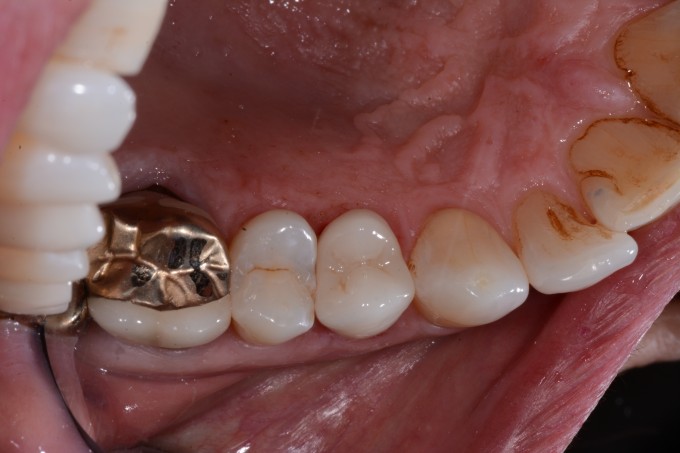
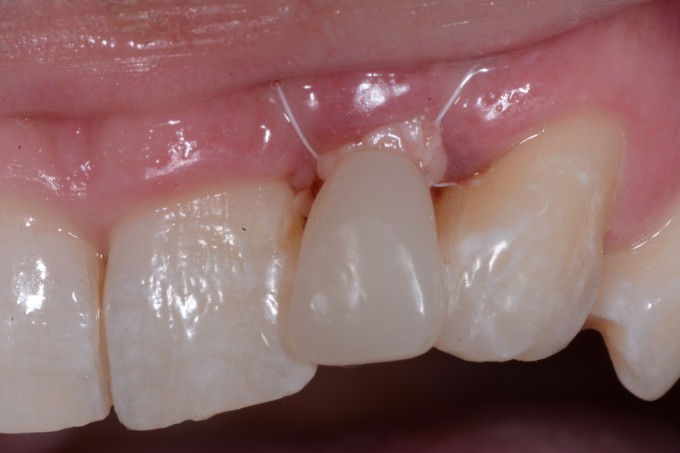
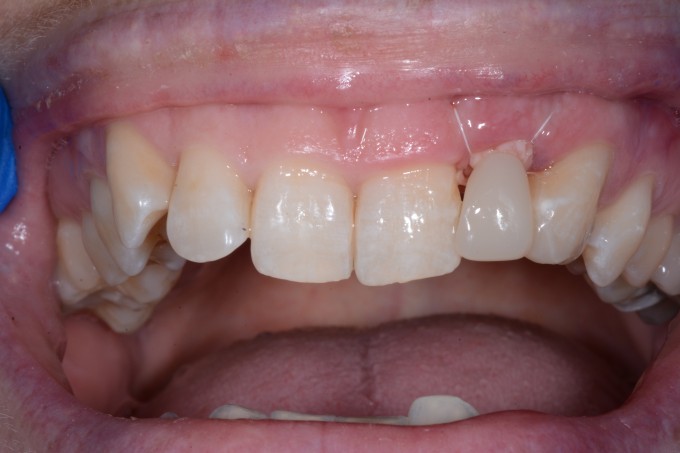
Temp Bridge milled today. Patient did not want to do an implant and did not like the esthetics of the crowns on 12 and 14... so we decided to do a bridge
Preop:
Prepped 12 and 14:
Extracted 13:
Cemented Teliocad Bridge:
I use permanent RMGI.. doesn't bind well to PMMA and I can get them off. I place teflon over the socket and that works well.


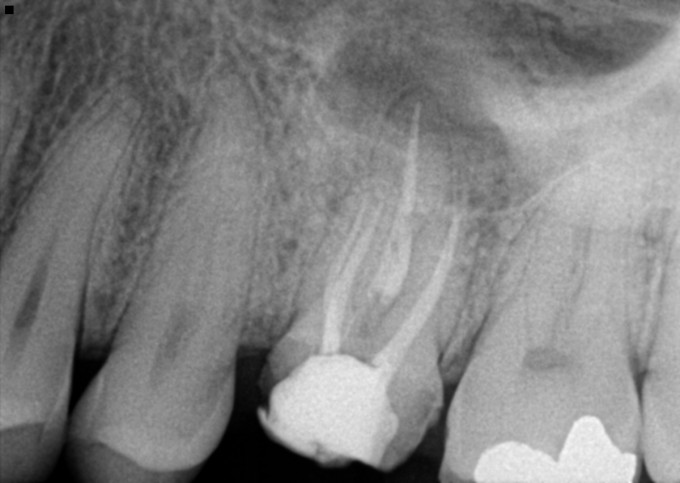
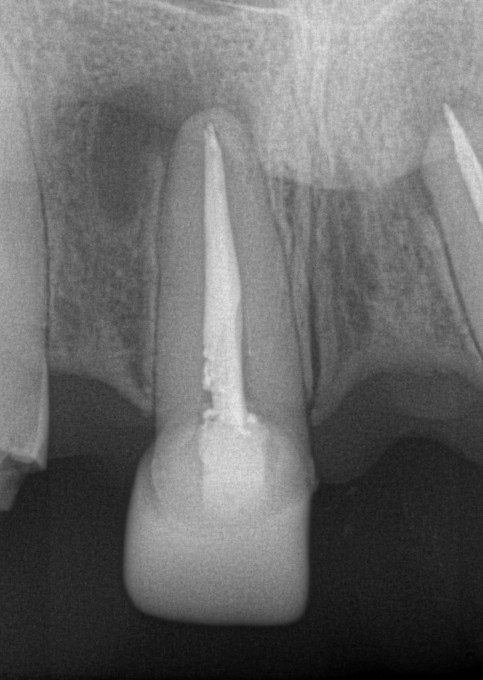
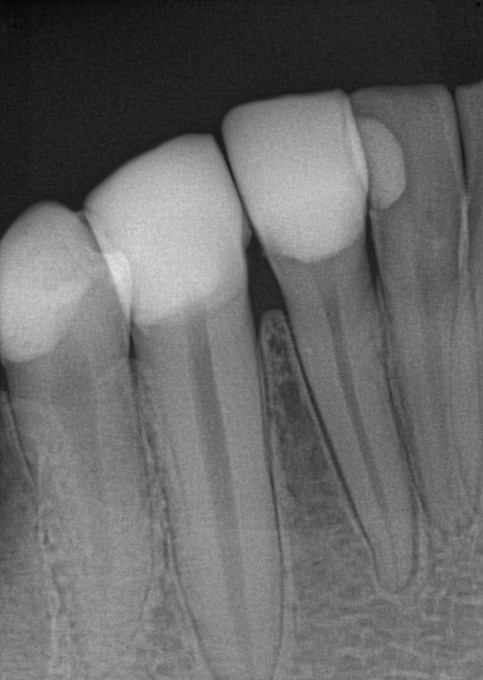
On 4/5/2017 at 7:54 pm, Mike Skramstad said...Here is an interesting failure that I had...This case was initially done in 2012
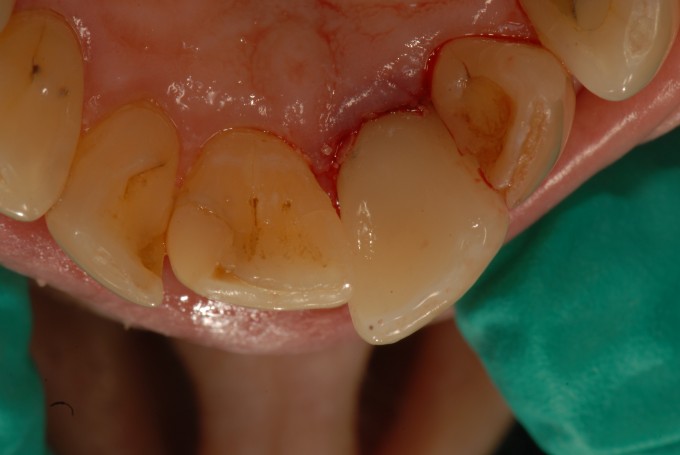
Preop situation #3:
The tooth was actually asymptomatic at this point, but needed a crown.
At this point (5 years ago), I was still prepping modified flat tops (not completely flat... but very high in enamel). I tend not to prep like this anymore. Here was the way I prepped the tooth:
Now as you can see there is a very prominent crack there. I saw it at the time as well, but the tooth was not symptomatic and decided it was more important to have good enamel.
I restored this with Vita Enamic. It was a new material at the time (we may have even been testing... i don't remember). Here is the lingual view:
The fit was incredible and I was very pleased with the restoration.
Now fast forward to June 28th, 2016.. he came in with this:
Not only did he crack the restoration, but the entire mesial and mesial lingual (right along this crack)....
So, what happened? Well, looking back, I made 2 foolish decisions in this process:
- Wrong preparation with that crack. I should have prepped traditional full coverage crown
- Wrong material. I never should have used Vita Enamic for this case
How did Vita Enamic contribute to this failure?
- I'm not saying that if I used a stiffer, higher modulus material like e.max this would have survived. However, because I used a low modulus material like Enamic, the forces of day to day chewing were transferred directly to the tooth. It's an interesting failure because the bond did not fail because of all the enamel it was bonded to. The reason it failed was because Vita Enamic is a very resilient material... it flexed during mastication and the forces where transferred down and out. Because the crack was there... it cracked the tooth still and took 1/2 of the restoration. If I used e.max, the material itself would have taken more of the force and even though it still likely would have failed because the preparation was wrong... it would have had a better chance.
I restored again with zirconia.

Anyone can show their successes, it takes pride and a true dedication to learning to show your failures. We learn more form those than the ones that go perfect. Congrats on showing real life situations.
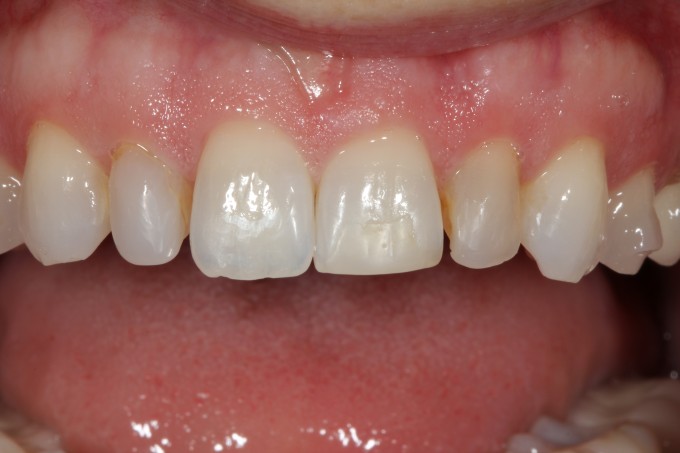
This patient is 79, so esthetics was not uppermost in his mind. This is a Biocopy crown. Sorry for the gore, but I just dismissed this patient. I didn't quite nail this shade but I came close. I'm satisfied. 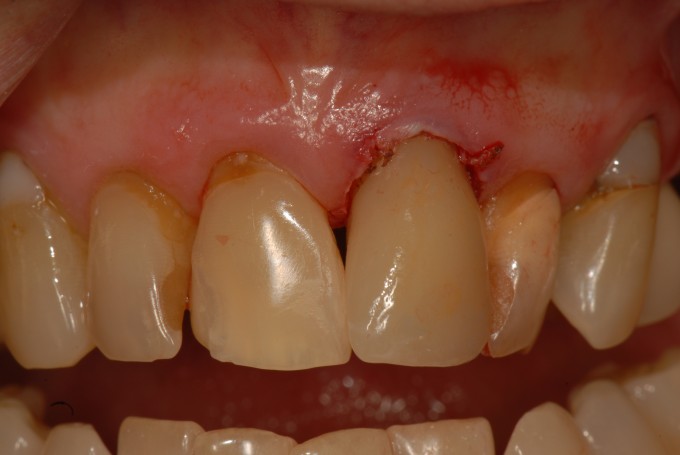
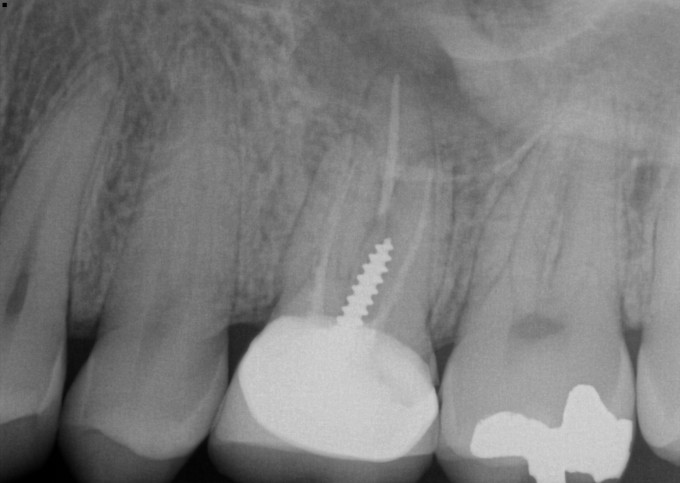
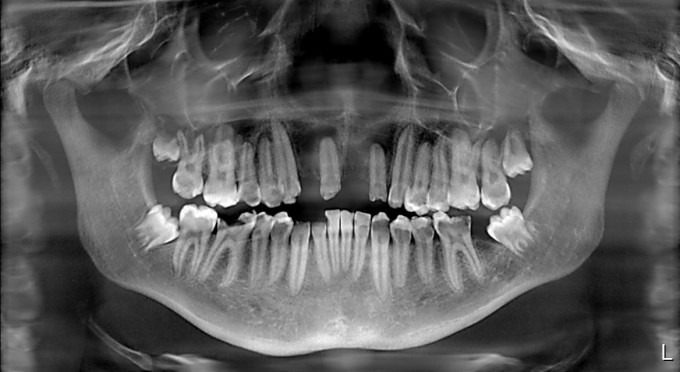
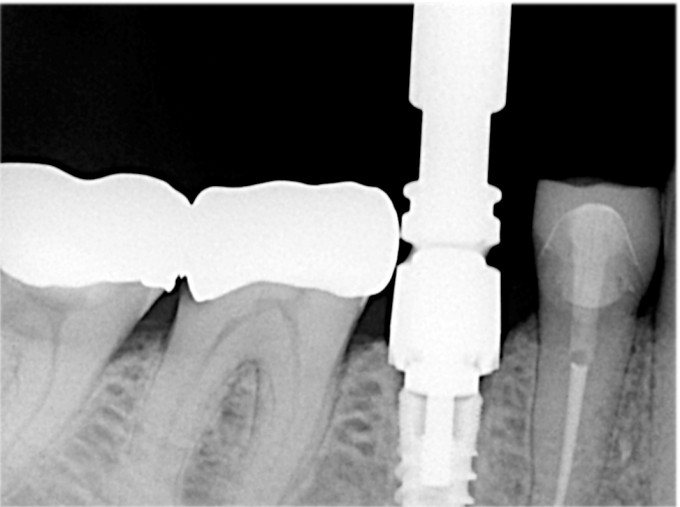
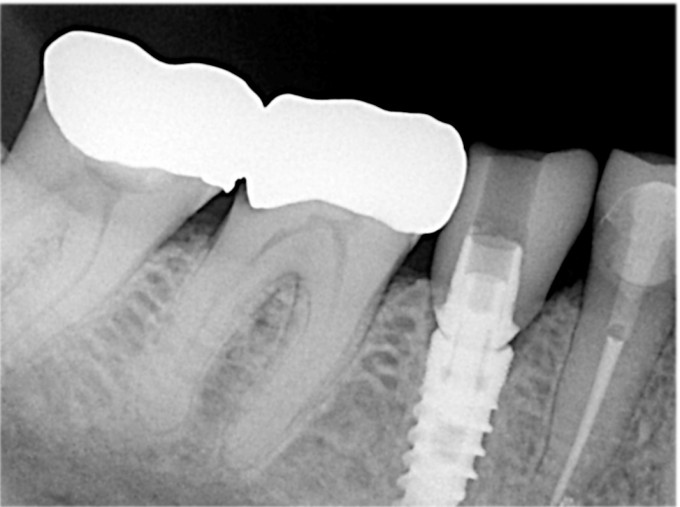
Here's an MIS Tibase crown that obviously wouldn't seat. The second x-ray is the MIS bone profiler. Very easy and efficient to use. The guide pin screws into the implant and the bone profiler slides down over the pin. The profiling drill can be attached to a slow speed or turned by hand.

Great job everyone posting! Keep it up. I really think it helps the many many people who are on here and don't post often.
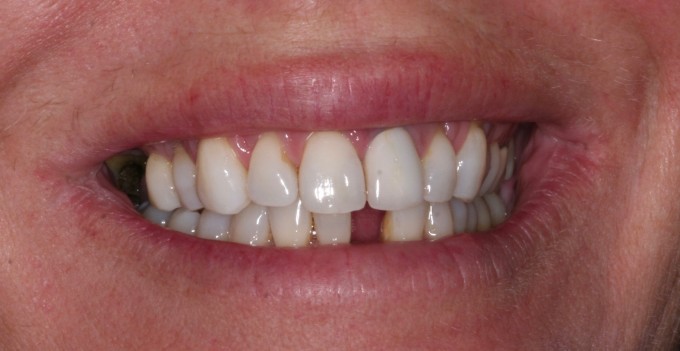
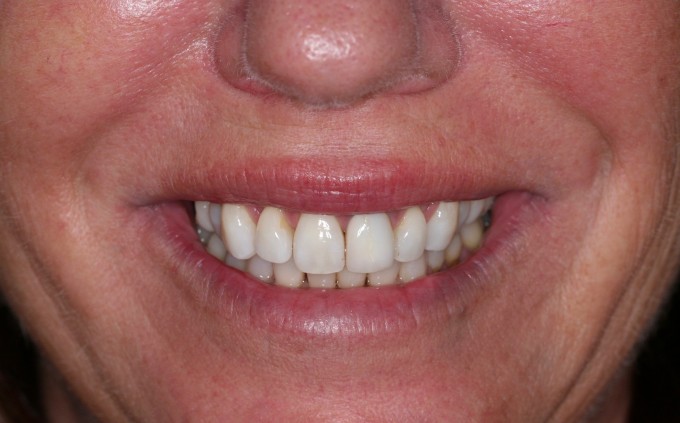
One nice thing about having an Orthodontist in your office is that we do a lot of "cross consultation" during the day. This patient was just finishing Invisalign and needed her small peg laterals corrected.
The initial treatment plan was crowns on #7 and #10 and a composite on #9.
The reason I did not do veneers on #7 and #10 is because the lingual and proximal contours were difficult preop and I felt like I could not get a good result... so I prepared conservative full coverage on them... I also did a rough composite on #9 at the beginning
Now, I made a couple mistakes that I regretted. I had an opening the very next day when I saw here and squeezed her in. I didn't have a lot of time so I relied on Biogeneric and Biojaw. This was a mistake. I should have scheduled more time in which I could do composite mockups and Biocopied. The design was difficult... and even though I am a massive fan of asymmetry between the lateral incisors, I was not in love with the final result. The other mistake I made was I got in a hurry and rushed the composite on #9... it was a bit of a sloppy job.
She came in today (one week post op) to adjust the bite... I will have her in again in 2 weeks to recontour the laterals just a little bit and repolish/possibly redo the composite on #9.
However, we are very critical in our profession. She was already very very happy
JMJ
![]()
This youth was on the way to an LDS mission trip to somewhere (didn't know the location) and was not working with our local orthodontist. Several lesion were present and a crown would be difficult due to the bracket and appointment logistics. Cerec and Cerasmart to the rescue again.
Managed to not destroy the arch wire with the prep. I was able to use a sectional matrix for the alloy restoration on the other tooth; we have an ortho floss pick called "Plackers" that allowed me to floss the contact after placing the alloy much more easily than using a floss threader.
Don't usually have to check radiographs for cement with a bracket superimposed on the restoration . . .
We treated these lesions and a few other direct restoratives and sent him on his way. He was thrilled at the single visit.
God Bless
matt
On 4/11/2017 at 2:46 pm, Mike Skramstad said...One nice thing about having an Orthodontist in your office is that we do a lot of "cross consultation" during the day. This patient was just finishing Invisalign and needed her small peg laterals corrected.
The initial treatment plan was crowns on #7 and #10 and a composite on #9.
The reason I did not do veneers on #7 and #10 is because the lingual and proximal contours were difficult preop and I felt like I could not get a good result... so I prepared conservative full coverage on them... I also did a rough composite on #9 at the beginning
Now, I made a couple mistakes that I regretted. I had an opening the very next day when I saw here and squeezed her in. I didn't have a lot of time so I relied on Biogeneric and Biojaw. This was a mistake. I should have scheduled more time in which I could do composite mockups and Biocopied. The design was difficult... and even though I am a massive fan of asymmetry between the lateral incisors, I was not in love with the final result. The other mistake I made was I got in a hurry and rushed the composite on #9... it was a bit of a sloppy job.
She came in today (one week post op) to adjust the bite... I will have her in again in 2 weeks to recontour the laterals just a little bit and repolish/possibly redo the composite on #9.
However, we are very critical in our profession. She was already very very happy
really nice work Mike.
So I found these two videos:
https://www.cerecdoctors.com/digital-learning/view/id/1289
https://www.cerecdoctors.com/digital-learning/view/id/1288
These detail how to post a screen shot from the AC unit and how to upload an RST. Has a video been made detailing the "how to" of posting a case?
Perhaps this is a limitation for potential posters? Certainly the "daily work" thread takes the pressure off feeling like posting the "best case ever" is the norm. And I put my stuff on the thread, which ought to increase any potential posters' comfort level about high bar outcomes . . .
Would love to see some other folks post their work. It is the only way to learn.
I learned a lot from the Daniel Vasquez before and after thread. Thanks for reviving and reinventing this concept, Mike. Great idea.
God Bless
matt
On 4/11/2017 at 2:46 pm, Mike Skramstad said...
However, we are very critical in our profession. She was already very very happy
Spectacular work. one modification- raise the tissue level on #9 a bit. Get the centrals symmetrical and you will take attention away from the laterals.

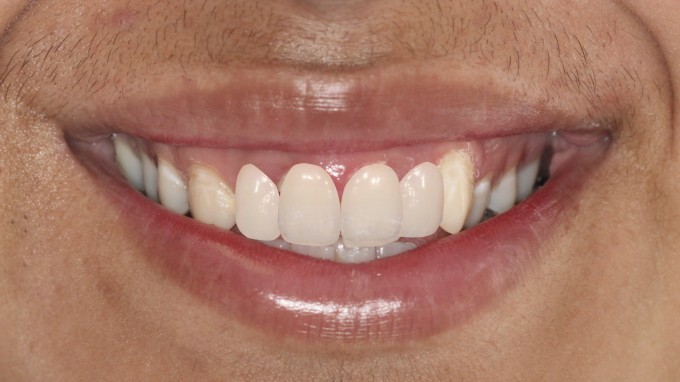
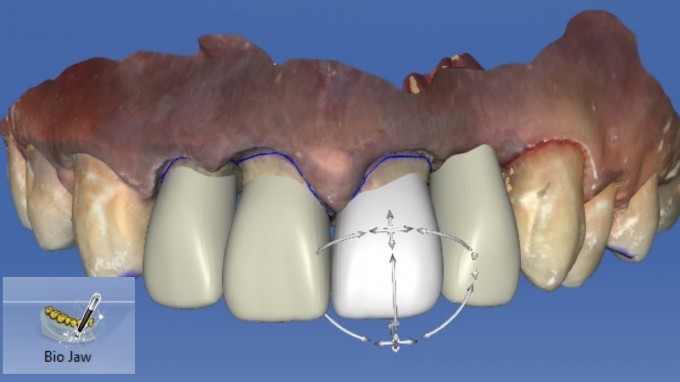
Here is an anterior case I recently did. At Ortho request, I created the correct tooth and they will close spaces later. Vita Trilux Forte #7 veneer

Several major mistakes:
1. Did not have a waxup to biocopy and did not mock up with composite. Design done freehand and with biojaw...way too much work
2. Should have insisted Ortho put the tooth where they wanted it, then simply filled the space, or at least had a solid space analysis for dimensions.
3. Missed the value, allthough this was taken immediately post bonding and the other teeth may have been somewhat desicated. Ortho was ecstatic about the result.
Credit to my assistant Patrick for the characterization.
Will get a final image after ortho is complete, allreadt back in brackets
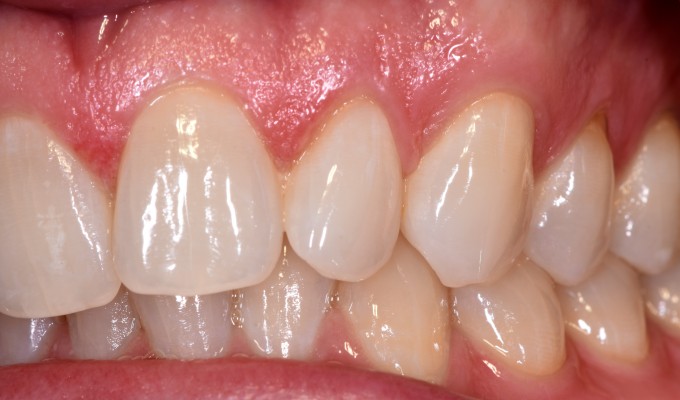
Here is another everyday case, #5 PJC, emax MT

Maybe a bit more color needed in the gingival 1/3
Need to get point flashes, ring flash not great for this.
Need to crop these images as well.
Pt had a crown that had broken at the gumline years ago but had a lingual retainer that kept it in place. Material is E-max MT A1, two wings, no prep. Thanks for the advice Mike. I am still getting better at staining. Please critique! Staining is always the toughest part...
How did you get e three unit PMMA to mill in 20 minutes? The last one I did just like this took about 45 minutes. I used the 25RZ and 10 I think?? Cant remember exact bur...
On 4/12/2017 at 8:40 pm, Jeffrey Gregson said...How did you get e three unit PMMA to mill in 20 minutes? The last one I did just like this took about 45 minutes. I used the 25RZ and 10 I think?? Cant remember exact bur...
I don't want to ruin anything for you.. but I will anyway :) .... New Software

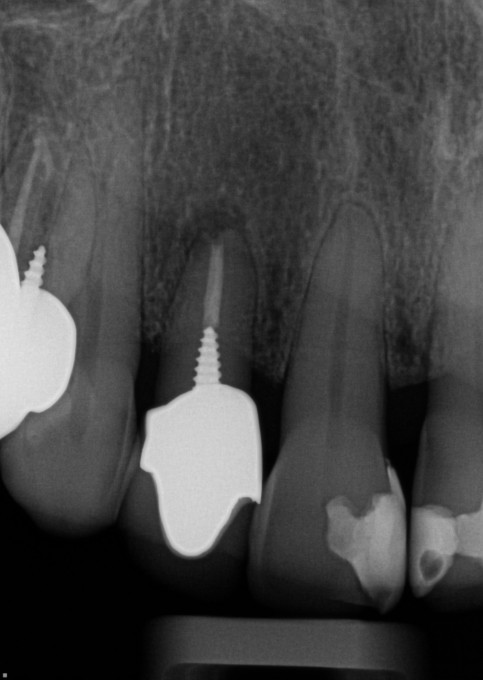
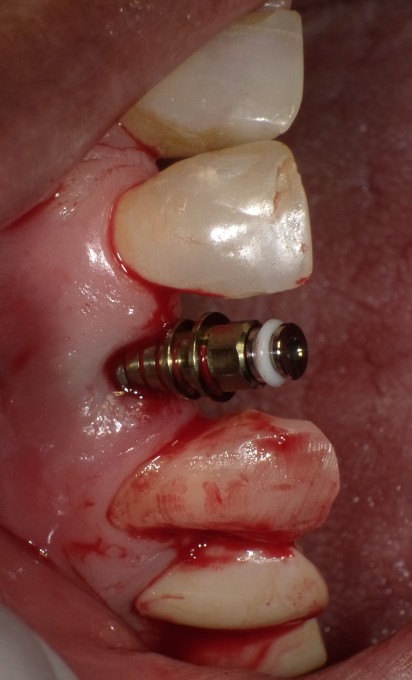
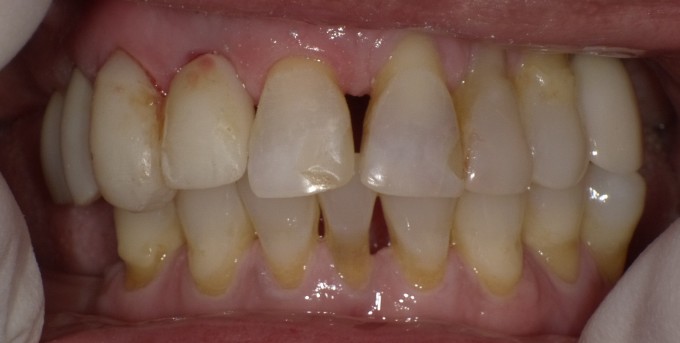
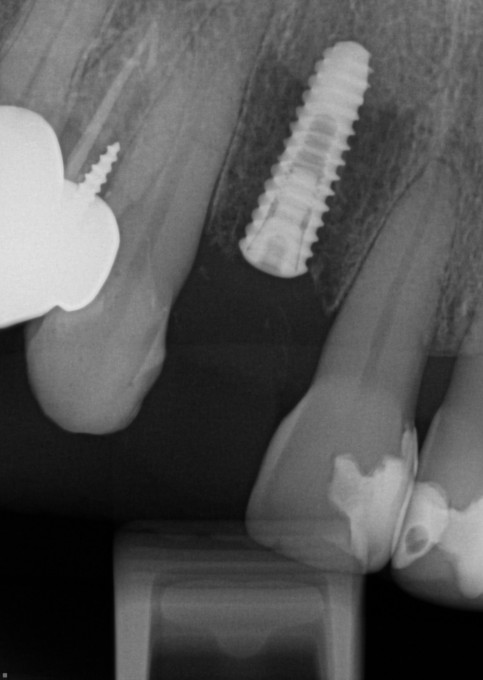
Patient had a failing / loose crown #7. Patient did not want to leave the office without a tooth. Extracted #7, immediate implant #7 (HiOssen ETIII), and a one wing Telicad maryland bridge (6-7). .. Thank you Mike for the tips from Level 3! I wish I had time to recontour #6, but I ran out of time.... She was happy that she didn't leave without a tooth.
One of my favorite uses today: One wing Maryland Bridge provisional. After a couple years of delay, Pt decided to pursue ortho to correct her crowding and malocclusion. She will be bracketed up in about 5 weeks from now. #10 was in an facial, and mesially inclined position with a failed endo exhibiting a 7-8 mm lucency associated with the apex. Tooth was retreated one time in the past, and failed to resolve. Decision was made to extract and graft, then we fabricated the maryland while the patient went to work for a while, then returned after lunch. Position of temporary is very close to the preop state. I did not biocopy, just made her look like nothing had happened. Ortho will add a denture tooth, or this one, to wires once space is created. I did not spend a lot of time characterizing, material is A3HT Lava Ultimate. A bit low in value, I did not have the right shade on hand, patient is happy. Told coworker how we majke evertything at the office, and coworker wants to transfer to this office.
When I first got involved with CEREC, there was a thread on here just like this that I used to love checking out. It really shows the different materials and applications that we can utilize on a daily basis. Here is a case I completed yesterday...patient wanted to replace her existing PFM due to the "bright color" and the dark exposed root-plus there was recurrent decay on the lingual. She has a low smile line but it still bothered her to have it there.
Pre-Op: 
Removed the crown and excavated the decay...milled out an Empress Multi A-3, polished only(I generally try this first with anteriors to see if we need to glaze), and bonded in place using VarioLink Esthetic Light.
Final: 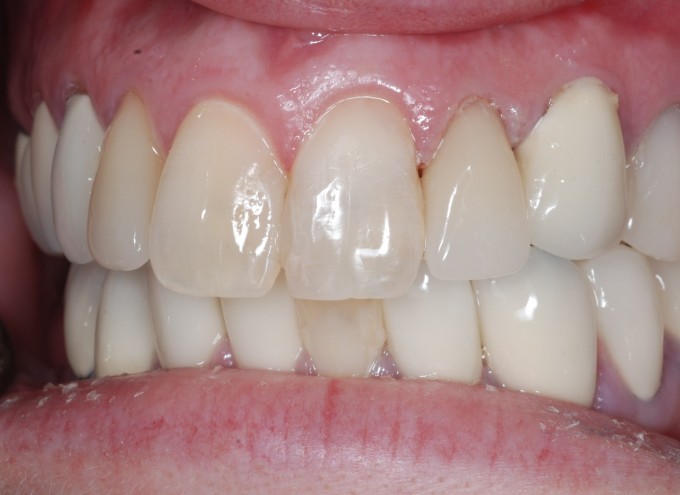
I probably should have buried the facial margin a little more but the patient was happy and has the afore-mentioned low smile line. Photos were taken immediately post-op but I will try and remember to take one at her next appointment to see if the facial margin is an issue. Thanks Mike for firing up this thread and everyone please keep posting!


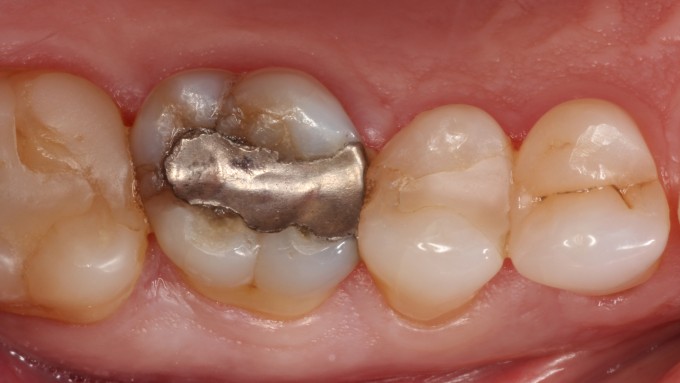
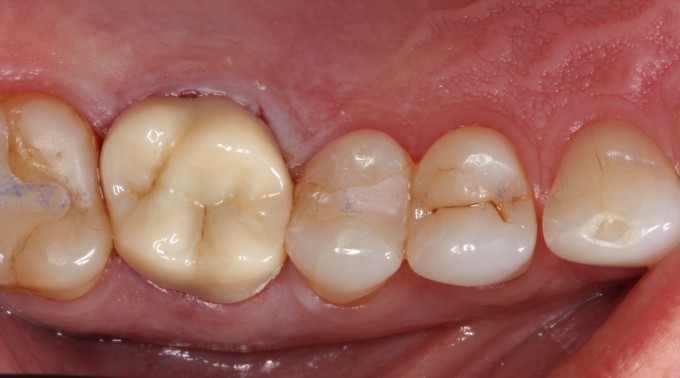
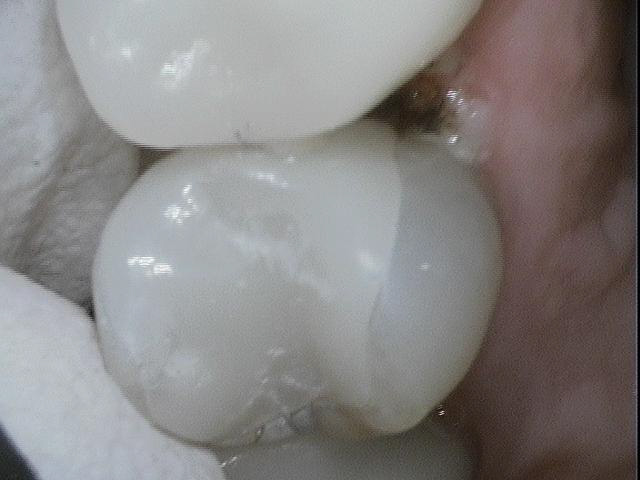
In the "day to day" category, involving material choices... heavy buxir, 30 "appeared" more serious in loss fracture potential, but 31 was symptomatic to biting, and multiple fractures that couldn't be removed with preparation...
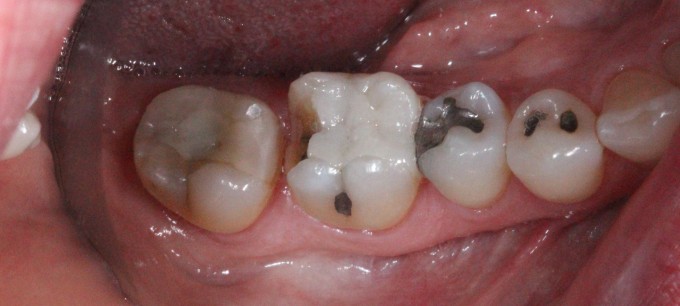
Not a lot of staining glamour, but everyday restorations, delegated and productive...obviously check for cement :)
Mark
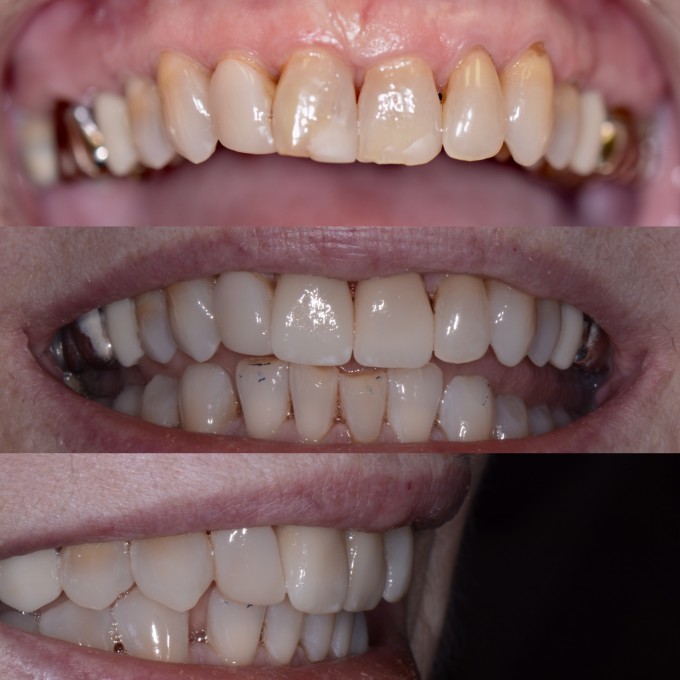
It's been a while since I've posted a case so here goes one from last Thursday. Pt chose to just restore 8,9. #7 had an old veneer and #10 was a natural tooth that was a shade darker. I chose to use emax A1 MT and added chroma with stain and A3 variolink cement. Pt was pleased with the result and the ability to restore them in under 2 hours.
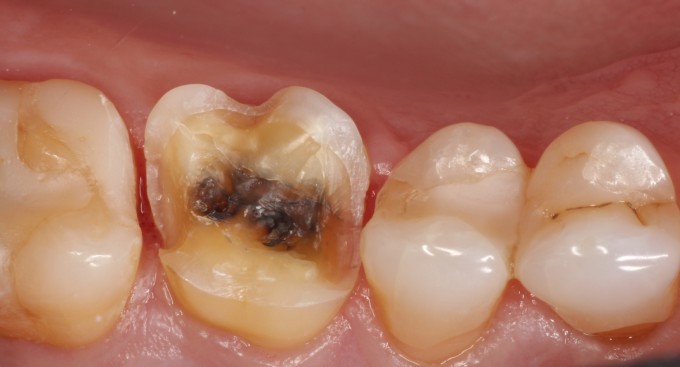
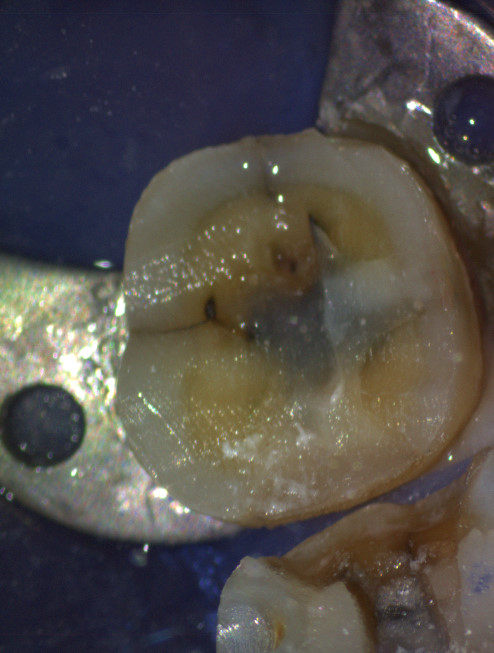
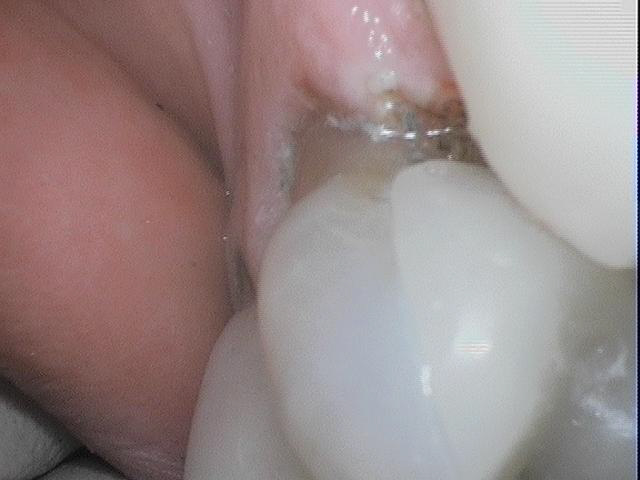
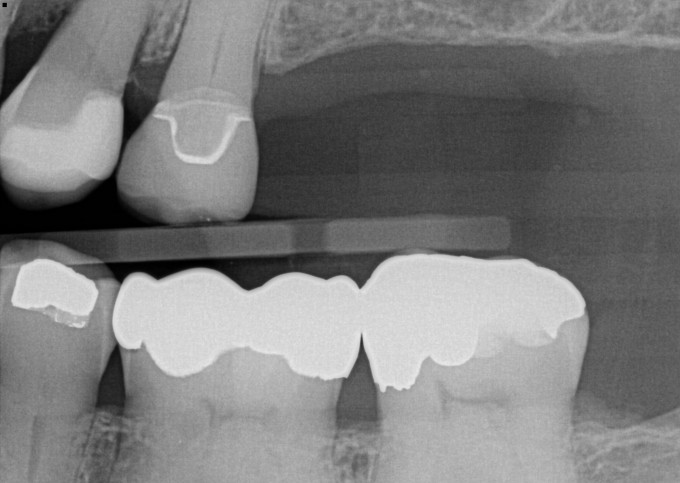
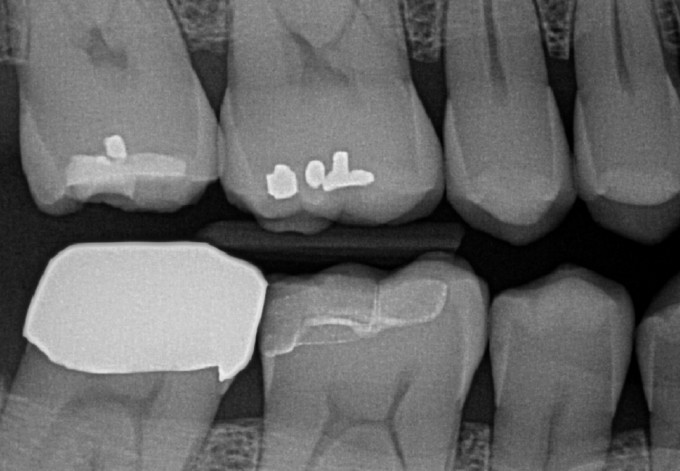
Inlay done Friday to replace failing amalgam. Undercut in buccal wall of interproximal box almost required more preparation, or basing out, but the inlay seated, although more snugly than usual. The two clinical photos are of the inlay before bonding.

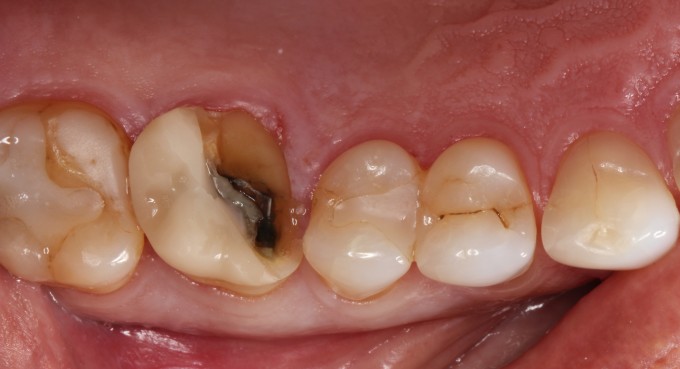
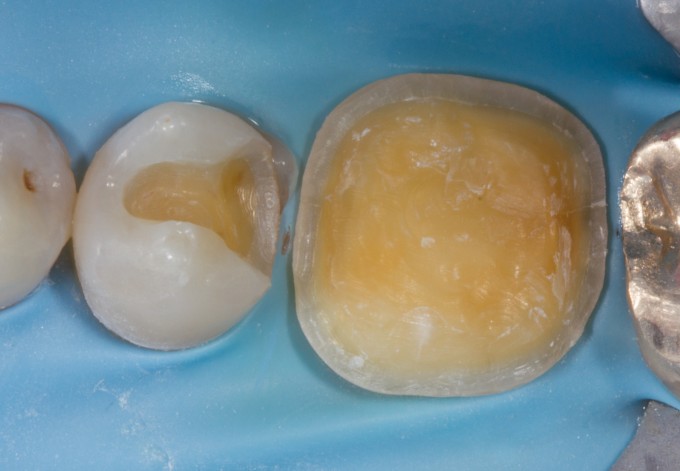
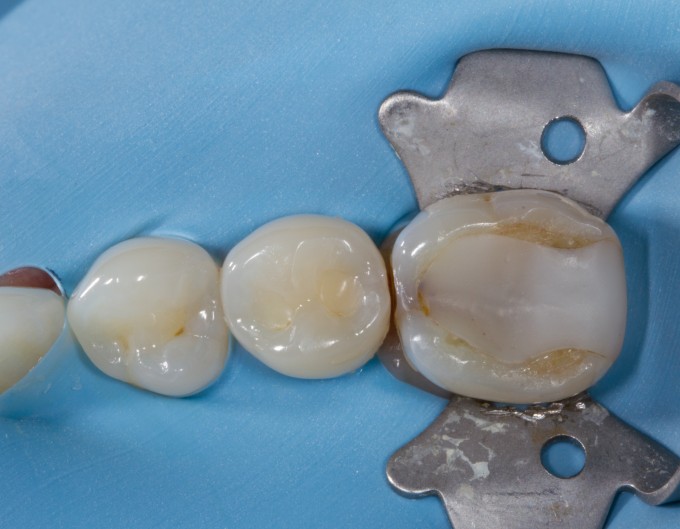
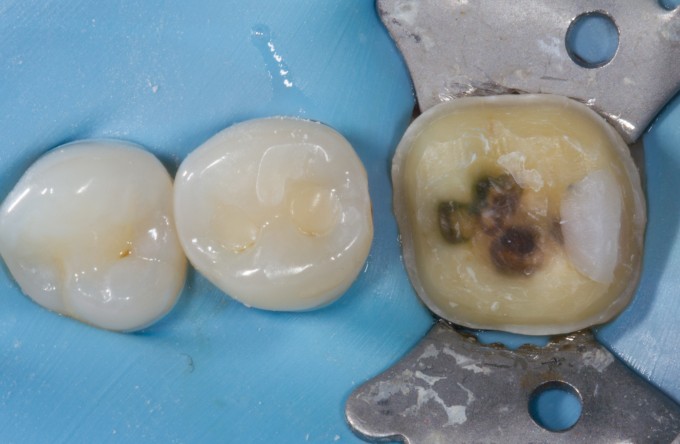
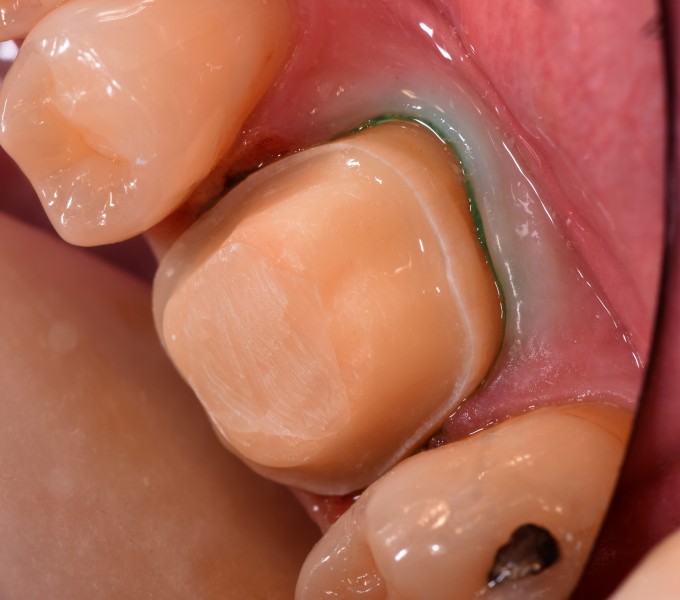
So I had this patient for initial exam last Friday with chief complaints of having a big hole with fractured filling on lower right side. I ended up doing # 30 onlay from GC Cerasmart. Everything went well and I asked some of my friends who are using CAD-CAM and their view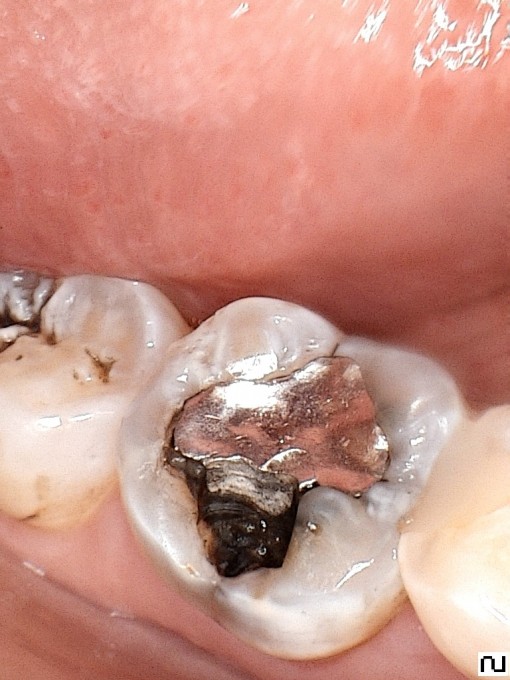
 on this particular case is that ML wall is way to thin and it will fracture and they would do full coverage crown on it. My argument to this is if it fails I will do crown for patient in short run but If I can buy out more time keeping more natural tooth why not do that. I want to get opinion about this case here and see if anyone would restore this tooth any differently in respect to material choice and/or preparing tooth for full coverage crown.
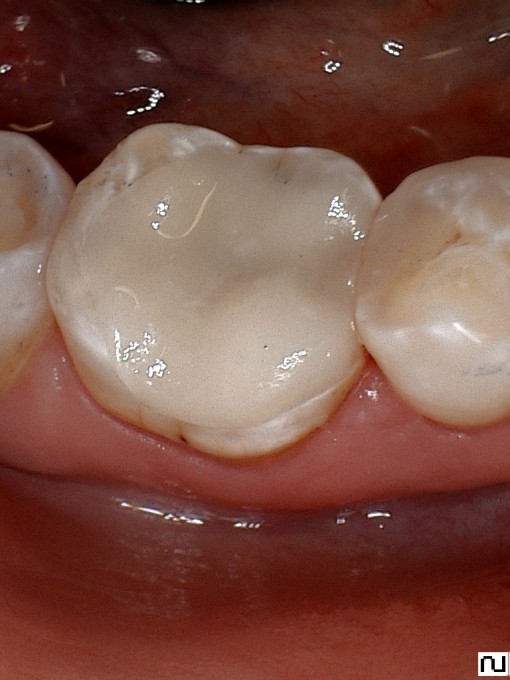
This is a restoration I did not do, but patient stated it was done about 10 years ago. A ceramic onlay on #19 (not sure if it was CEREC... I suspect it was). It failed and cracked do to improper reduction and the previous dentist should have extended it through the crack on the mesial. This led to decay on both the mesial of #19 and the distal of #20
Placed rubber dam and prepped the teeth. A full coverage "crownlay" on #19 and DO composite on #20 (I did this direct and did not mill)
I did the direct composite first and then designed the crown.
Here is the inital proposal (needed zero adjustments) and the prep images:

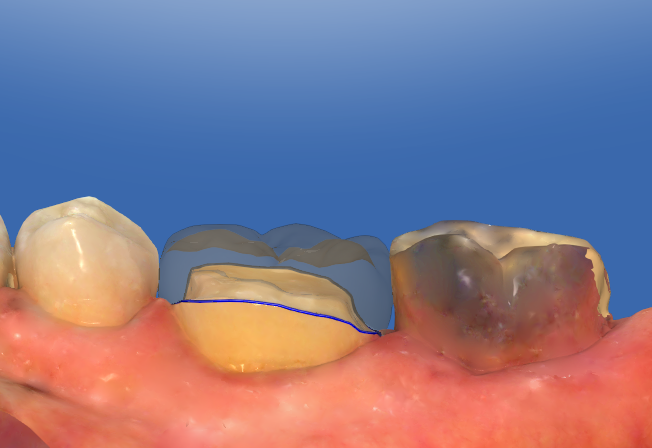
Final result... just spray glazed e.max MT shade A1:

On 4/19/2017 at 12:09 pm, Tom Monahan said...Nice cases everyone.
Mike, I think you just wanted to rub in some 4.5 pics
Initial proposals are crazy good. Here is another prep image and initial proposal from this morning. No final picture because my battery died on camera... will get next time:
Mike,
If your original plan was to do #20 as a direct composite and there was no detectable occlusal caries, why not do a slot prep and keep the tooth reduction to a minimum? If I have a GV Black style preparation to work with and a totally open and a totally acessable interproximal surface because of a crown preparation on the neighboring tooth, my tendency is to restore with CeraSmart.
On 4/19/2017 at 12:29 pm, Charles LoGiudice said...Mike,
If your original plan was to do #20 as a direct composite and there was no detectable occlusal caries, why not do a slot prep and keep the tooth reduction to a minimum? If I have a GV Black style preparation to work with and a totally open and a totally acessable interproximal surface because of a crown preparation on the neighboring tooth, my tendency is to restore with CeraSmart.
My original plan was a "slot" prep, but there was sight decay in that groove, so I took it out to be safe. I enjoy doing direct composite if everything is isolated perfectly and I don't find it difficult. My rationale for milling these has more to do with the cervical (gingival box) margin. If it's too far away from the adjacent tooth or i feel like it will be difficult to restore an ideal contact I will mill. Restorations like this, I tend to restore direct.
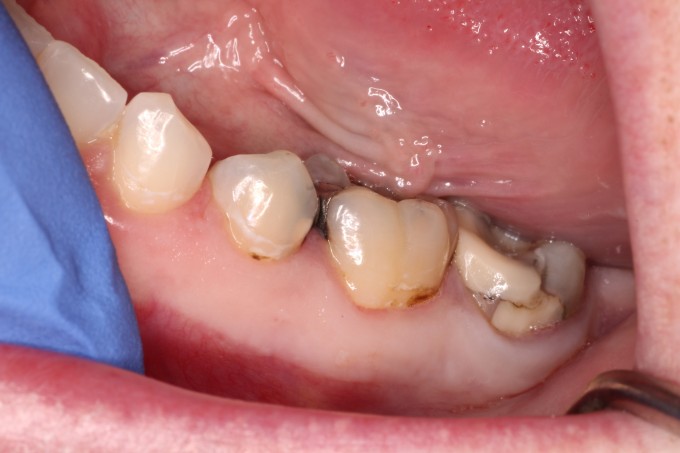
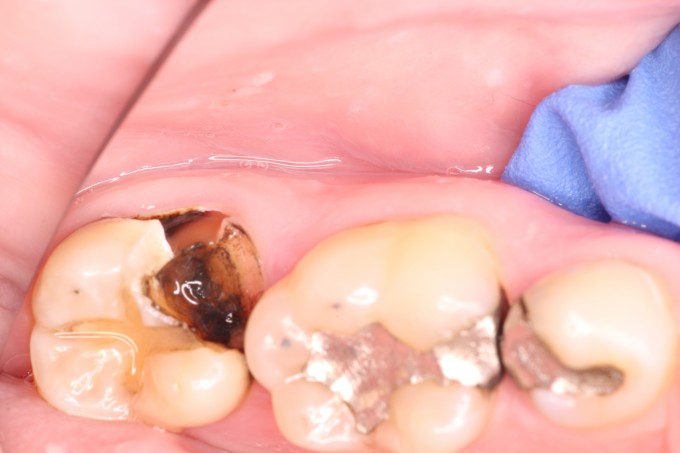
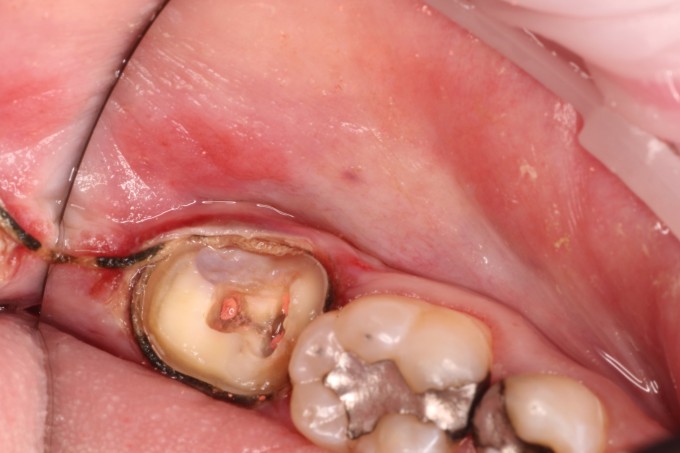
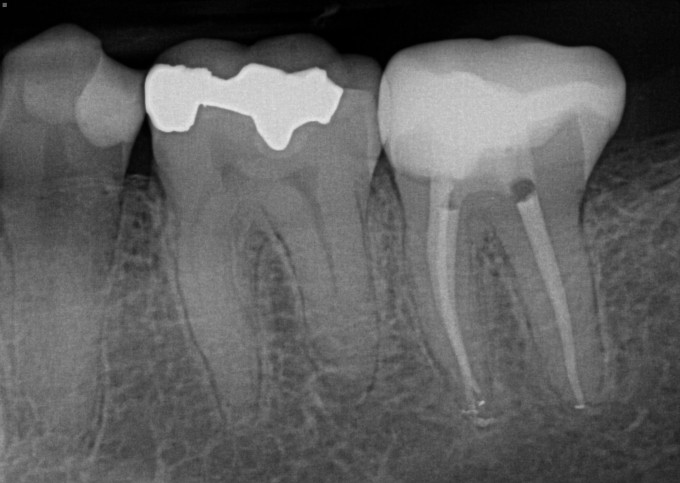
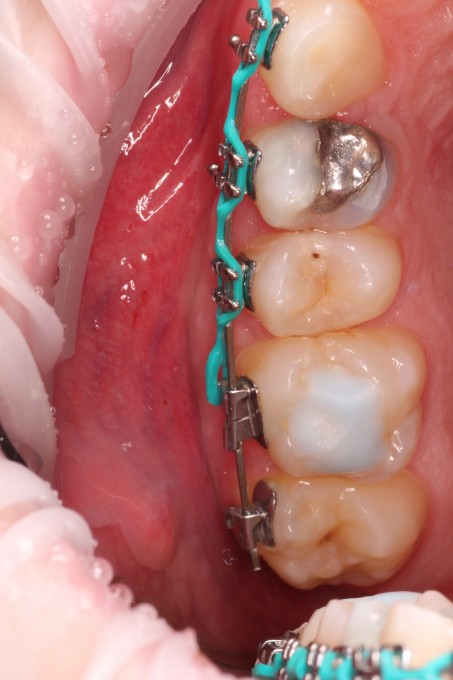
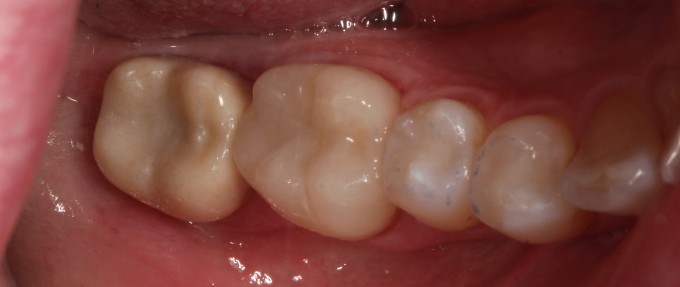
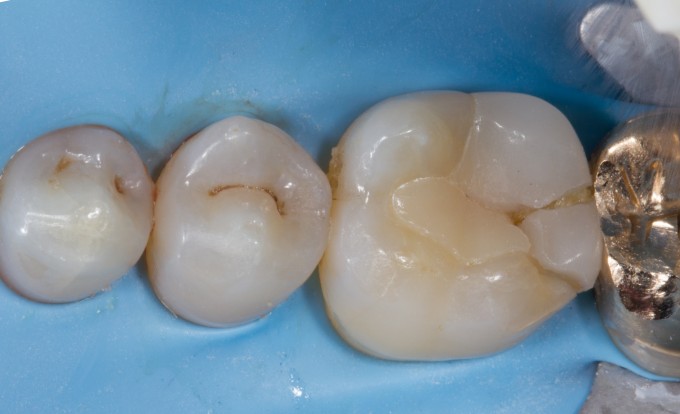
Here is a typical posterior case we did today. #19 fractured and painful to biting. 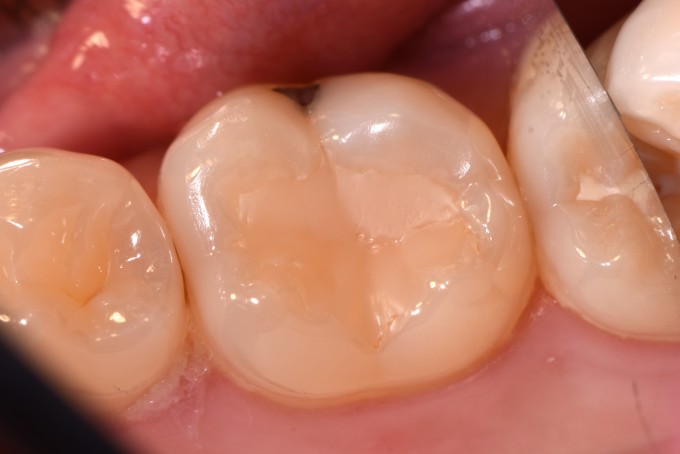
 Removal of restoration
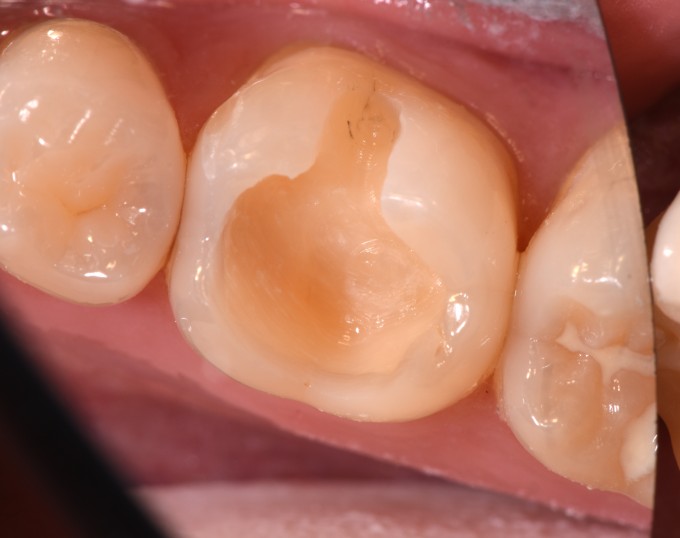 Preps
Preps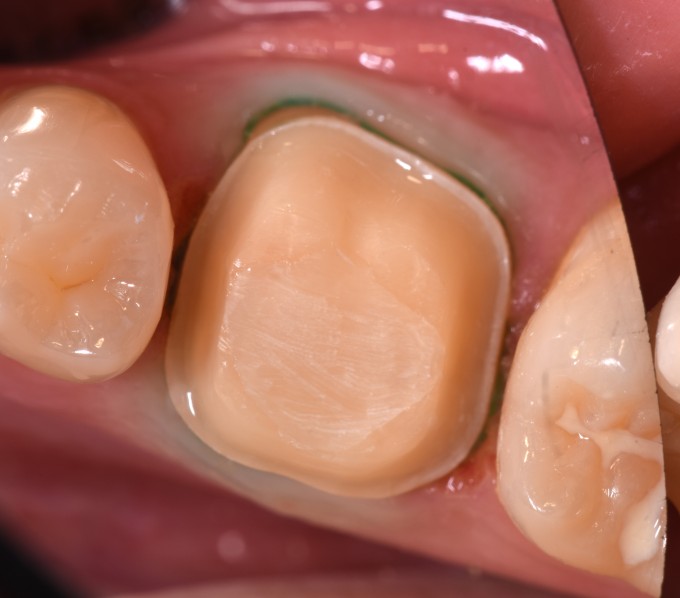
 Immediate postop
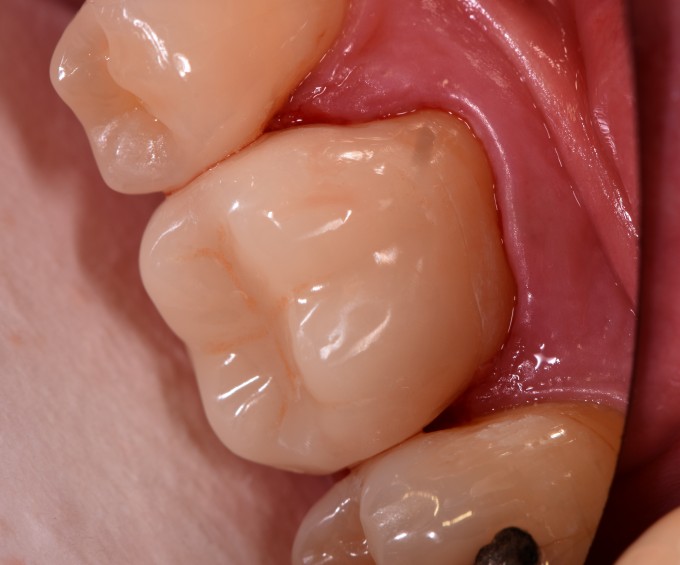
 Emax MT A3
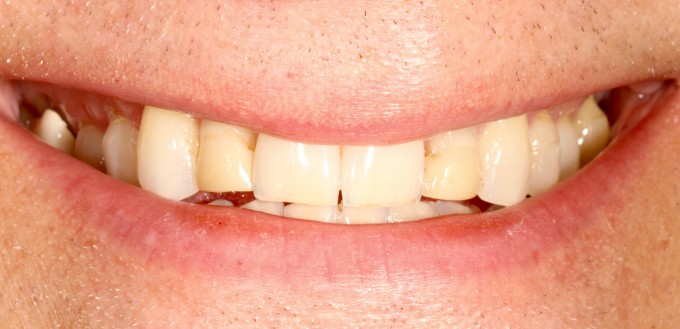
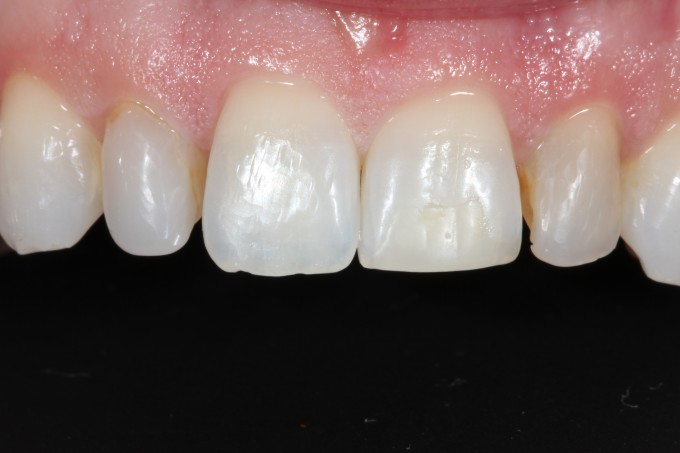
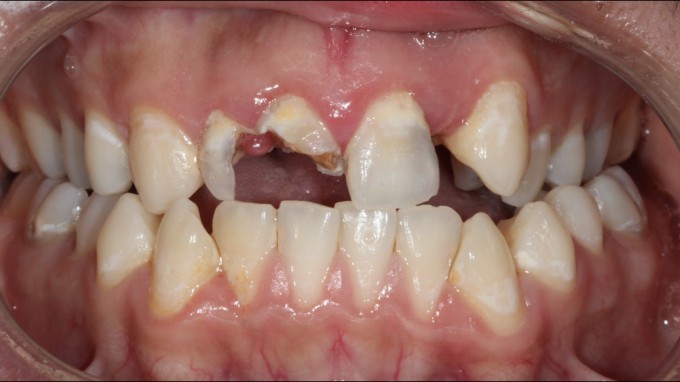
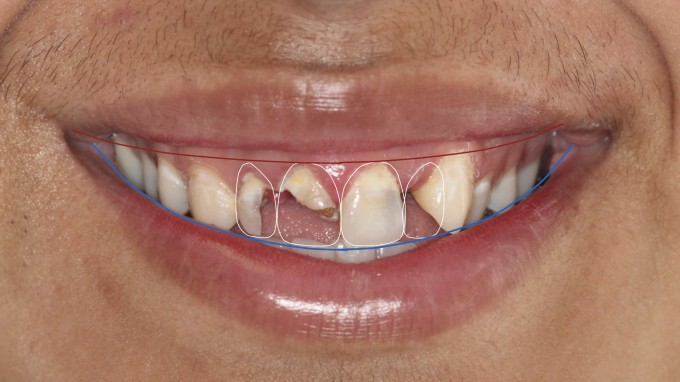
 Anterior case I did last week. Took the finals this morning.Three hour case start to finish, 7-10.History of sports related trauma. Multiple horizontal and oblique fractures.
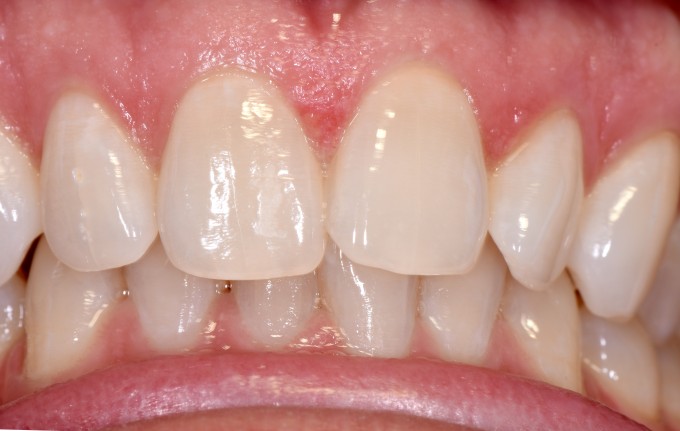
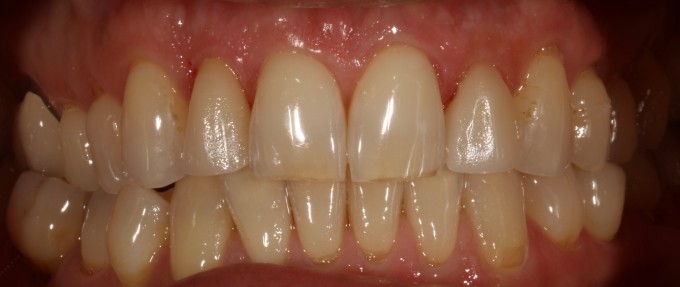
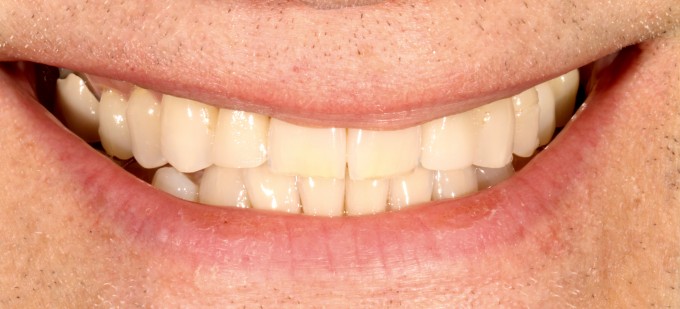
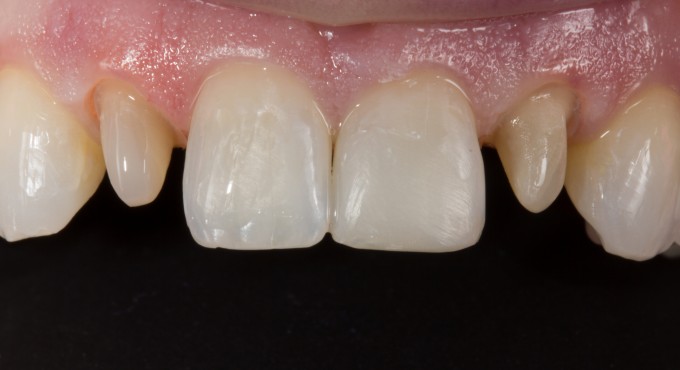
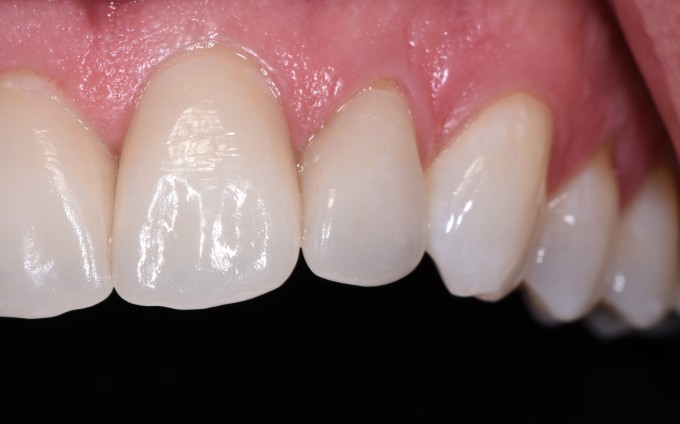
 One week postop
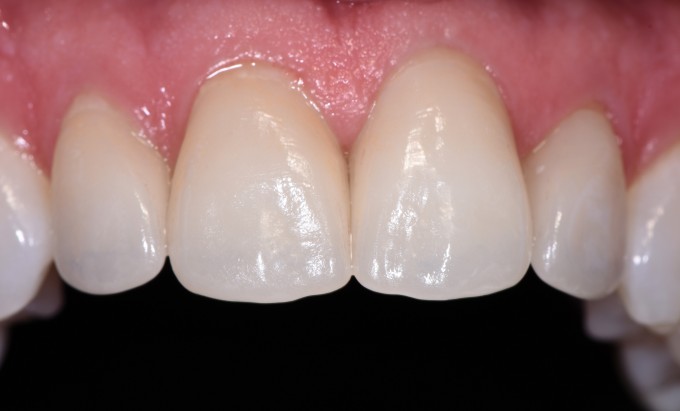
 e
e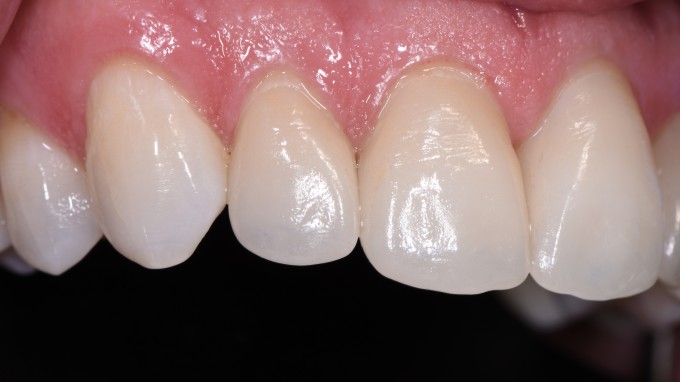
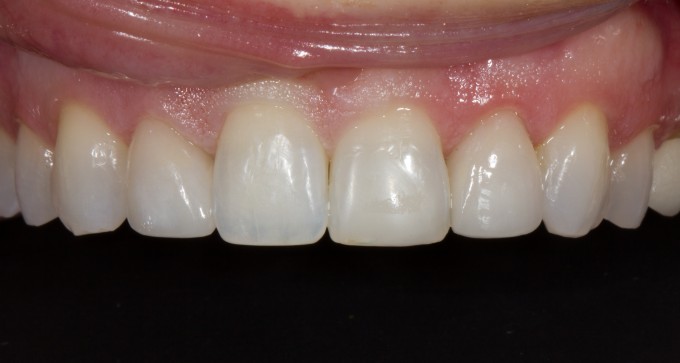
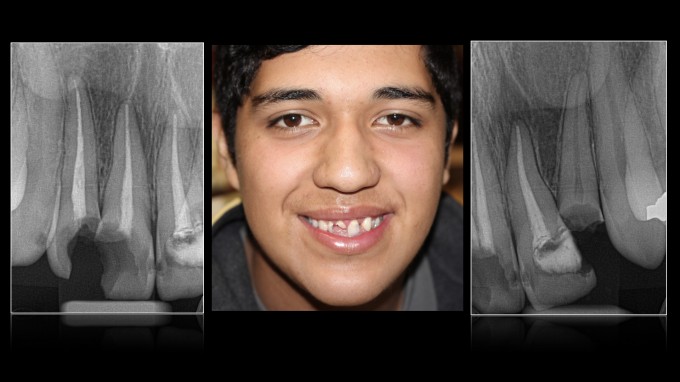
 Empress multi A2
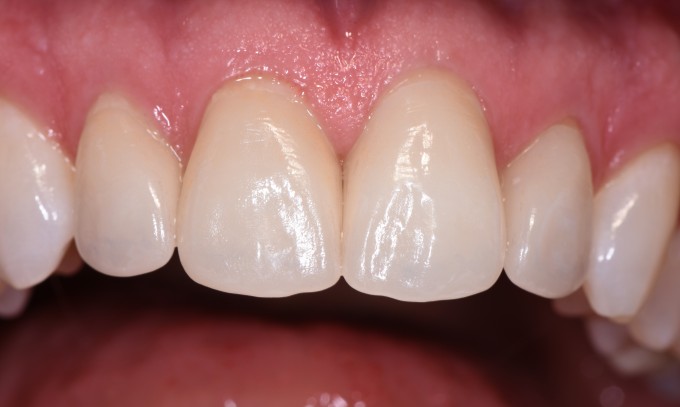
I still love how beautifully Biocopy can be used to very accurately reproduce existing occlusion. Here's a recent example of a lady with recurrent decay under her PFM. The preop occlusion is seen in the Biocopy folder:
Postop photo shows how closely the occlusion was reproduced
J
