
Digital Magazine
Digital Magazine

 By CDOCS Staff
2 months ago
 By Shivi Gupta
2 years ago
 By Erin Green

Digital Magazine
Milling and Post-mill Processing of 3M Chairside Zirconia
 By Michael Snider
2 years ago

 By Matt Jones

Digital Magazine
Revolutionizing Practices Using Digital Dentistry: Part 3
 By Ahmad Al-Hassiny
2 years ago

Digital Magazine
Revolutionizing Practices Using Digital Dentistry: Part 2
By Ahmad Al-Hassiny
2 years ago
Digital Magazine
Revolutionizing Practices Using Digital Dentistry: Part 1
By Ahmad Al-Hassiny
3 years ago
Digital Magazine
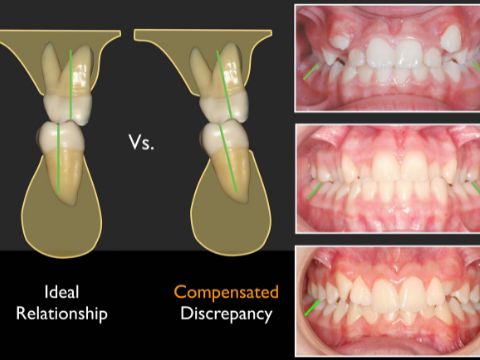
Transverse Considerations in Periodontal Attachment Loss
 By Shalin Shah
3 years ago
