 Mike Skramstad
 Those of you that were at my lecture in Vegas at DSW 2017 saw me do some bigger cases digitally. I thought I would post a case that I just finished that shows this workflow
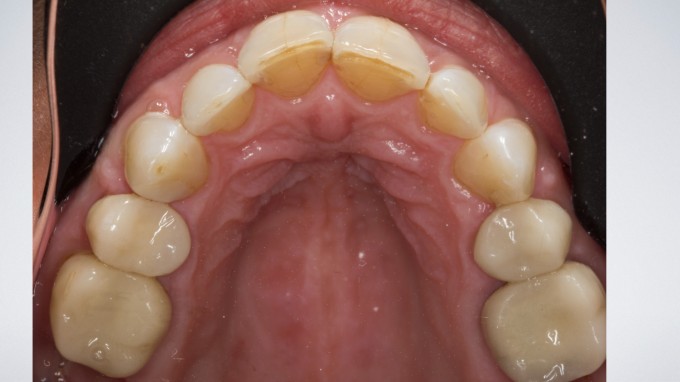
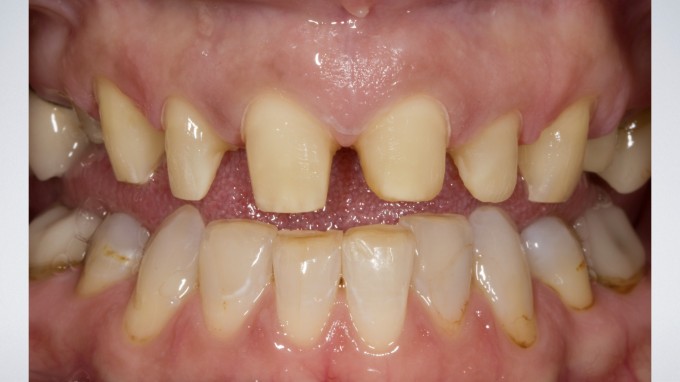
I have seen this patient for some time and she has always told me that she does not like her teeth. She is mostly unhappy with 3 things:
- The lines and discolorations in her teeth
- The shape of her teeth (specifically #7)
- Tooth #9 was more facial than tooth #8
- The open incisal embrasures between the canines and the laterals
- The minor collapse of the buccal corridor
- The unesthetic crowns on #3 and #14 (recession and margins that showed)
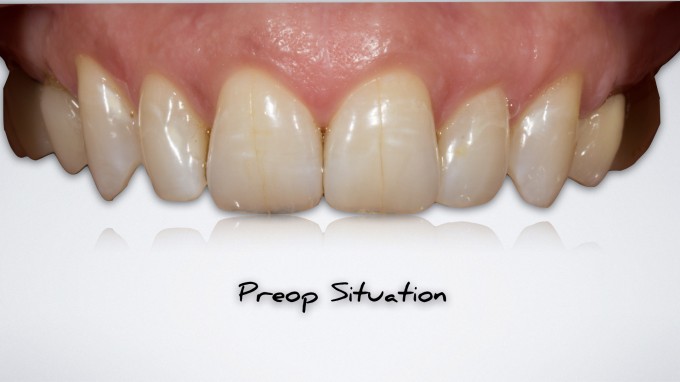
To give you an idea what she was seeing, here is her smile:
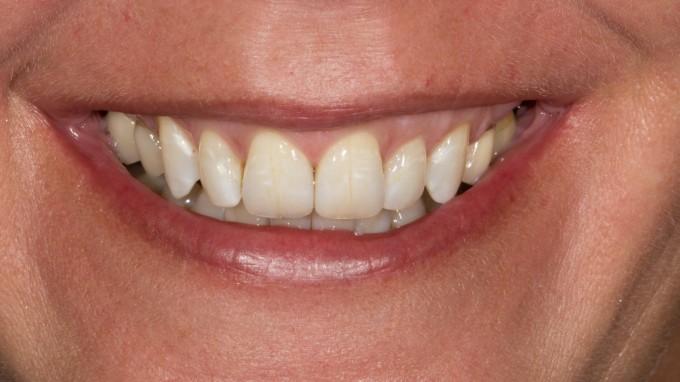
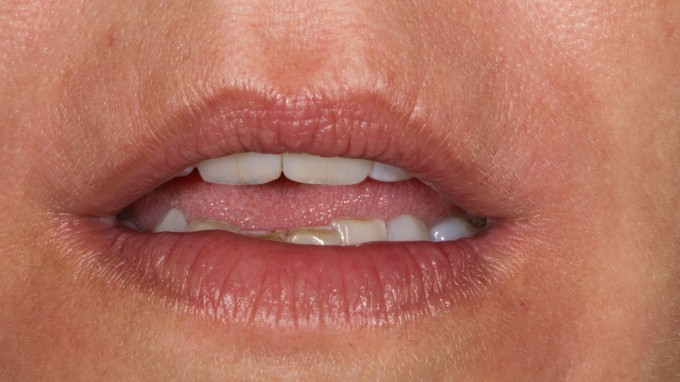
I knew that we didn't need to change a lot...She had a very normal tooth display at lip at rest for a 46 year old woman:
I think it's important to REALLY talk to the patient about what they want so you are clear when designing the case. She made several requests including the following:
- She wanted her concerns fixed, but didn't want people to know that she had fake teeth. This meant a very natural shape that almost mimicked what she had now... just chaning the shape and buccal corridor a little bit
- She didn't like the "blue" at the edges... which means I have to watch the incisal effects
- She wanted a natural shade... nothing bright. More natural
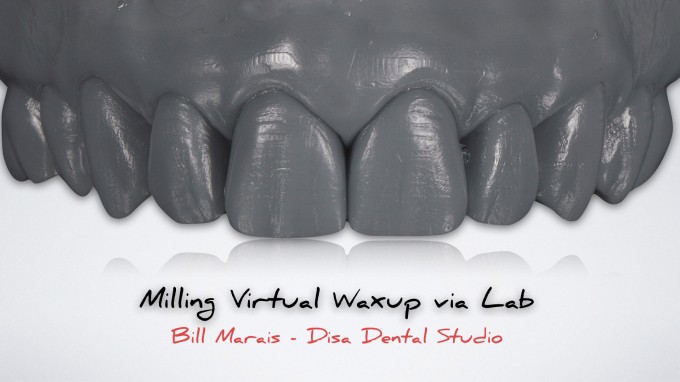
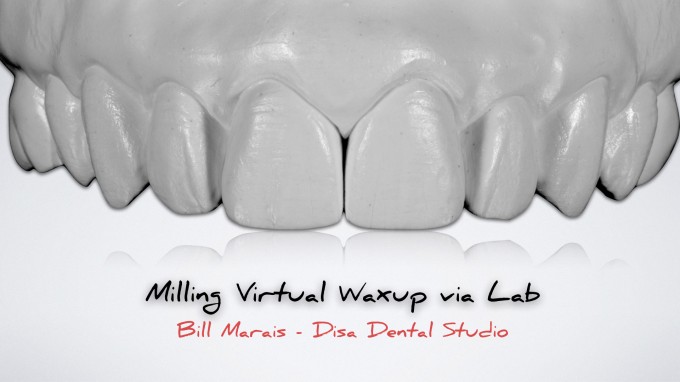
So I took this information and scanned her with the Ortho software. I exported the scan to my lab technicial Bill Marais and he digitally designed the smile via Exocad. Now often times I will have him send me the case via .stl and I will 3D print the case and use as Biocopy. In this case we did more of a "hybrid" approach in which he "milled" the digital waxup on a 5 axis mill with a grey "puck" and then used his hand skills to define certain areas. We did this because I wanted details and it's difficult to get this kind of detail via 3D printing.
Next we duplicated in white stone just in case... I use this to make a Copyplast matrix for a reduction guide, to transfer the waxup to the mouth for depth reductions, and also to fabricate provisionals.
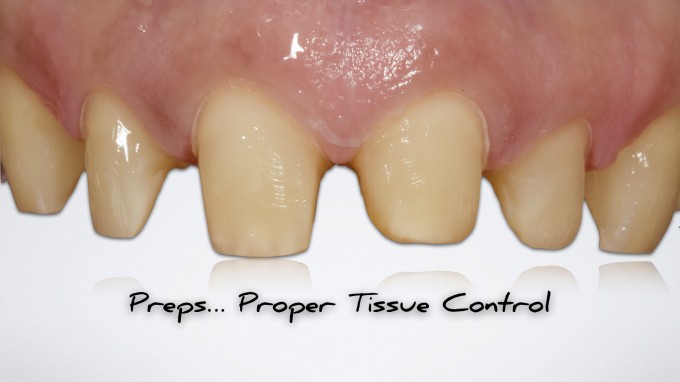
We went ahead and prepped the teeth. We made the decision based on the waxup to prepare more of a full coverage veneer type prep. We tried to keep everything in enamel as best we could due to this prep style. We prepped a little more based on the decision to move the teeth slightly lingual in the anterior. This also helped us control the function:
Tissue control is very important. I don't like dealing with inflammed gingiva so one tip is to make sure you pack cord prior to defining the margins so you protect the gingiva:
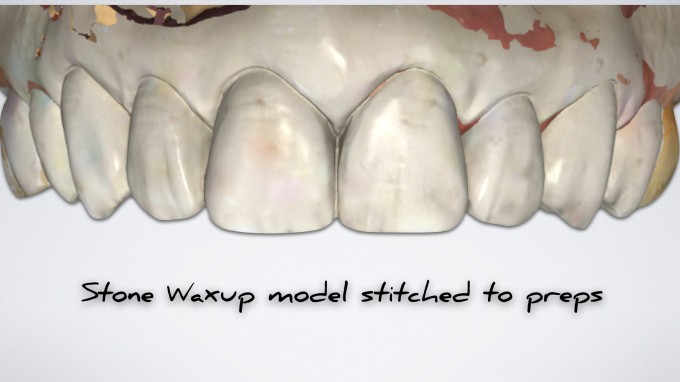
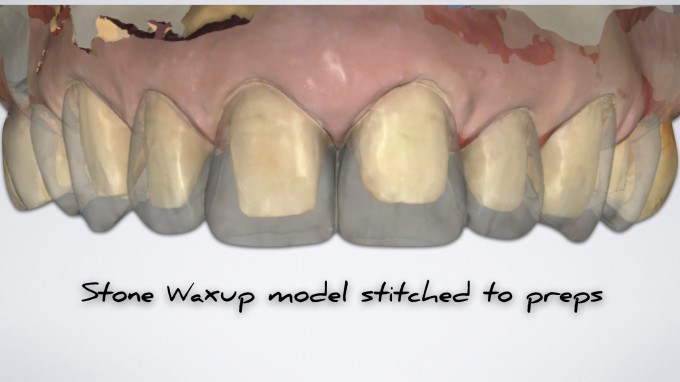
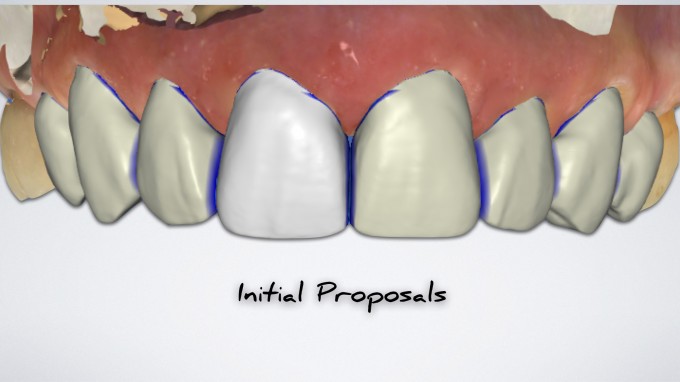
IMO, it's very important to get the waxup model to stitch with the prepped teeth. This makes a MAJOR difference in how easy the design is and how much closer it will replicate what you are trying to execute. For this reason, we left the molars intact (no waxup on these teeth either) and use them as stitching abutments to correctly overlay the waxup to the preps:
By doing that, here are our designs.. initial proposals took very very minor tweaking (only about 5 minutes)
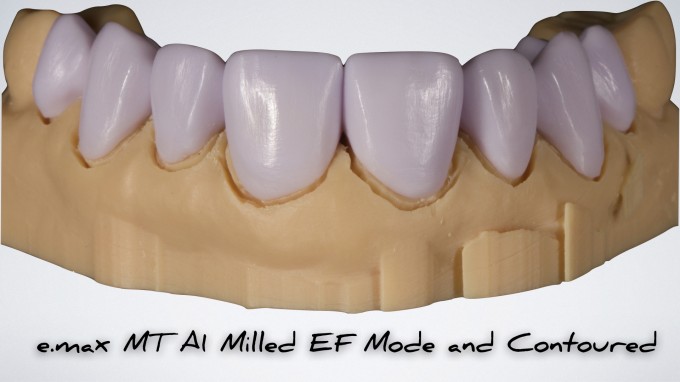
I went ahead and exported the .stl of the preps and 3D printed a prep model. It was a solid model so I manually ditched the margins with a bur to get the restorations to seat. Here are the e.max restorations milled in EF mill (Extra Fine for better trueness):
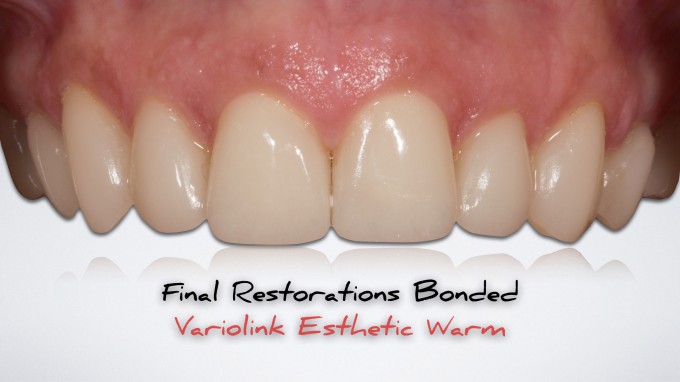
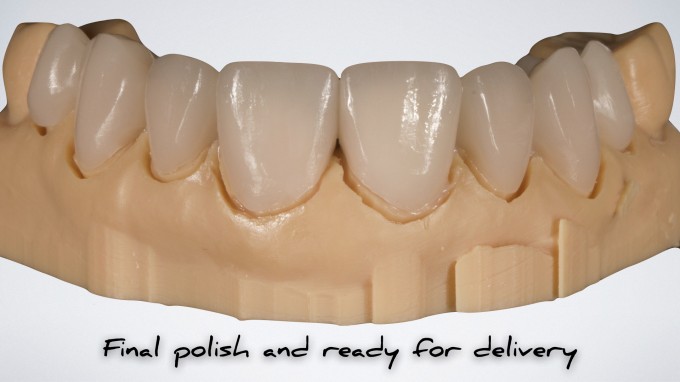
I did some small incisal effects with Ivoclar Ivocolor and then polished the restorations (no glaze). Here they are ready for delivery:
And here are the final restorations bonded into place with Variolink Esthetic warm. She was very happy with the result. I think I could have maybe done a little more contouring (some washed out in the picture)... but shape is always the most important thing and we did what she asked... creating more of a monolithic tooth with a natural shape and natural color: