Sometimes you have to do the first one...

To get to the second one...
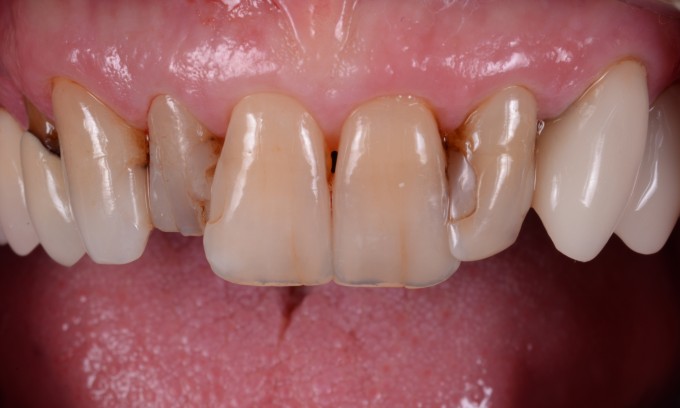
Patient is going through an extensive treatment plan but was concerned about #7. He stated he feels like he has a hole there when he smiled, and because it sat so far back, it was dark. He is not interested in ortho but asked if we could “bring it forward.” He wasn't interested in #10 before this, before anyone asks. We were able to help him out today and now he is ready to do #10 interestingly. Very minimal prep on facial and I’ll try and dig up prep photo tomorrow.
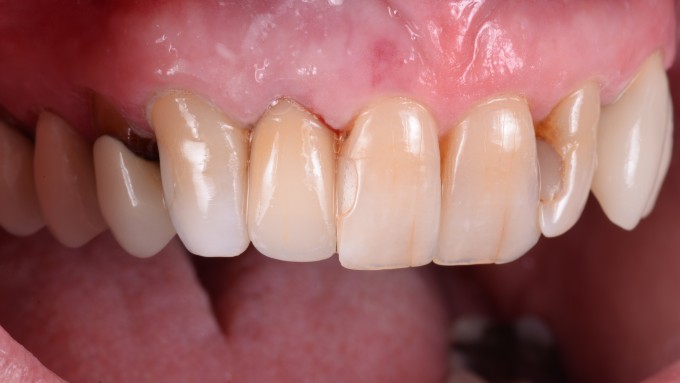
Felt like value is slightly low. Assistant did a great job with block selection and stain and glaze. One critique may have been we could have used a lighter cement. Great to take photos after these to learn and critique your work.
Block is Vita Triluxe 3m2
Preop
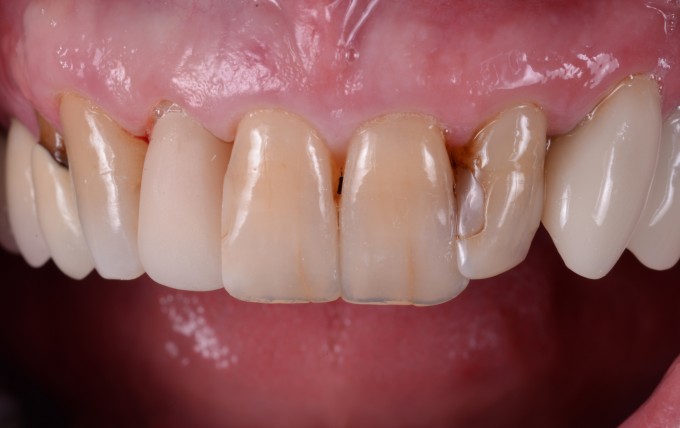
Try In out of miller
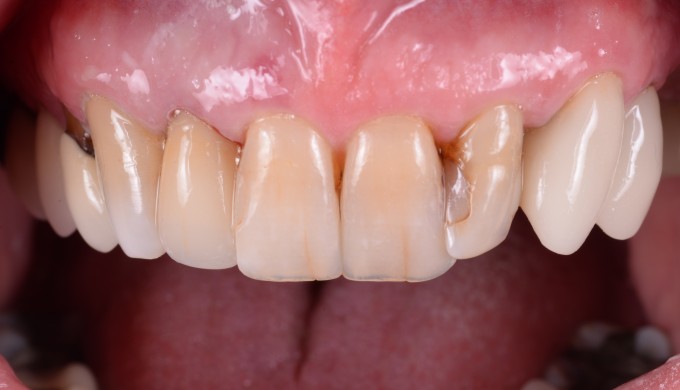
Final


Fantastic! I bet you cant wait to do #10 ![]() Which camera are you using Tom? I feel your pics are really clear and crisp.
Which camera are you using Tom? I feel your pics are really clear and crisp.

Paul,
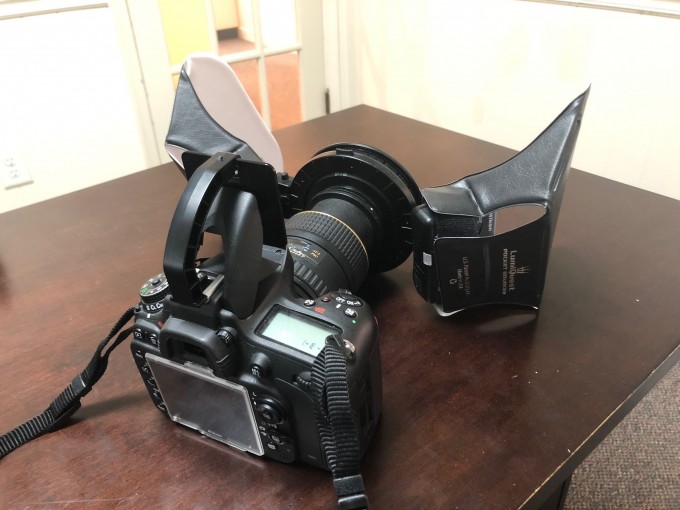
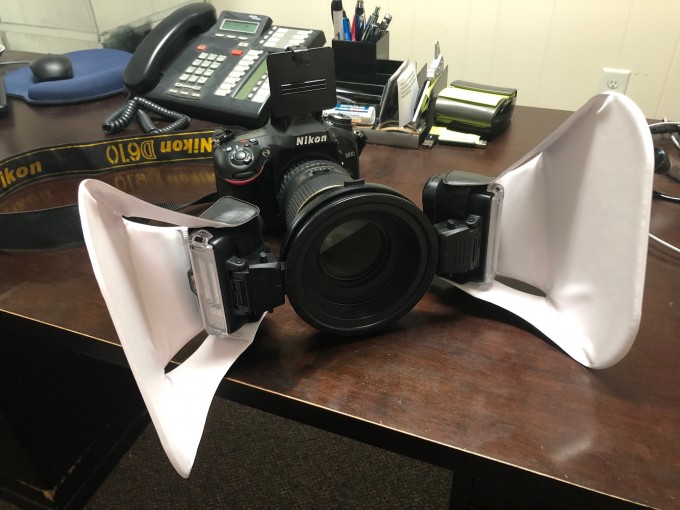
Here is my setup:
Nikon D610
Tokina Macro 100 F2.8D -- must shoot in manual
Nikon Wireless Remote Speelight SB-R200 dual point flashes
Nikon SX-1 bracket for the lenses
Adapter for the Tokina Lens since it isnt Nikon SY-1-62
Lumi Quest Bouncer for dual flashes
Diffuser for pop up flash Nikon SG-3IR Panel
Hope that Helps, lots of ways to do it, but this seems to get me the most consistent results for these cases.

Close enough in my opinion. Very nice job. I love these "real world" cases where the dentist is trying to improve the situation without necessarily doing a full mouth rehab.
Tom, that looks excellent. For us relative newbies, could you describe (in as much detail as you'd prefer) how you went from the inital crown photo to the final stained and glazed crown. What block and sequencing of stains, etc?
Thanks


On 3/1/2019 at 7:05 am, Charles LoGiudice said...Close enough in my opinion. Very nice job. I love these "real world" cases where the dentist is trying to improve the situation without necessarily doing a full mouth rehab.
+1 Nice work!
Mark

On 3/1/2019 at 7:05 am, Charles LoGiudice said...Close enough in my opinion. Very nice job. I love these "real world" cases where the dentist is trying to improve the situation without necessarily doing a full mouth rehab.
Especially if the effort and the consequent result justify this patient-friendly approach as in this example.
Paul,
I’d be happy to.
So from the start I’d start having your assistants or yourself really look at anterior teeth. Most are either mostly a single shade or a shade gradient. This was was the latter. Now, all teeth have other characteristics, but for us to get in the ball park that’s what we are looking for. Warmer teeth I’ll stick with Vita. Either mark 2 for single shade or triluxe or triluxe forte for the shade gradient teeth. If the teeth are bright I’ll change to empress. Just a brighter block.
They’ll use a vita 3D master shade guide to see what blocks we want and I’ll take preop photos before we start prepping. During the preparation, the assistant is looking at surrounding teeth and making mental notes. They used to write it down but after a while they can remember what they are trying to achieve. After prep, design, mill and I’ll usually have them look at the mill preview stage to place the block where they want it if using a multi color block. Depending on how much translucency they want will depend on restoration position in the block. After milling we will try in which is second photo. From here they will contour the tooth to match surrounding teeth, looking at surface texture as well. If we are running behind I’ll step in and do this part. After this, they’ll go back to lab and use the photos from the preop and put them on an iPad or computer and use that for staining and glazing.
Now as far as other tips, you can always darken a crown up. So they’ll look at the tooth as a whole and nail the base shade. But she knew she could darken the cervical with stains which is what she did. After running it through the oven to set the stains, we will normally polish to match the texture/shine of the surrounding teeth.
Always take photos as you are going to find stuff you would have changed. And go over them with your team to point out positives and negatives. Now this particular assistant is a hard critic on herself but as she told me:
“I’m not beating myself up. Im proud of my work most of the time. I just like constructive criticism so I can be better. You strive to be better and I want you to have assistants who have same values. We gotta do nice work because ultimately it’s your name on it.”
I tell all my assistants that I’ve had so far,which has been 3, that I can train you to a point. As most of you know, I’m color blind. So at some point they’ll pass me and they know it