
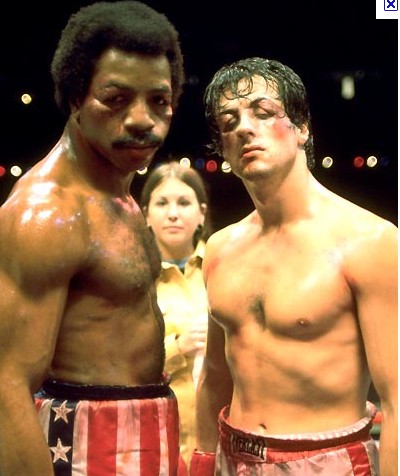
Flipper was not his cup of tea
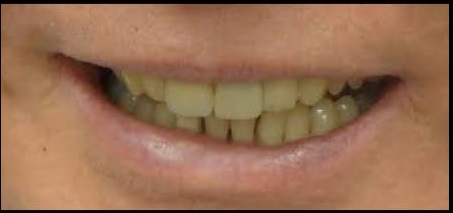
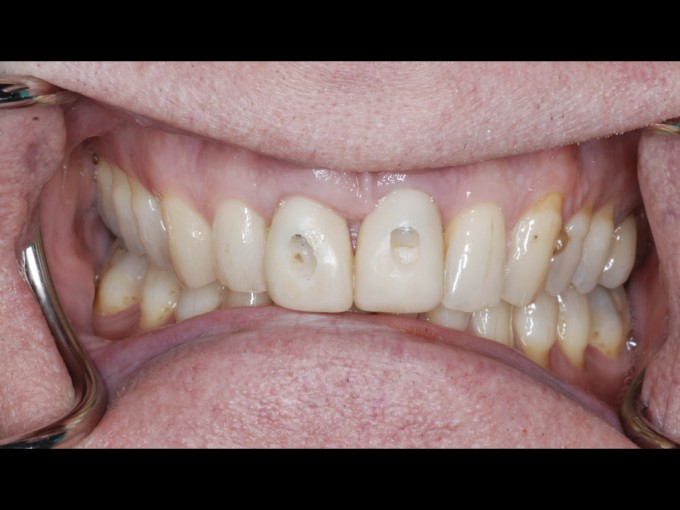
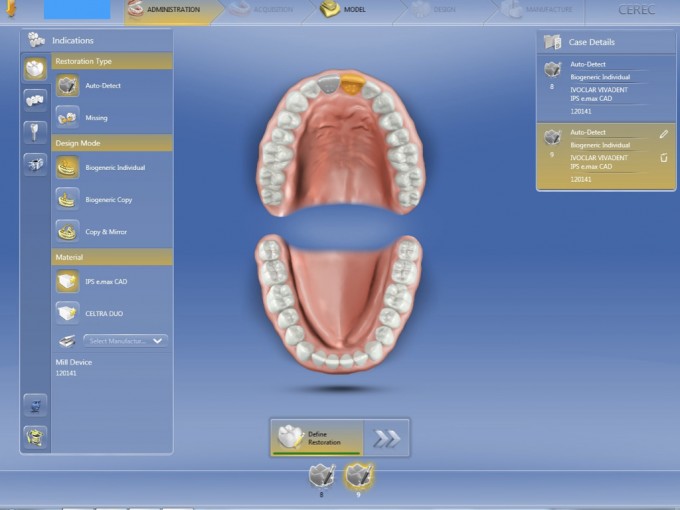
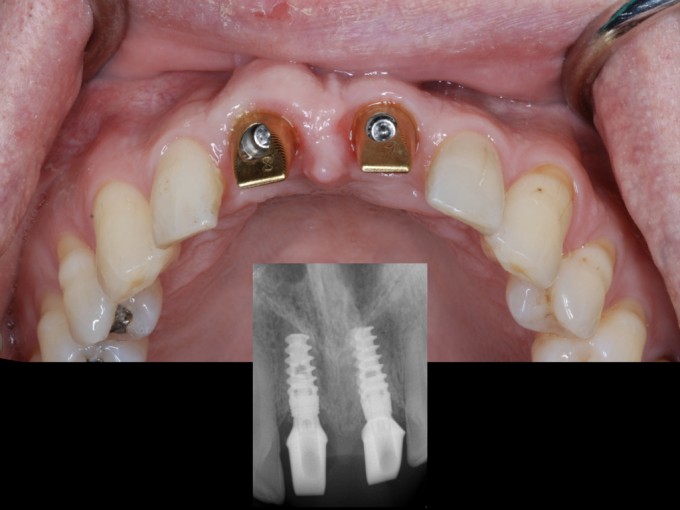
Just wanted to present a fun and interesting case that I just completed this week on a wonderful English gentleman. He presented about 1 year ago with failing RCT's and resorbed roots on teeth 8 and 9:
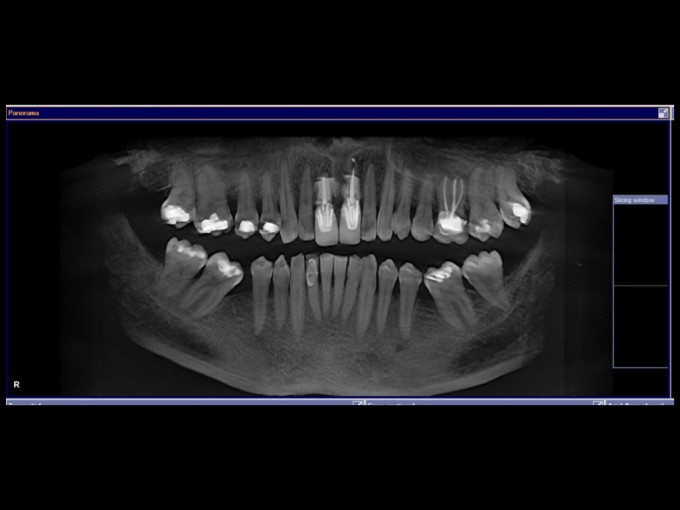

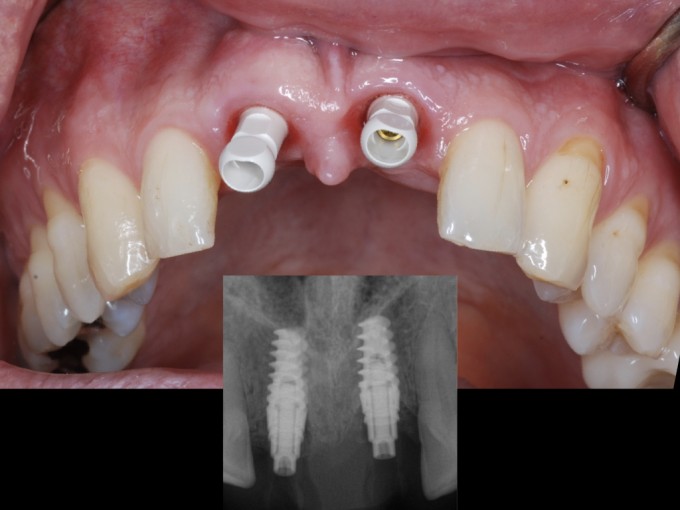
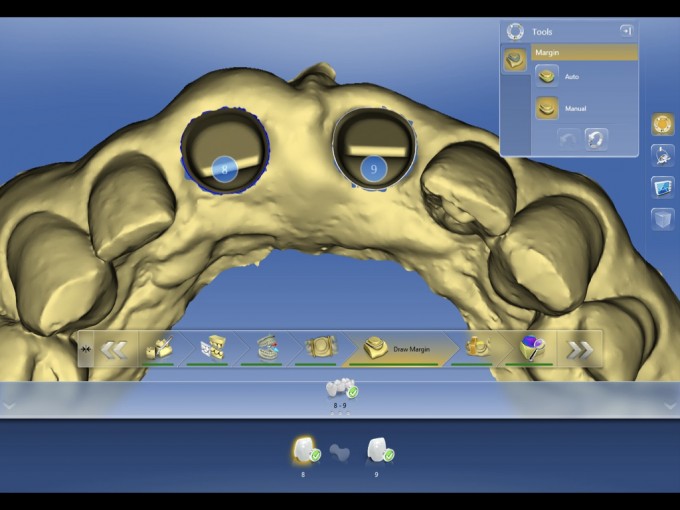
After discussing options, it was determined that extractions and implants would be the best plan. We discussed gingival zenith issues, and due to a low smile line and him not being concerned about it he did not want to pursue excessive grafting with the surgeon. He asked if we could space out treatment a bit, so we began with #8. I fabricated a flipper for him(which he hated) and sent him to the oral surgeon for extraction and grafting. A few months later, on the day of his implant surgery, I received a call from the oral surgeon, and he mentioned that our patient was asking if we could put a tooth in so he did not have to use the flipper any more...the surgeon informed me that he was comfortable with the insertion torque and that I could place an immediate provisional-and they sent him right over! Time to scramble...the OS placed a Nobel Active 5.0 so I placed a scanpost and imaged:
We then milled out a Vita Enamic IS block, left it out of occlusion, and undercontoured the facial in the gingival 1/3 to avoid gingival pressure. Unfortunately, because of the lack of time to prepare properly for this curveball, the only shade I had on hand was 1M1:

Now, this is part of why he is awesome-when I told him the tooth was too light, and that we could mill another one later, he told me he loves it(he would have loved anything to get rid of the flipper) and that he would stain it down with Earl Grey!
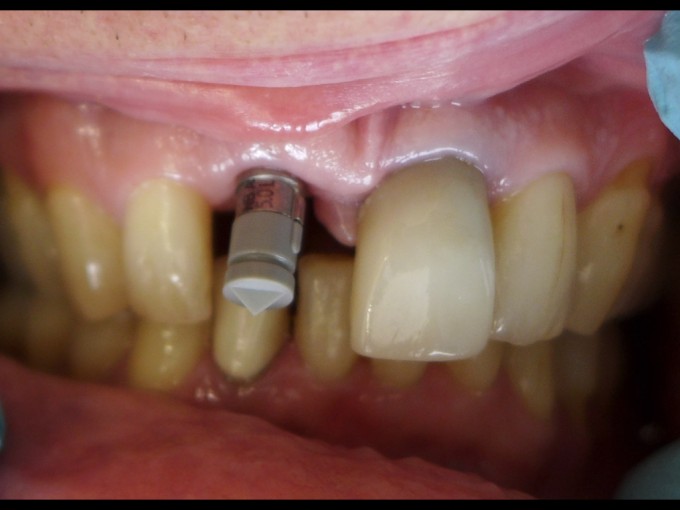
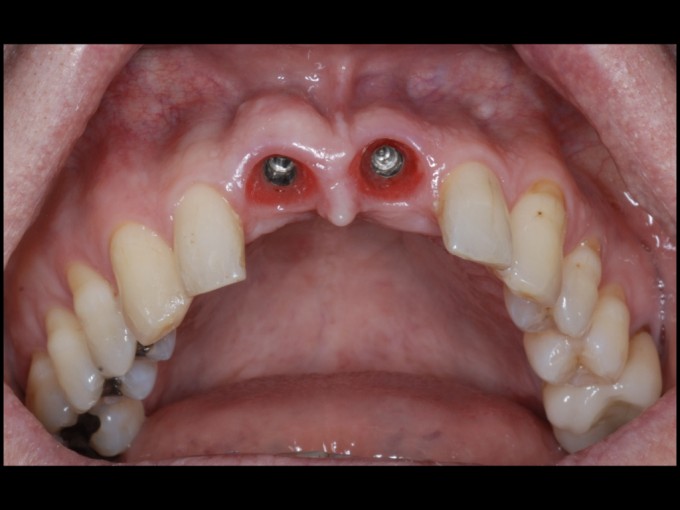
A few months later, he went back to the OS for removal of 9, and this time the OS did an extraction and immediate implant, and informed me that I could place an immediate temporary in this site as well. When he returned from the OS, sure enough he had worked #8 into a better blend! We then fabricated an Enamic IS for #9 and let the patient heal:

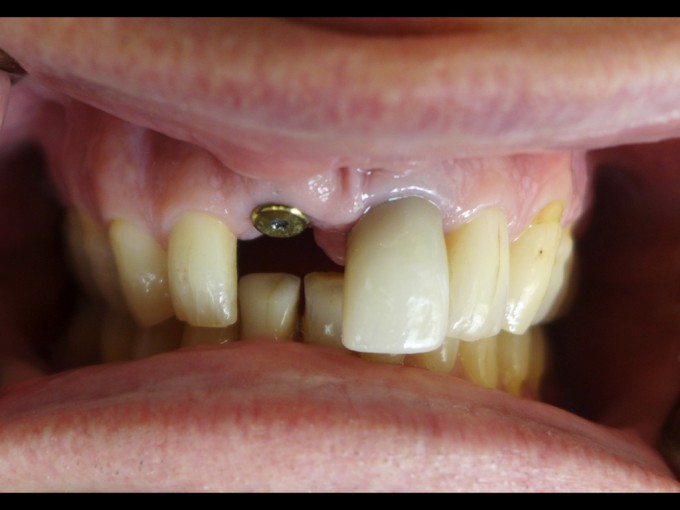
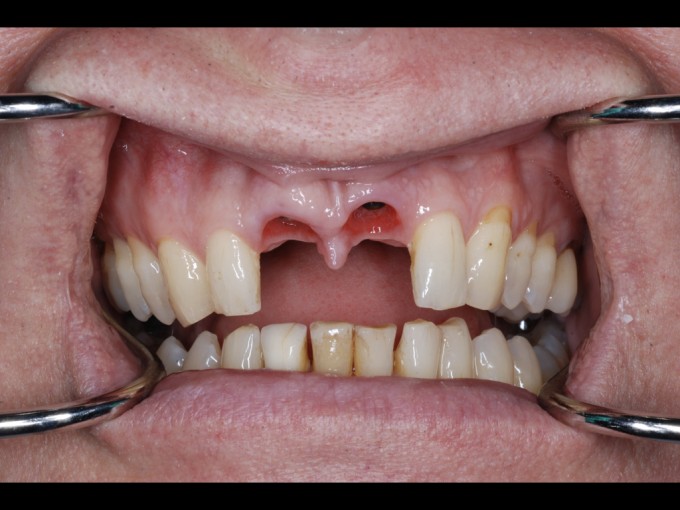
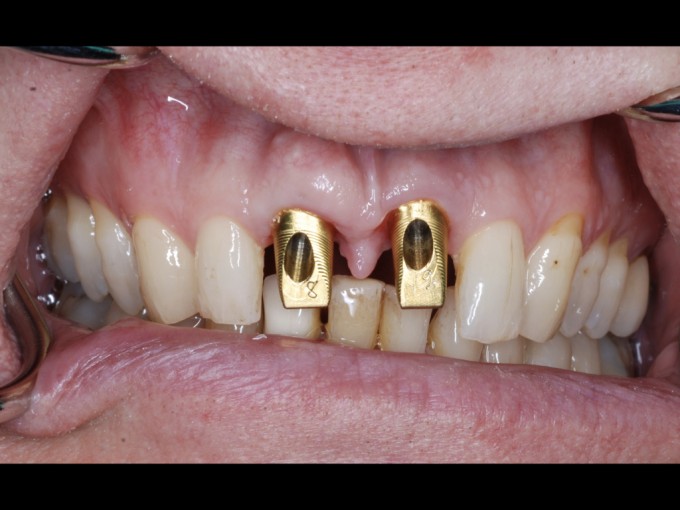
Now, please note that #8 is slightly longer than #9-the reason for that is...well...I hadn't noticed in the process of the appointment. No other real excuse:). A few months later, he returned for the next step in the process. Now, with the access holes through the facial, I clearly knew I needed custom abutments, so this seemed like a perfect time to try out the Atlantis workflow. Note how nicely the gingiva responded to the temps:
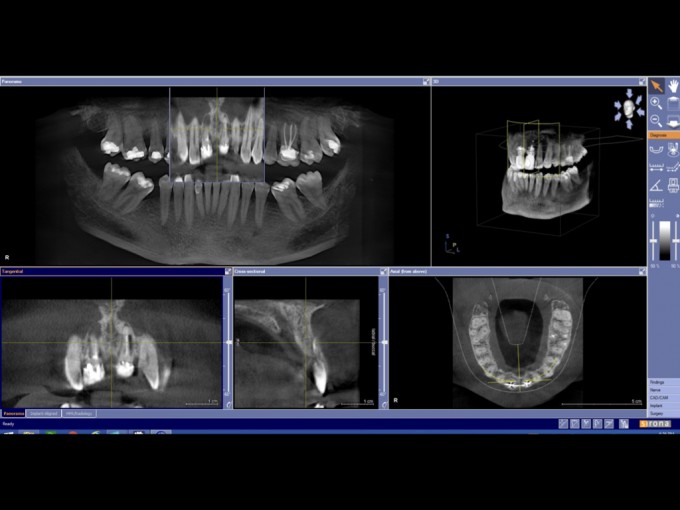
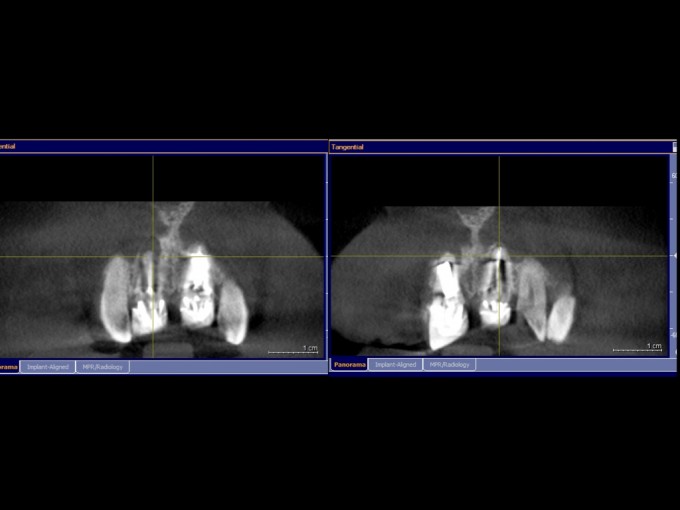
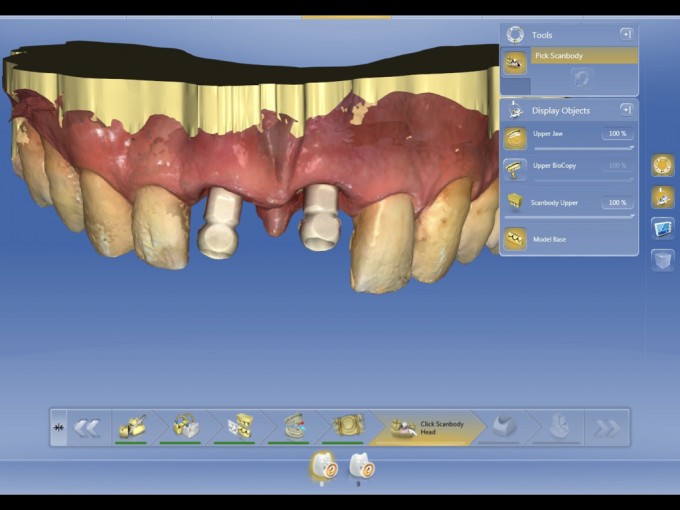
We placed the IO FLO scanbodies and imaged-you can tell the funky angulation of the implants in the scan images:

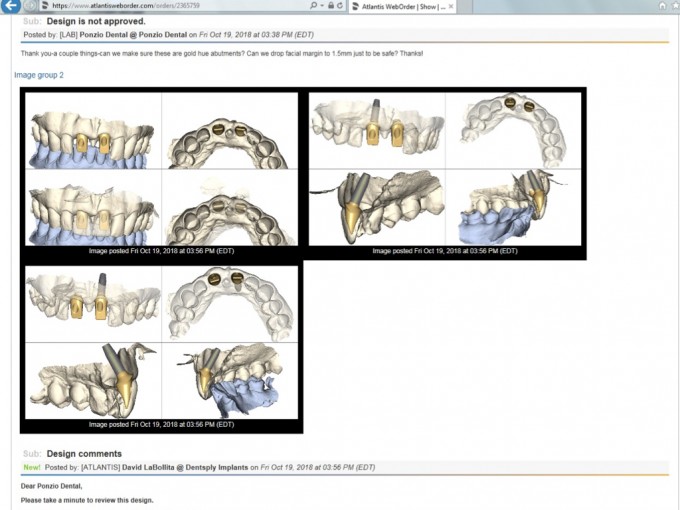
Within 24 hours, the following file was available for my review:

So, bounced that over to my buddy Dan Butterman, who suggested some minor edits for me(thanks Dan!). He also pointed out that it did not have me set up for gold hue abutments, which I thought that I had requested-so make sure to double check when ordering...they very quickly sent me an updated plan, which I approved:
Now, one lesson I learned is that when imaging the IO FLO scanposts, the scanbody folder should be well-imaged. I had scanned similar to a chairside case, where I capture a clean image in the maxillary arch folder and then the detail of the scanpost and enough data to stitch, but when they sent back my Core file an area I had not imaged well was causing an issue:
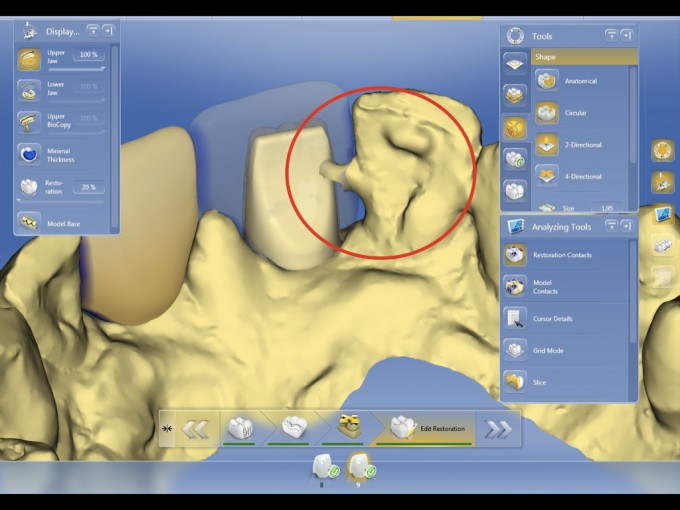
Reached out to Atlantis and they sent a corrected file, but just another thing to watch out for. After a couple of days, I received my abutments and used the file to design and mill out my crowns. It was a very easy process and all we had to do was design two crowns. They fit the abutments perfectly, which was pretty cool to see:

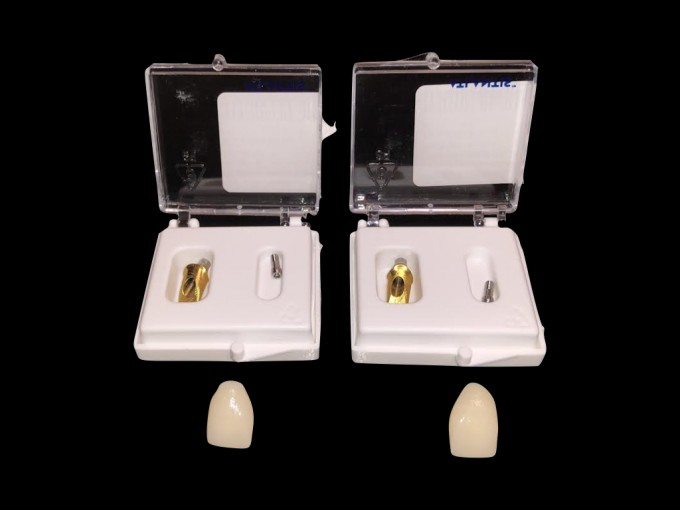


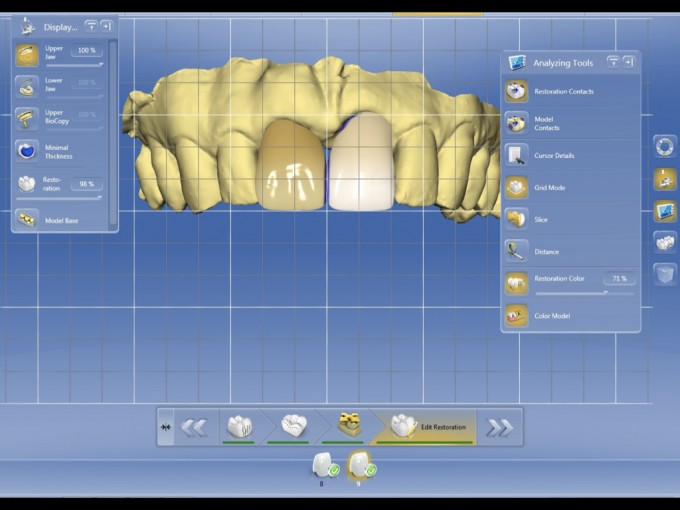
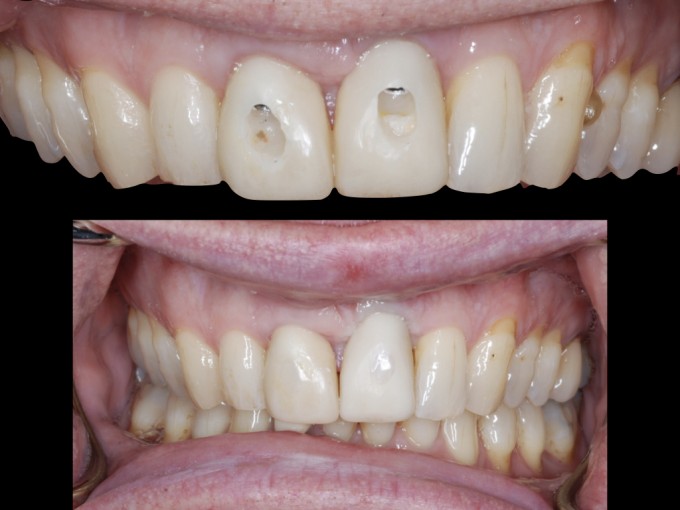
Finally, delivery day, after the patient returned from a trip to China, where he informed me he drank enough tea to take everything down another shade or two. The Atlantis abutments fit perfectly, without any discomfort for the patient. He was right about his trip-the crowns were a little too light initially so we refired them with some additional stain to bring them down a bit:

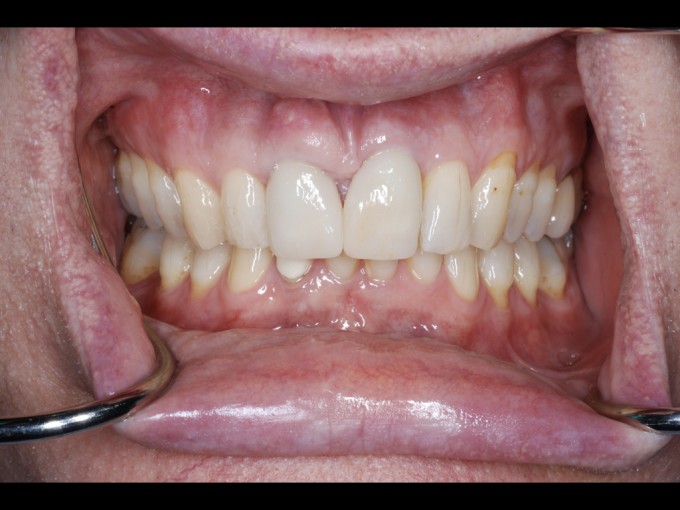

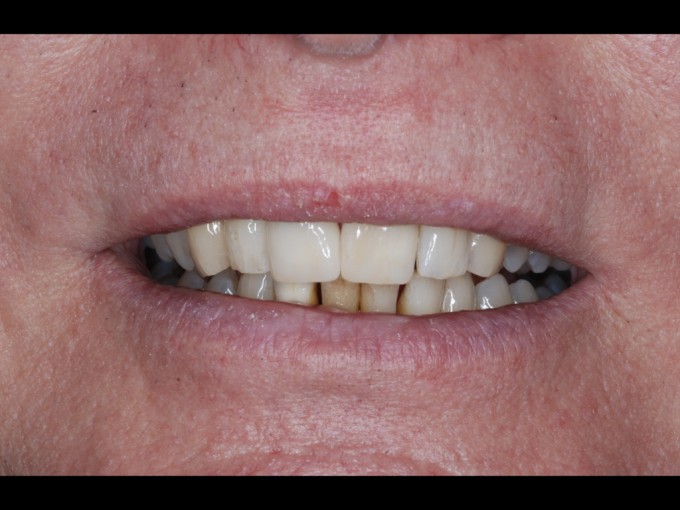
Final crowns were e.max A-2 MT. Obviously, the gingival heights ended up asymmetric, and I missed on the DI line angle of 9. We had one fun exchange along the way where he told me "I don't want perfect teeth-I am English." To which I replied "Then you came to the right dentist!" This was a fun case, mainly because he was an awesome patient, but also because I got to use the technology in such a variety of ways...always amazes me the flexibility and options CEREC gives us, and this Atlantis workflow was really incredible. Thanks again to Dan for taking a look at this case to help me get on the right track!


I love the story, and I appreciate real world cases where everything is not necessarily esthetically perfect. We make these compromises all the time.


Nice work. Love the documentation and the workflow. I really love that they etch the tooth number in to each abutment. Just makes it that much easier. I feel like we're cheating on these cases!
Josh, what makes it even easier than that is ordering the seating jig for 10
Bucks. Makes it so simple

On 11/9/2018 at 1:46 am, Richard Rosenblatt said... Josh, what makes it even easier than that is ordering the seating jig for 10 Bucks. Makes it so simpleDefinitely. I already do, but love that little detail.

Great restorative workflow and treatment Anthony.
It doesn't matter much on this tea-drinking Englishman with a low lip line but this is a great example of the esthetic risks involved with immediate implant placement vs. grafting and delayed implant placement. Also: I would not recommend placing a 5 mm implant in the esthetic zone.
Farhad
@Farhad-thanks for the feedback. They were actually both 4.3 NB A implants but they use the 5.0 scanpost...sorry about the mix-up. Definitely shows some of the esthetic issues that arose from the immediate implant vs. the one he grafted and waited on.
Are the scan bodies implant specific in regards to size? Is there a universal scan body for each brand of implant. It is difficult to know exactly what you need with all these implant brands. I would had to buy a scan body and really only use it once.
On 11/9/2018 at 1:22 pm, John Poston said...Are the scan bodies implant specific in regards to size? Is there a universal scan body for each brand of implant. It is difficult to know exactly what you need with all these implant brands. I would had to buy a scan body and really only use it once.
Yes, each implant has a corresponding Scanpost, but the Nobel family shares a scanpost between a few of the similar implants. There is a PDF of all the implant systems and the corresponding tibase/scanpost including Patterson part numbers on this site. Here is the link for you: https://s3.amazonaws.com/cerec-prod/downloads/20120.pdf
Yes, the investment in the first Scanpost is an investment, but then once you have it, you can restore others as they come in. :-)
