
The whole is greater than the sum of its parts
It's such a great time to be in dentistry; technology and education are helping us to provide an increasingly high level of care for people, and it's such a gratifying experience. For example, taking a digital impression instead of a traditional one; the consistency, accuracy, time and cost savings, and patient experience are all terrific upgrades. CBCT technology is another great example; the incidental findings that we never would have located with 2D radiography, the increased awareness of the "whole person mindest" (thanks, TK!), the ability to make decisions on a more complete set of data, are all game changing! CAD/CAM abutments and restorations have allowed us to increase accuracy and efficiency in so many aspects of our dental lives. Dental implants have progressed in research supported design and have become a key part of the modern dental practice. Lastly, the high quality of education available to us in support of each of these examples is key to making the most of them all. Each of these are valuable in and of themselves, but by combining them they become truly advantageous to our work, and more importantly to our patients. Here's an example of one such case:
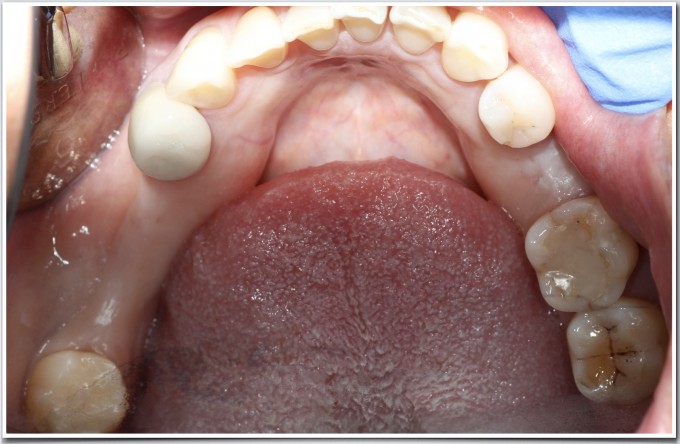
The patient was referred for implant therapy in the #19, 20, and 29 sites. Prior to CBCT, guides, and excellent clinical training, I would have considered punch access, placed 3 implants with healing abutments, all using a pano and with no regard to what was happening with the soft tissue, notably in the #19 site.
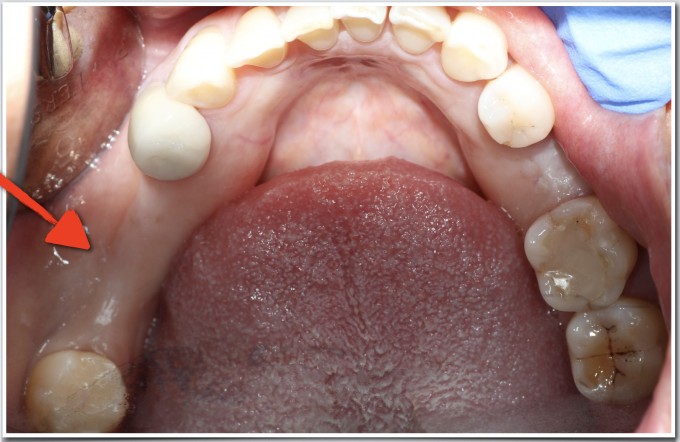
I took a digital impression, designed the future tooth positions for all 3 sites (a true prosthetically driven approach), and merged that data with the CBCT. Seeing where the teeth are supposed to be in function certainly helps to plan the correct implant positions. After all, the point of the implant is not the implant, but what eventually goes on it! Seeing the big picture in this way almost forces you to consider things such as occlusion, spacing from teeth to implants and between implants, and also soft tissue challenges, as indicated by the arrow.
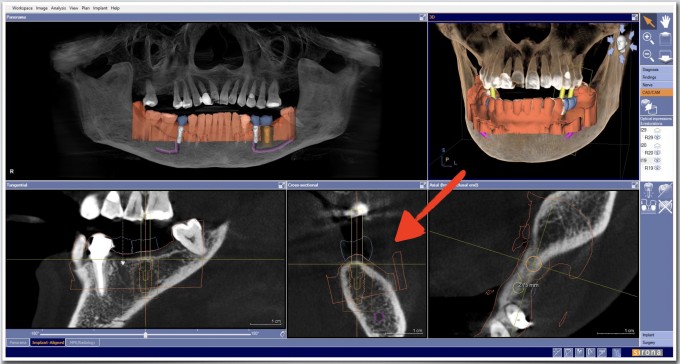
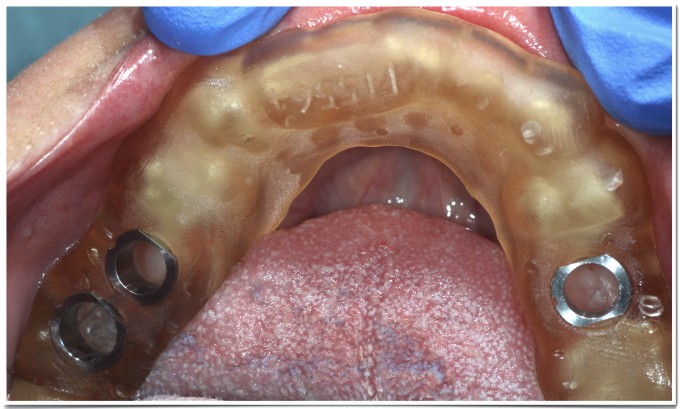
Being able to see the case 3 dimensionally really helps your understanding of the clinical realities facing you, and being able to perform a virtual surgery that is prosthetically driven is also a boon. Even better is being able to reproduce these planned positions with precision using a surgical guide. Trying to achieve a copy of your virtual plan using free handed surgery is exceedingly difficult, and does not serve our patients when techniques exist to help us achieve ideal outcomes. In this case I ordered a SICAT Digitalguide and printed it in house with a Formlabs 3D printer.
Because of the virtual surgical planning, coupled with surgical education, I knew I could place the implants without bone grafting, but I also was aware that I would need to manage the poor quality mobile tissue that would be against the buccal of the #19 implant if I did nothing. I repositioned 3 or 4 millimeters of thick attached tissue from the crest to the buccal; there was some suturing involved after this photo with the healing abutments.
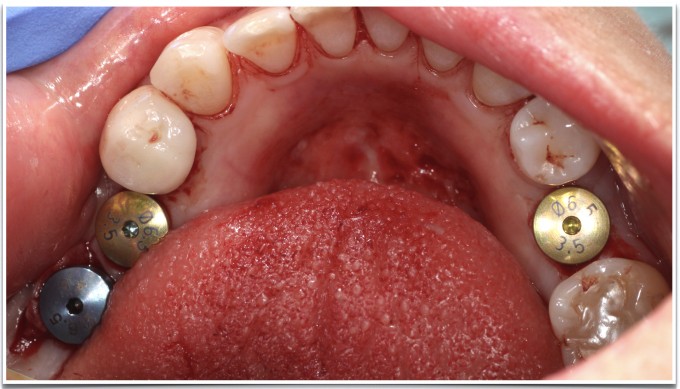
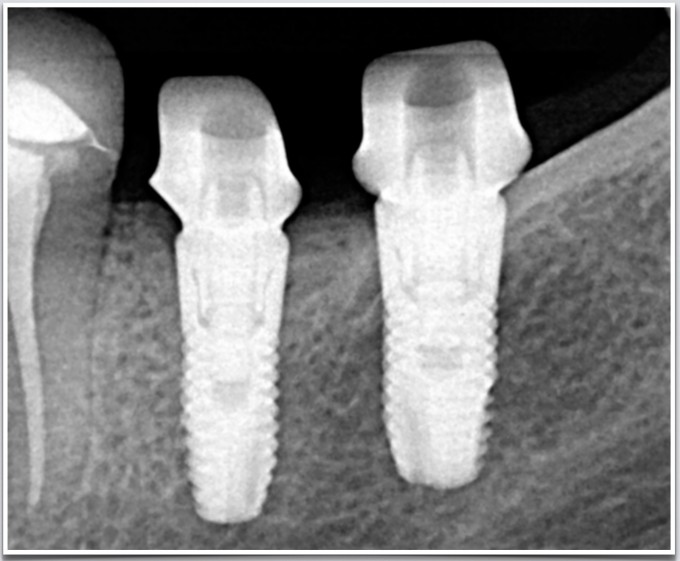
The combination of soft tissue management, correctly positioned fixtures, and an implant system (in this case, Astra EV and their BioManagement Complex) designed around postop bone and soft tissue maintenance, led us to this 2 month post op
The approach I would have used before adopting digital workflows would have been a fixture level, open tray polyvinyl impression. I would have placed the implant analog, made a soft tissue model and sectioned the die myself prior to sending it to a lab for an abutment (before my implant education, I would have done a closed tray impression using a stock abutment and a snap cap). When it came back I would often be disappointed by the contours of the abutment, the height of the margin relative to the tissue, and then the contours and contacts of the restoration. In this case, the digital workflow used was to image the Atlantis scanbodies and send the case via CEREC Connect to Atlantis, where they design custom abutments and send me their design (based on my preferences of contour, margin placement, etc.) to approve prior to fabrication.
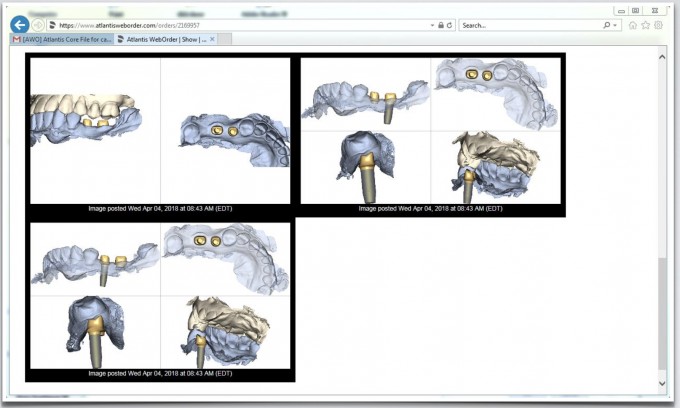
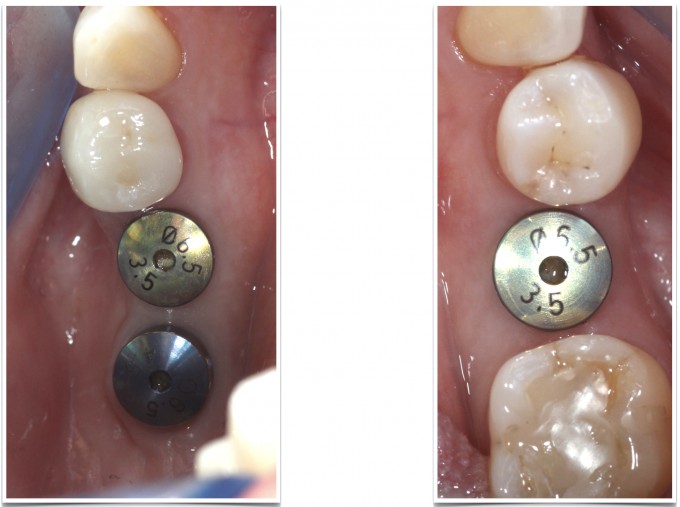
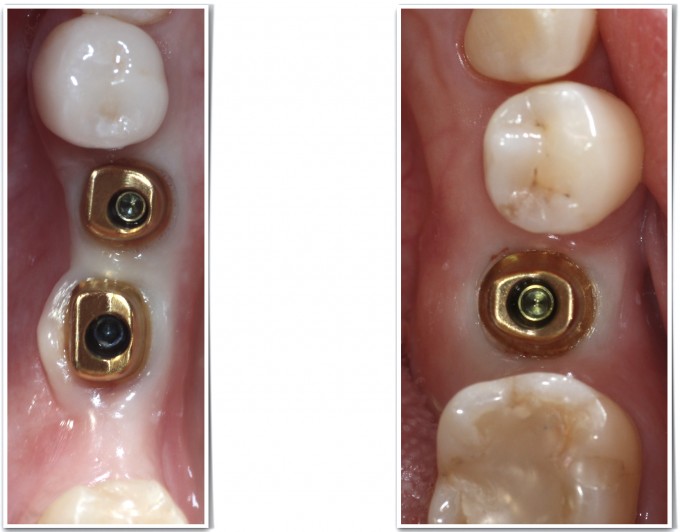
Once approved, Atlantis will send a Core file, which you can load into the CEREC chairside software and produce the crowns over their abutment designs in the 3 days it usually takes them to manufacture and deliver the custom abutments. This is a far less frustrating process than dialing in the fit of the crowns chairside. In fact, the first time the crowns I produced touched the custom abutments was in the mouth; I was so confident they would fit, it didn't even occur to me to test the crown to abutment fit before seeing the patient! Here are the custom abutments immediately after seating them to spec

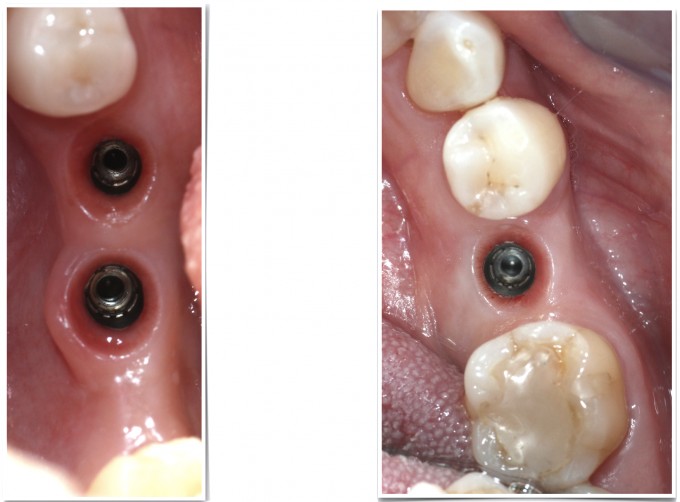
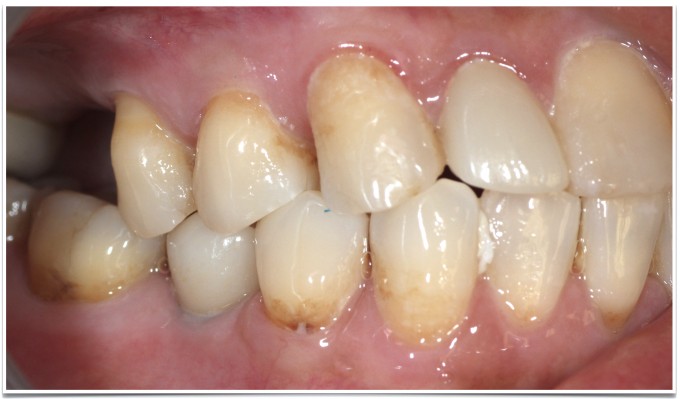
And finally, here are the restorations on recall
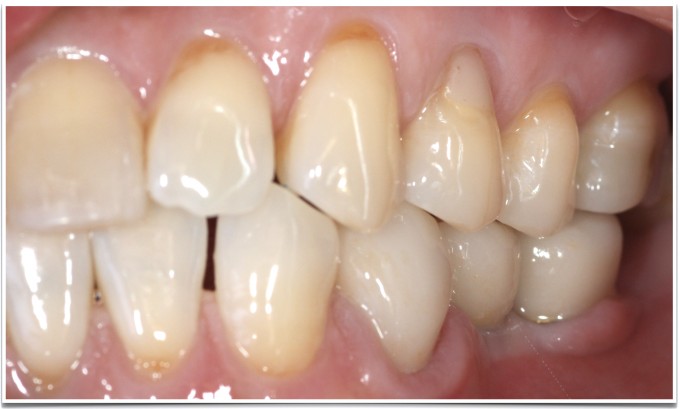
All of these technologies and techniques are valuable on their own, but combining them helps us address the patient in a more nuanced yet predictable way. It has been such a great journey adopting these work flows into my practice and seeing what they've contributed to consistent clinical success, improved patient experiences, and personal gratification. I am looking forward to what's next, and sharing those with this terrific community!
Jeremy
Nice case. Love the way you managed the tissue. So,many things in one case and you make it look easy.
How was your surgical stent made?
Thank you, Paul and Robert
The guide was a Digital guide from Sicat. Using my planned implant positions and guided implant system that I’ve selected, they design the guide and send me the stl file, which I then printed in house with SG (surgical guide) resin. The fee from Sicat is $120, the sleeves from Steco are about $7 each, and there’s about 12mL of resin used to print the guide. Maybe $150 total to produce this guide.
Awesome Jeremy! Great documentation and explanation of the process. Love the soft tissue healing. Are you imaging with the IO Flo scanposts at the time of surgery ever or usually just wait for when the implants have integrated?
Nice case Jeremy! I feel like I'm cheating when I use these technologies, they just make the whole thing so much more effortless. (Is that the right way to say that?) I need to get better at documentation and photography! Thanks for the inspiration!
On 10/21/2018 at 11:56 am, Daniel Wilson said... Awesome Jeremy! Great documentation and explanation of the process. Love the soft tissue healing. Are you imaging with the IO Flo scanposts at the time of surgery ever or usually just wait for when the implants have integrated?
Thanks, Dan!
I don't usually do that, as I like to see where the tissue ends up, whether it's a stock healing abutment or custom healing abutment. Azento, of course, makes this a slightly different conversation, but my preference is to image after the sulcus is defined.
Jeremy
On 10/21/2018 at 7:28 pm, Josh Fowler said... Nice case Jeremy! I feel like I'm cheating when I use these technologies, they just make the whole thing so much more effortless. (Is that the right way to say that?) I need to get better at documentation and photography! Thanks for the inspiration!
Thank you, Josh!
Maybe it's "less hard" than the traditional work flows?
Jeremy
