
8 Unit Veneer Case

I haven't posted a case in awhile... thought I would post one that I just finished...
Preop situation: Patient had very old veneers on front 6 teeth. He wanted to change them out with a "whiter" solution and also wanted a fuller smile.
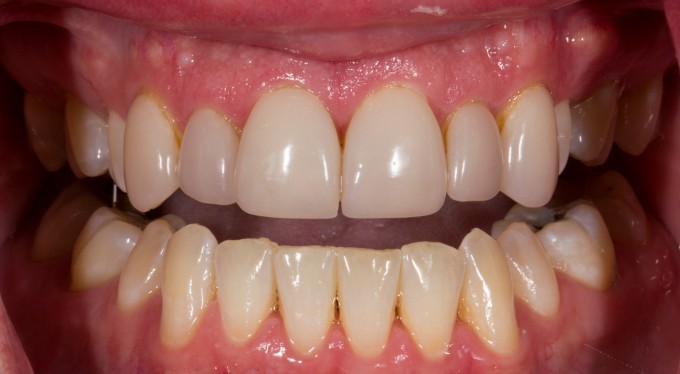
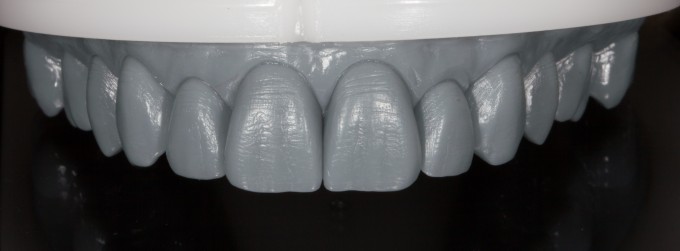
We decided to do the front 8 teeth to take care of his buccal corridor issue. We imaged with Ortho software and sent to lab to have a digital waxup done
After rough prepping the teeth, we transferred the waxup to the mouth and then did final depth reduction

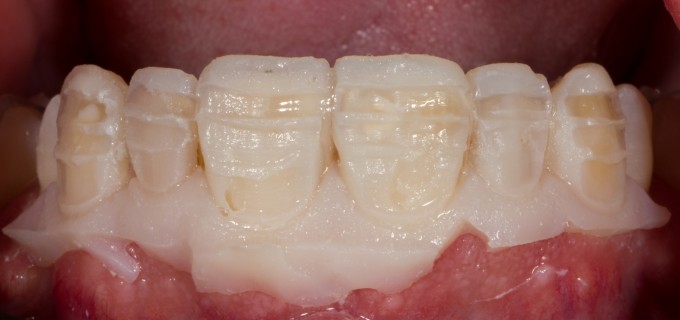
Here are the final preparations:

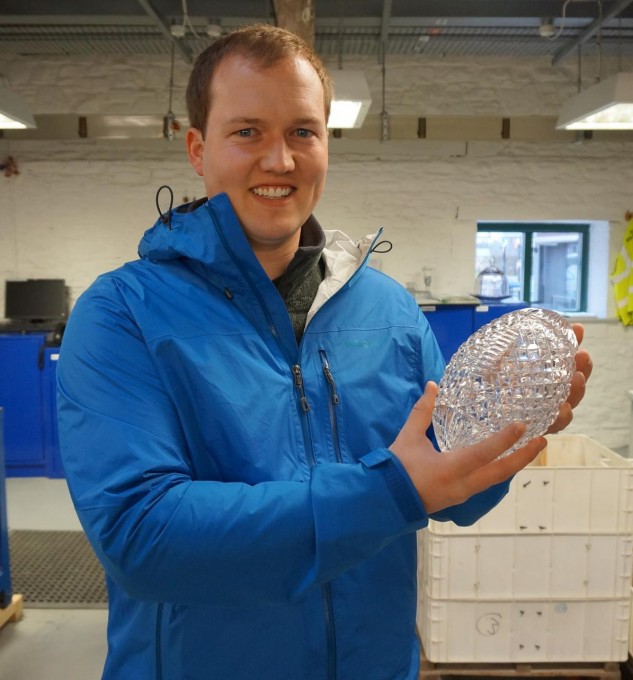
And here is the final result. Vita Mk II 1M1


Blindingly beautiful. Nice preps and great result!
Seems like the wax-up is quit different from the finals. Specifically #6 seems rotated a bit to the distal. Could you have prepped and restored it allow for a more mesial rotation?
#7 seems a bit longer than #10. Thoughts?
Gorgeous work Skram.
On 1/24/2018 at 12:59 pm, Jake Skowronski said...Blindingly beautiful. Nice preps and great result!
Seems like the wax-up is quit different from the finals. Specifically #6 seems rotated a bit to the distal. Could you have prepped and restored it allow for a more mesial rotation?
#7 seems a bit longer than #10. Thoughts?
Gorgeous work Skram.
Good pickups:
- #7 is a bit longer. Did not notice it until I took the pictures. That will need to be adjusted
- As far as the waxup... I was hoping someone would notice this... one of the reasons I posted it. I had to do quite a bit of changes do to the preps ironically being "too" conservative. It looks like there is plenty of reduction... but the reduction interproximal an be deceiving... The facial reduction was not enough...
The reason for this is that i forgot that we have spacer. The minimal thickness of the restorative material is from the outer surface of the restoration to the spacer (not the prep). So if you reduce .7mm (which I did) and the spacer is 120 microns, then the final thickness of the material is now under .5mm (probably less because that calculation is assuming that your prep is 100% perfect.
So, because the restorations are too thin I had to bulk them out a little bit and try and finish them back a little bit. This accounts for the result not being as good as the waxup. It was a great lesson.
To correct that, now i'm doing 2 things:
- Prepping just a little bit more (more .7-.9mm... still in enamel)
- Lowering my spacer to 60-70 microns on anteriors.
This will help get a more "true" result to the waxup, avoid prep show through, and have less design time.
No matter how many cases that we do, we still learn valuable lessons on every one that will help us on future cases.
Mike, since there is a concurrent thread about bonding to cementum, could you comment on how you handled the bonding here, as it appears there is no enamel at the gingival margins of 6 and 11 (and perhaps others)

I noticed when I prep especially anteriors I am trying to create 3 planes and I do cervical Plane I would create undercut. If I keep my bur straight to remove the bulkiest portion of the tooth it will create a chamfer without undercuts. Mike is right it is very difficult to control thickness interproximally that is why I use different matrixes.
Another thing I do not do anymore is to adjust my Laminates according to minimal thickness. If I do my whole mock up and wax up would be wasted. Of course I want to make sure I have enough thickness. I did not have any issue doing that. Gregory
Mike,
You mentioned a digital wax-up. Can that be imported into the Cerec software or are you scanning a model and using biocopy?
I completely agree gregory with your comments. I have fixed issue with lowering spacer... but if i get a minimal thickness error still, i ignore it
Gary, the pictures are deceiving. They are almost all in enamel. The canines might be slightly out of it in certain area (maybe)... but the stained areas make it look worse. However, you take small chances in situations like this. Much different than placing margin in an area of Abfraction like that other thread
On 1/24/2018 at 1:56 pm, Mike Skramstad said...On 1/24/2018 at 12:59 pm, Jake Skowronski said...Blindingly beautiful. Nice preps and great result!
Seems like the wax-up is quit different from the finals. Specifically #6 seems rotated a bit to the distal. Could you have prepped and restored it allow for a more mesial rotation?
#7 seems a bit longer than #10. Thoughts?
Gorgeous work Skram.
Good pickups:
- #7 is a bit longer. Did not notice it until I took the pictures. That will need to be adjusted
- As far as the waxup... I was hoping someone would notice this... one of the reasons I posted it. I had to do quite a bit of changes do to the preps ironically being "too" conservative. It looks like there is plenty of reduction... but the reduction interproximal an be deceiving... The facial reduction was not enough...
The reason for this is that i forgot that we have spacer. The minimal thickness of the restorative material is from the outer surface of the restoration to the spacer (not the prep). So if you reduce .7mm (which I did) and the spacer is 120 microns, then the final thickness of the material is now under .5mm (probably less because that calculation is assuming that your prep is 100% perfect.
So, because the restorations are too thin I had to bulk them out a little bit and try and finish them back a little bit. This accounts for the result not being as good as the waxup. It was a great lesson.To correct that, now i'm doing 2 things:
- Prepping just a little bit more (more .7-.9mm... still in enamel)
- Lowering my spacer to 60-70 microns on anteriors.
This will help get a more "true" result to the waxup, avoid prep show through, and have less design time.
No matter how many cases that we do, we still learn valuable lessons on every one that will help us on future cases.
I had a recall on a 4 unit veneer case this morning. It was the first time I have seen him since we restored him in December and it looked absolutely stunning. We took pictures and as I studied the pictures I noticed about 3 different tweaks I want to do with a bur when he comes back ![]()
![]()
Absolutely agree with your observations and proposed adaptations, I think that will work very nicely.
Ive never had a problem being too conservative...... my evolution includes being more conservative.
Good stuff, thanks for posting.
What are your thoughts on using emax here? I ask that because you could go thinner on the material with more strength. Also the less you prep, the less flexible of the tooth. I have a veneer case with my master ceramist right now and they are .1-.3 in some areas with emax press. And it works great.
This case is still really nice but I made a small mistake on my case also and learned a lesson. I think we all do this but that’s what makes us better.
Thanks for sharing mike.
Hi Jeff-
My opinion that if laminate veneers are supported properly with enamel, there is very little advantage of using emax over feldspathic.
You cannot compare milling and pressing. First, when you press, the spacer is already placed on the dies so you can press super thin and uniform.
When milling, the spacer is not calculated until later and the milling strategy is often not uniform based on prep design. That presents problems that pressing does not. How thin you can go is completely dependent on prep and especially milling. I believe that thinness with milling is .5mm
If you think of milling (grinding), you can also go thinner with materials like Vita compared to emax.
So... i thin a spacer of 70 and nice prep of .7mm is the sweet spot. Then you ignore the minimal thickness like Gregory said above.
I would agree with much of what you said. I think materials can be thinner when pressed or stacked in the lab especially with a conservative prep.
I think we are all learning (especially from you) on cases like this with spacer and prep design and material. We don’t want to cut off too much enamel but as you said milling is different than pressing.
I assume that there will be less effect of the cement at a spacer of 70 also. This could be good and bad depending on the stump Shade.


Mike-
Huge improvement from the pre-op. I am sure your patient was pleased with the outcome.
I have made the same mistake with minimal thickness as discussed here...did a case in Biocopy from the waxup, though I had adequate reduction, yet my proposals had the blue minimal thickness showing through....so I would bump is out, mill, and then have to trim and thin out manually.....it appears others have had the same issue.

1. We have an opportunity to join waxup and prep without rescan using other Cad programs 2. I would use in this case E.max and set a minimum thickness of 0.3 mm. It can give excellent results. Really nice work, Mike. Waxup is beautiful
