
Anterior Implant treatment carried out with CEREC/Galileos Integration and Clear Correct
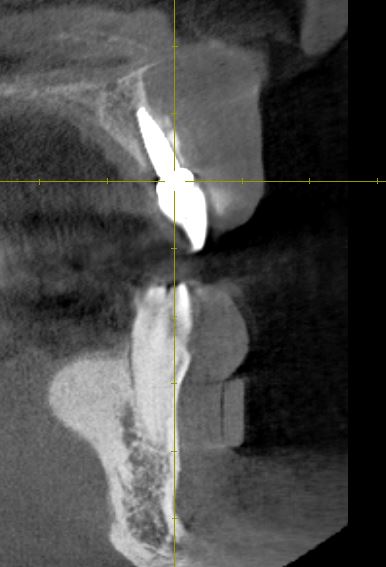
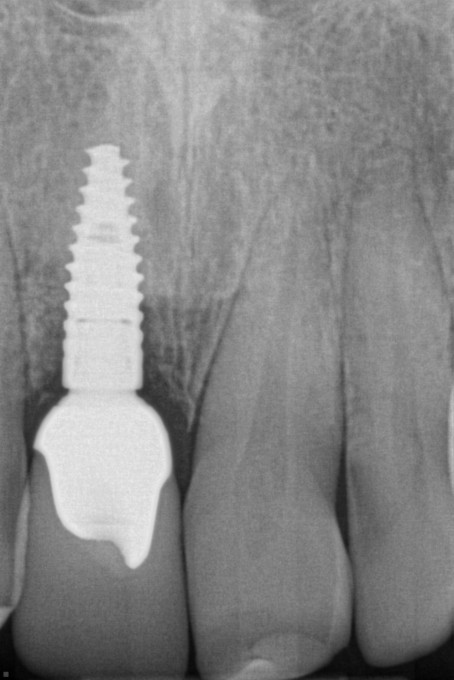
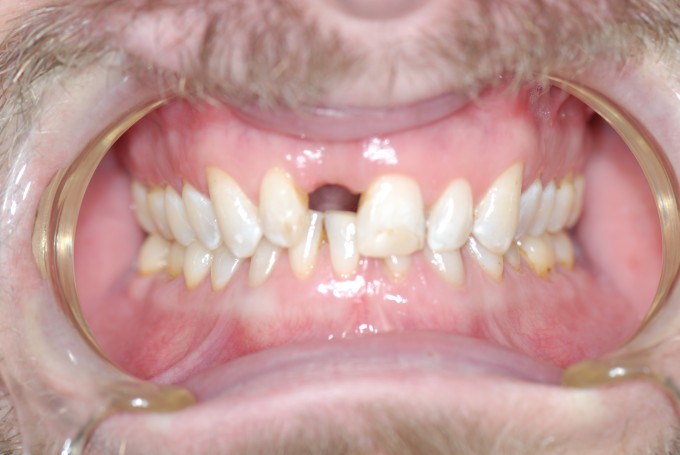
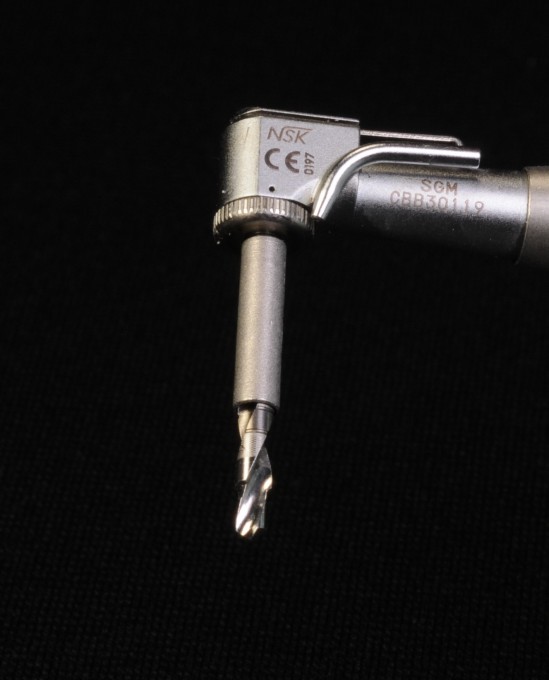
This is a Dental Lifeline Network Donated Dental Services case done for a disabled veteran. There is plenty that can be improved with this case. Ross Enfinger, Chris Aadland, Daniel Wilson, and especially Mike Skramstad would never post something like this. I accepted this patient because I saw an opportunity to gain experience doing a comprehensive esthetic implant case, but with lower esthetic demands than if this were a soccer mom. It is the best I could do under the circumstances. I received some coaching along the way from Farhad and Emil Verban. The patient presented with an edentulous space that was too narrow for a normal looking central incisor. Clear Correct generously donated their orthodontic services. The ortho isn't perfect but the patient is 40 years old with some serious space issues. The edentulous space was enlarged enough to provide some room with which to work. Straumann graciously donated the 3.3 x 10 BLT Roxolid implant, the healing abutment, and the Variobase. The osteotomy was carried out using a CEREC Guide 2 milled in house with Densah Osteotomy drills and the old Verban Drill stops. Emil loaned me one of his reduction gear handpieces, a pilot drill, and some drill stops--he wanted to spare me the expense of purchasing the drill stops which were available at the time because he was rolling out his new drill stops a few months after this implant was placed. I did purchase a set of his new drill stops. A membrane was placed under the reflected labial gingiva, FDBA was placed between the membrane and the ridge to increase the width of the ridge for better esthetics, the site was sutured shut and allowed to heal for six months. After the six month healing period, the implant was uncovered and a healing abutment was placed. After two weeks of healing, a fixture level impression of the upper arch and an alginate impression of the lower arch were obtained, models were poured, and the split custom zirconia abutment and e.Max crown were fabricated. 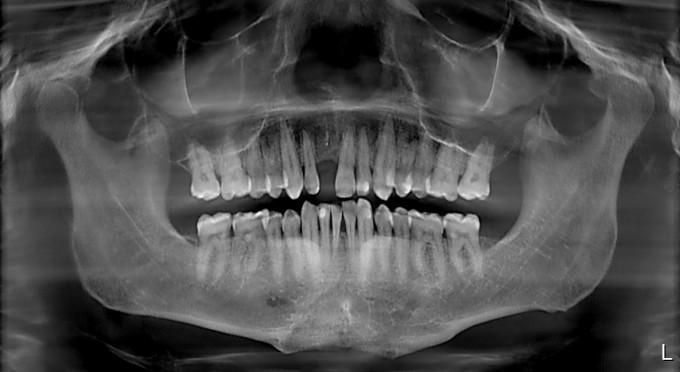
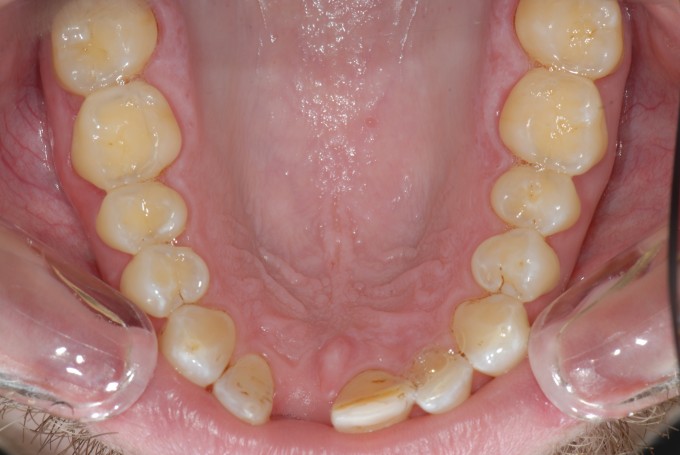
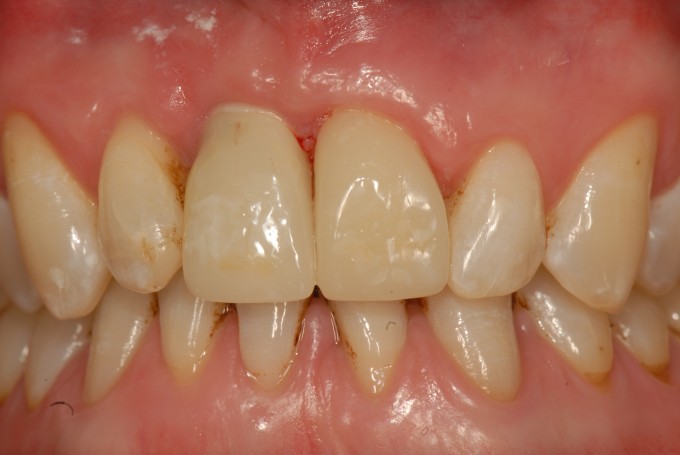
The pre treatment planning pictues
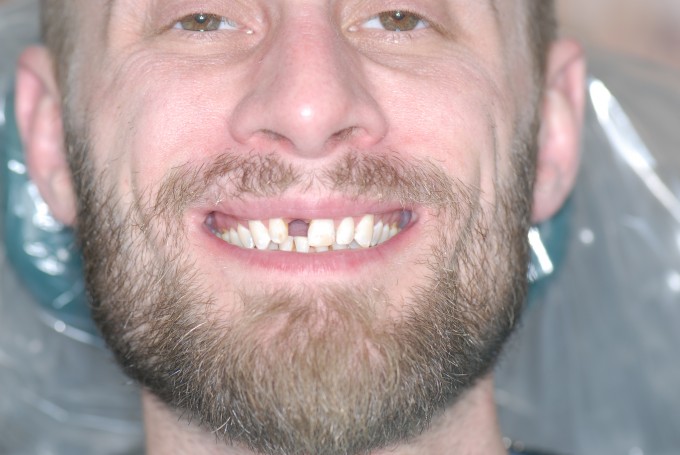
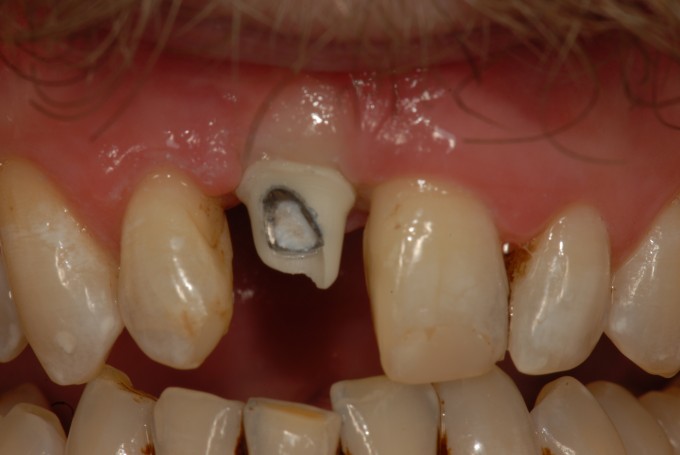
The custom abutment and implant crown. It was necessary to reduce the mesial of #9 because it was too large. I could have done a better job. Now it is too small with a cant.
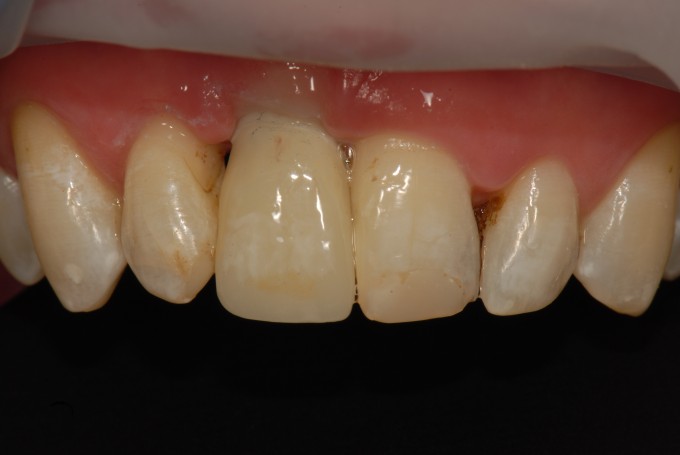
The distal of #9 was rotated to the lingual. A veneer pretty much solved the cant and size discrepancy. It was necessary to polish out some orange peel in the glaze on the veneer. In the process, some of the white stain was lost. The veneer should have been restained and reglazed but we were running out of time. The result is still an improvement over what the patient presented with. The gingiva has almost covered the abutment margin.

Don't be too hard on the old man.
How did the patient feel about his new grill? I'm guessing pretty happy, and if so that's a win.
Terrific job, and bless you Dr Chuck!!!
J
Absolutely bless you Chuck--- going to take a closer look tomorrow- and admire your case
Mark
Overall a nice outcome for this patient. My only question:
Why is there a loss of papillary and gingival tissue height from #7 mesial to #10 mesial as compared to the pre-op pic?
Farhad
On 5/15/2017 at 9:51 pm, Farhad Boltchi said... Overall a nice outcome for this patient. My only question: Why is there a loss of papillary and gingival tissue height from #7 mesial to #10 mesial as compared to the pre-op pic? Farhad
Thank the Lord that we heal. Rack it up to a lack of finely refined surgical skills? I flapped this case (I felt the ridge was too narrow to prepare the osteotomy and place the implant blind through a tissue punch hole), and it was necessary to to reflect tissue to place a membrane and do the bone graft) and and the loss of papilla height is a result of the flap I reflected. The photo of the finished case, taken immediately after I placed the veneer on #9 shows that the papillae are coming back. All the photography for this case was done the day of the procedures because he drives 45 miles to my office and it is difficult for him to make frivolous trips to my office simply to satisfy my desire to follow the case. Also, it is likely that I will never see this patient again. He is not the kind to seek regular dental care.
Thank you for your service to this veteran and for continuing to inspire dentists on this board with your pursuit of excellence. This is a fantastic result and I am sure the patient is ecstatic. Well done, sir!

Dr. Chuck Great Service for the patient!
In case like yours I always perio probe location of the bone. If I see I have lower crest especially on interproximals I would not reflect papilla to avoid black triangles. If you get one it is almost impossible to regain it.
Second point I always keep in mind: the lower we interproximally the more space between the roots (IDR) the less predictable we will get papila back again even it is normal crest.
Design: Abutment is very close to lateral interproximally, I would have made less emergence profile and also would remove from the buccal not to have pressure on the tissue. Gregory
Gregory,
Thank you for your comments. You see things that never occur to me. It would have been nice to have a Variobase "C" for this case. As it was, I narrowed the shoulder as much as I thought was tolerable.

Great work! It's even more impressive that you were able to get all those companies to donate their products. Fantastic case all around.
Ted,
I found that our industry partners are very gracious in cooperating with a case like this as long as they trust that the doctor is not trying to pull a scam on them. There is no harm in asking.
Great job Chuck! Thank you for going the extra mile to make this happen for this disabled Veteran who served our country
Very nice result! I'm wondering if you could share your work flow for staining? Which stains did you use, did you layer the stains. I'm relatively new, so I'm interested to hear how the master works.
There are probably as many staining protocols as there are lab technicians and dentists. What I do with these is to use a double bake technique. The e.Max is crystalized without glaze so we are working from the actual final color of the restoration. That means that e.Max glaze can't be used without Object Fix because e.Max glaze fuses close to the e.Max crystalization temperature, and that is too much complication. I then use clamping laboratory technicians' forceps, hold the restoration close to the teeth and apply Empress stains and glaze, firing the Empress glaze at the Empress Glaze fusing temperature. The stains are mixed with Empress Glaze about 60% stain, 40% glaze and applied to the restoration on the unbaked glaze. It's basically a what you see wet is pretty much what you get after the restoration is baked. That is what I did with the veneer. For the implant crown, I photographed the patient's maxillary incisors and imported the photo onto my MacBook Pro and went off the image on the MacBook Pro screen to do the staining.
Firing before glazing is doable. In fact, teeth are never as shiny as glazed porcelain. Anterior teeth look fine polished and fired with no glaze unless stain is needed. If I use glaze on an anterior crown, I will dull the gloss with Diashine Coarse. Glaze has no effect on strength. The firing is all that is necessary to gain maximum strength--it heals the microcracks caused by the milling. I dry fire most Empress CAD, Vita, and Celtra Duo glass ceramics.
On 5/16/2017 at 11:14 am, Charles LoGiudice said...Firing before glazing is doable. In fact, teeth are never as shiny as glazed porcelain. Anterior teeth look fine polished and fired with no glaze unless stain is needed. If I use glaze on an anterior crown, I will dull the gloss with Diashine Coarse. Glaze has no effect on strength. The firing is all that is necessary to gain maximum strength--it heals the microcracks caused by the milling. I dry fire most Empress CAD, Vita, and Celtra Duo glass ceramics.
I tend to stain and glaze all of my e.max restorations in the first fire on P1 or P3. Here's my rationale. If I nail it the first time, good for me and I save myself and extra firing. If I don't like it then, I strip off the color, and start over. Depending on the demands of the case, I have started staining in the mouth like Mike Skramstad and Tom Monahan have discussed on the boards.
One reason, I think I have been somewhat successful with this is that when I first started with CEREC, I stained and glazed everything. 2nd molars included. Even though the patient couldn't see it, I would evaluate how my block selection was and then how my stains affected the outcome and if I got close to what I first expected in my mind. As time went on I got better and better and then started doing anteriors and staining and glazing in the first fire become just my routine. I will say, I do think post polishing is necessary after you stain and glaze a case to tone down the "shiny" look of a glazed crown.
Dan
Like I said, there are many ways to stain and glaze. I don't know if I have seen this clinically, but those of us who have been using CEREC for years know about Rella's findings that glaze on the occlusal wears faster than polished ceramic, becoming pitted and more abrasive to the opposing dentition than a polished surface without glaze. It's whatever floats your boat and produces the warm fuzzies for you. What I don't like about polishing/stripping away stain characterization is that all that extra grinding/polishing on the labial surfaces tends to eliminate the surface texture and surface texture might be more important to a natural looking result than stain. In the final analysis, whatever works. Dentistry is part art, part science.
Nice work Dr Chuck! Lots of great cases today. This is awesome to give this quality of work back.
Charles !
Thank you for for doing this wonderful service for a disabled vet. You gave him back a smile. That is priceless !
Winnie
On 5/16/2017 at 2:18 pm, Daniel Wilson said...On 5/16/2017 at 11:14 am, Charles LoGiudice said...Firing before glazing is doable. In fact, teeth are never as shiny as glazed porcelain. Anterior teeth look fine polished and fired with no glaze unless stain is needed. If I use glaze on an anterior crown, I will dull the gloss with Diashine Coarse. Glaze has no effect on strength. The firing is all that is necessary to gain maximum strength--it heals the microcracks caused by the milling. I dry fire most Empress CAD, Vita, and Celtra Duo glass ceramics.
I tend to stain and glaze all of my e.max restorations in the first fire on P1 or P3. Here's my rationale. If I nail it the first time, good for me and I save myself and extra firing. If I don't like it then, I strip off the color, and start over. Depending on the demands of the case, I have started staining in the mouth like Mike Skramstad and Tom Monahan have discussed on the boards.
One reason, I think I have been somewhat successful with this is that when I first started with CEREC, I stained and glazed everything. 2nd molars included. Even though the patient couldn't see it, I would evaluate how my block selection was and then how my stains affected the outcome and if I got close to what I first expected in my mind. As time went on I got better and better and then started doing anteriors and staining and glazing in the first fire become just my routine. I will say, I do think post polishing is necessary after you stain and glaze a case to tone down the "shiny" look of a glazed crown.
Dan
Hi Daniel, what's your rationale for choosing between P1 or P3? P1 for anteriors for the more subtle shine of the painted glaze and P3 spray glaze for the posteriors? Is that correct?
Thanks!
Maxime
P1 is about 25 minutes and can do up to, I believe 6 units.
P3 is the speed cycle, takes 14:15 , and can do only two crowns. Use the small firing support ring.
