
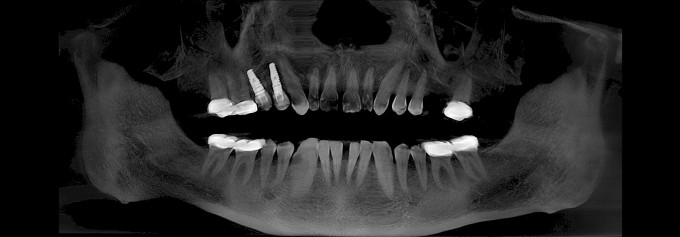
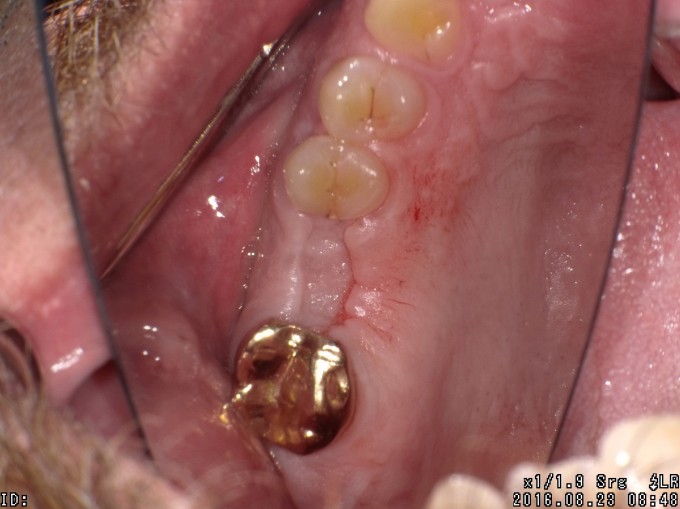
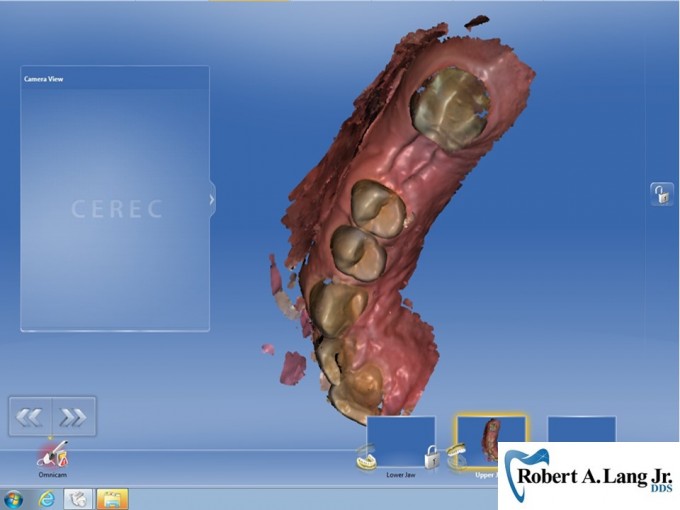
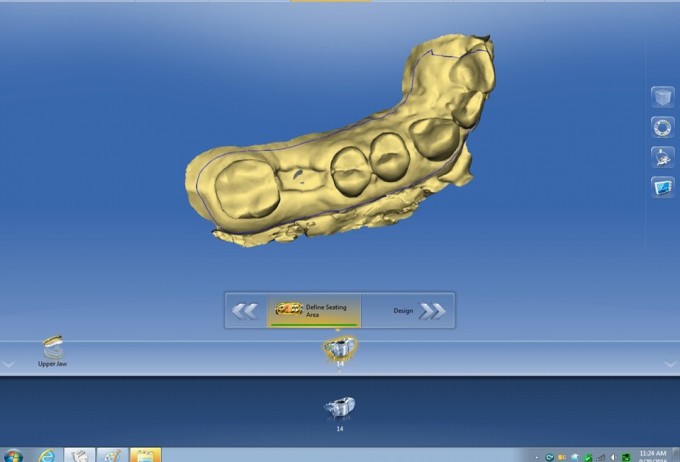
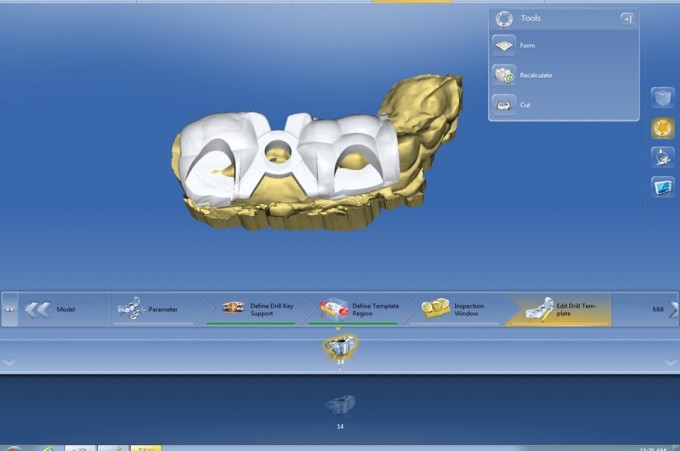
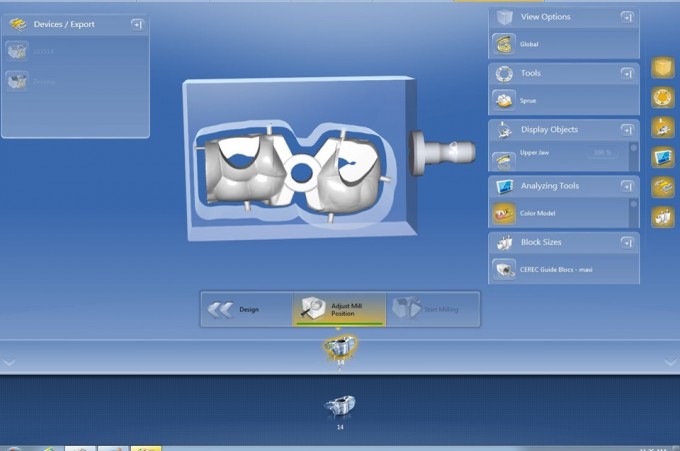
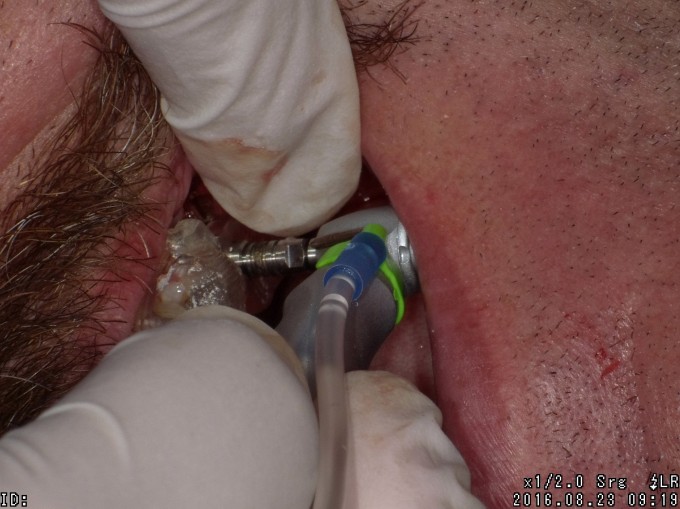
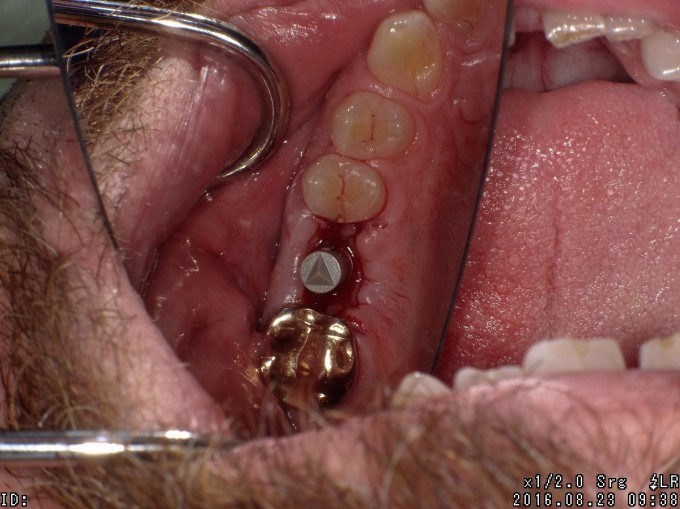
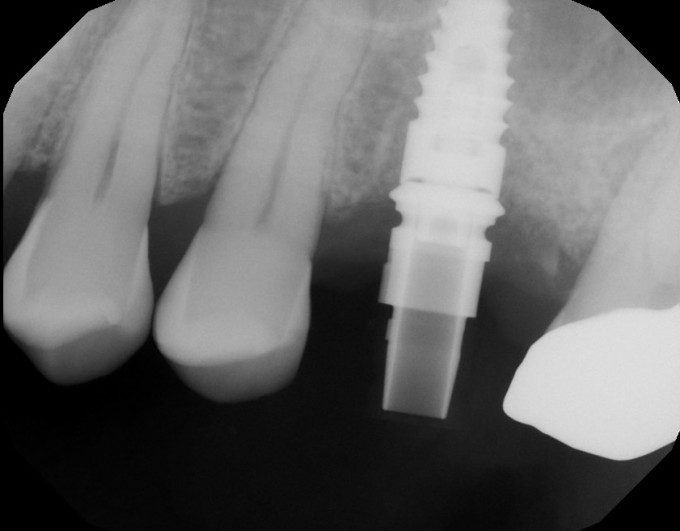
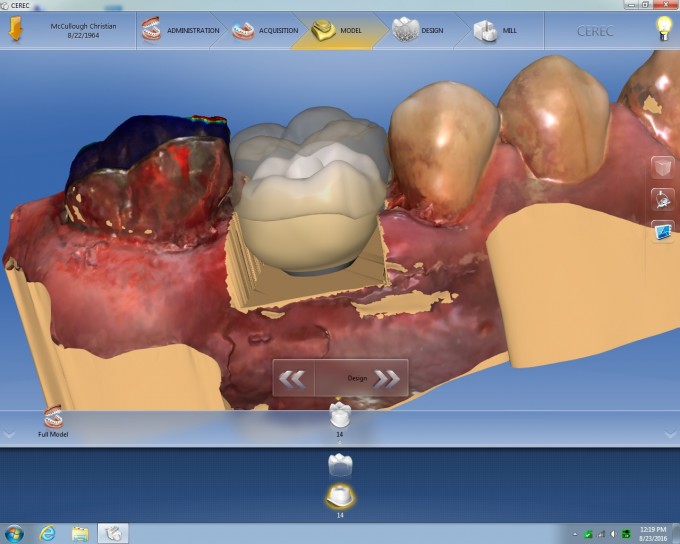
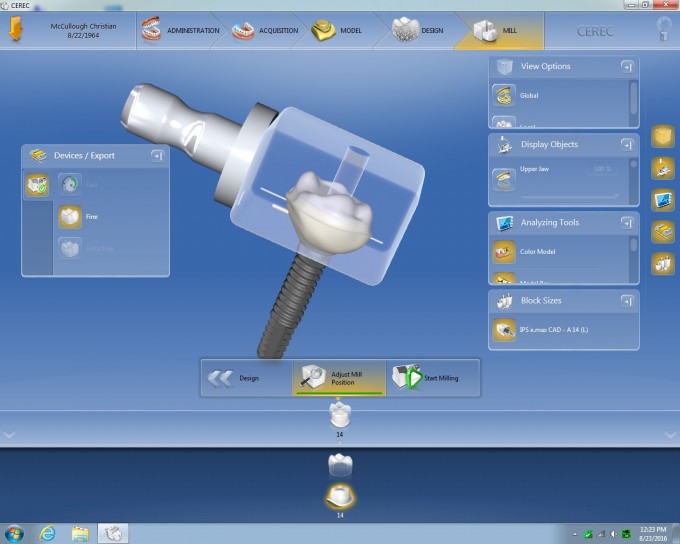
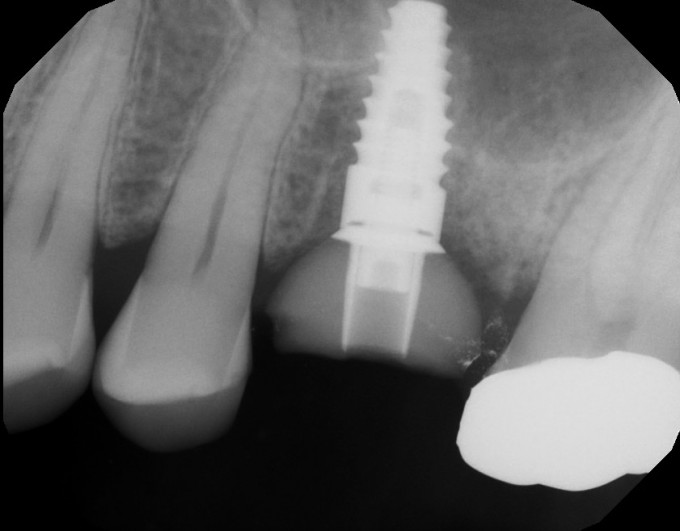
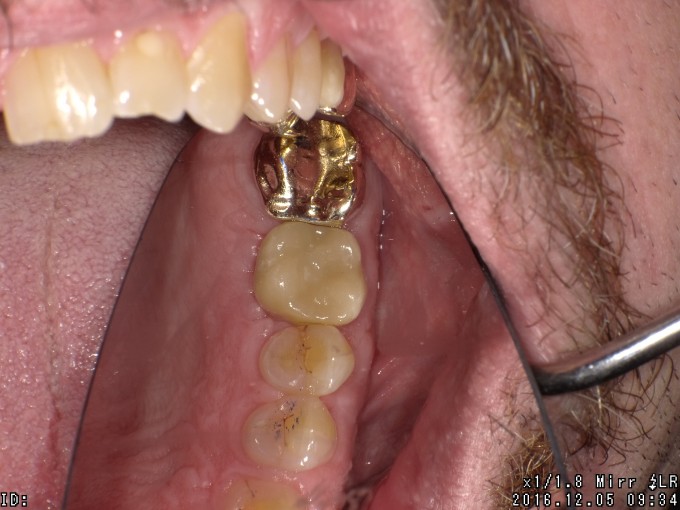
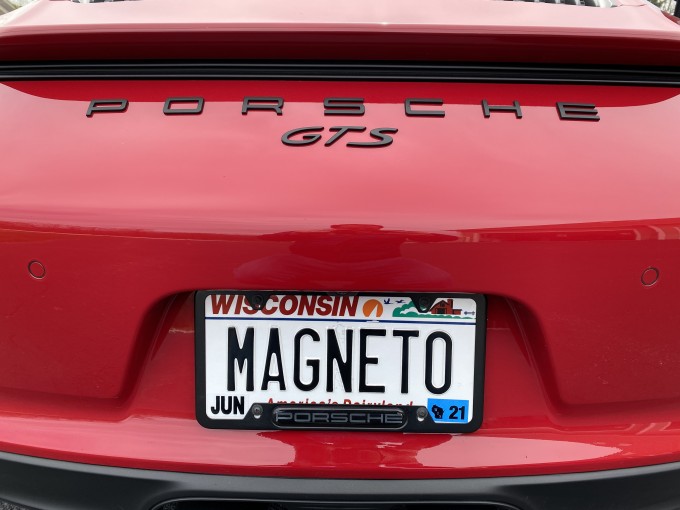
#14 Custom Healing Abutment
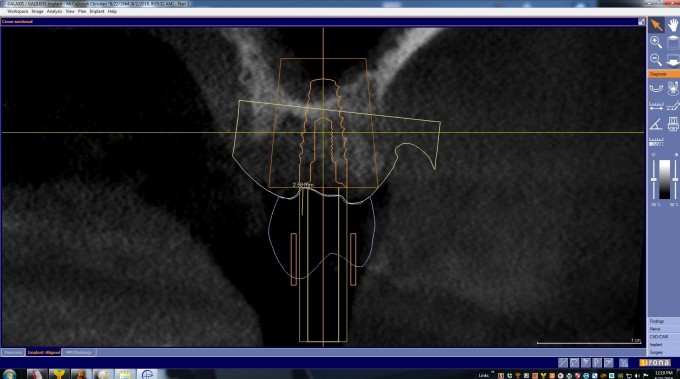
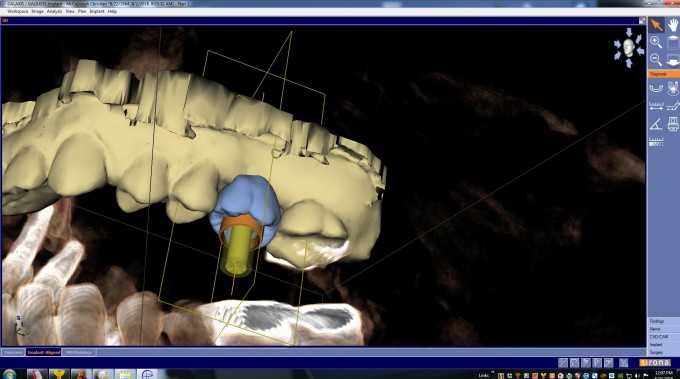
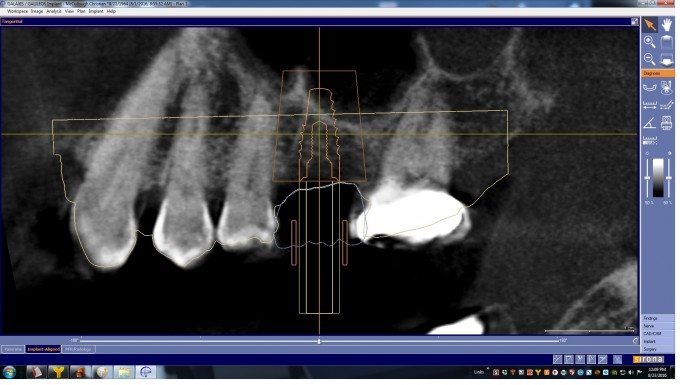
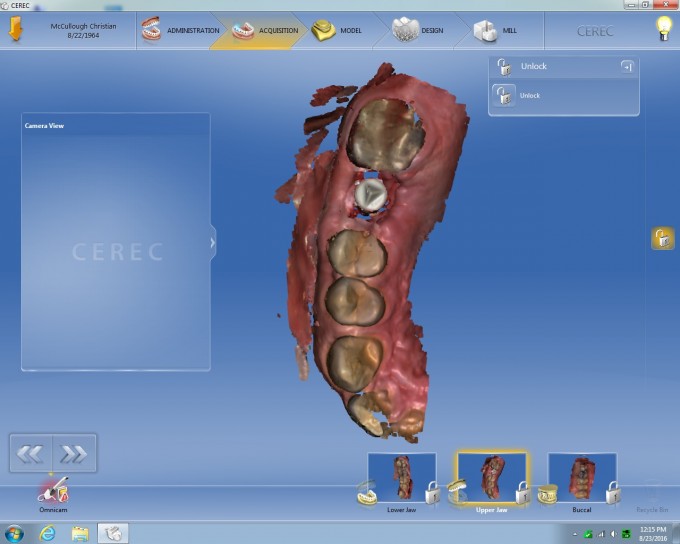
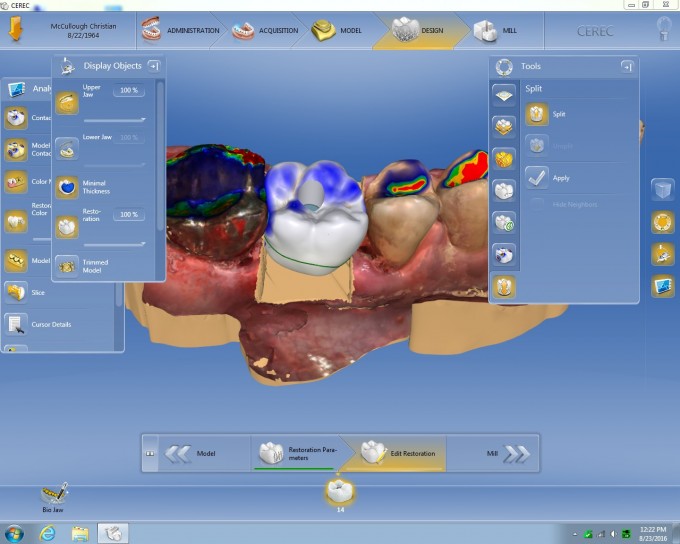
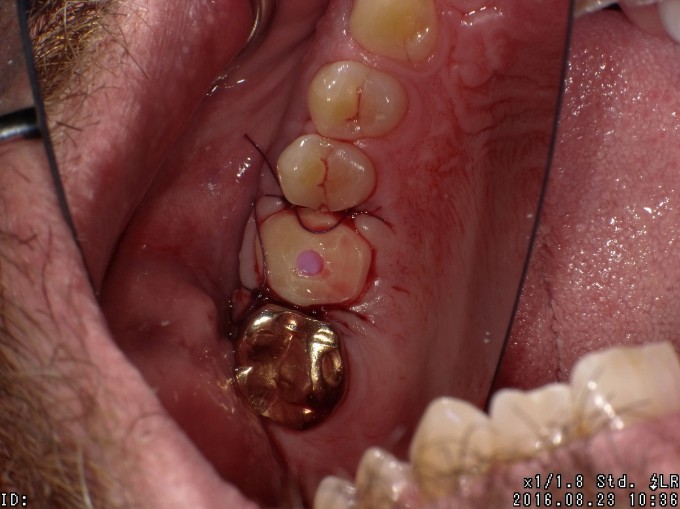
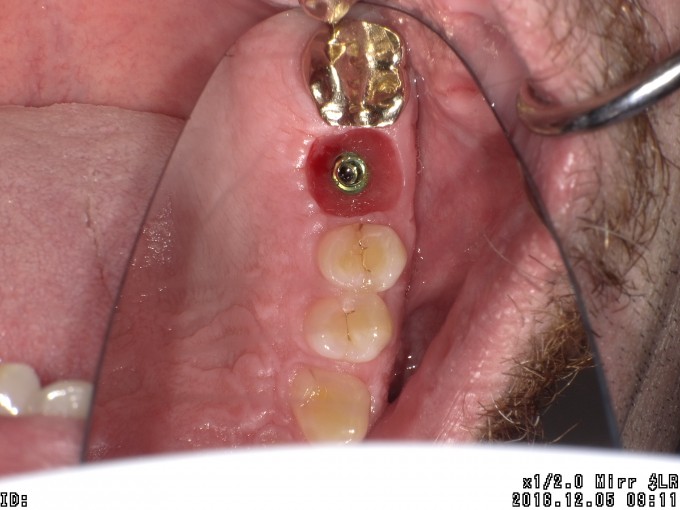
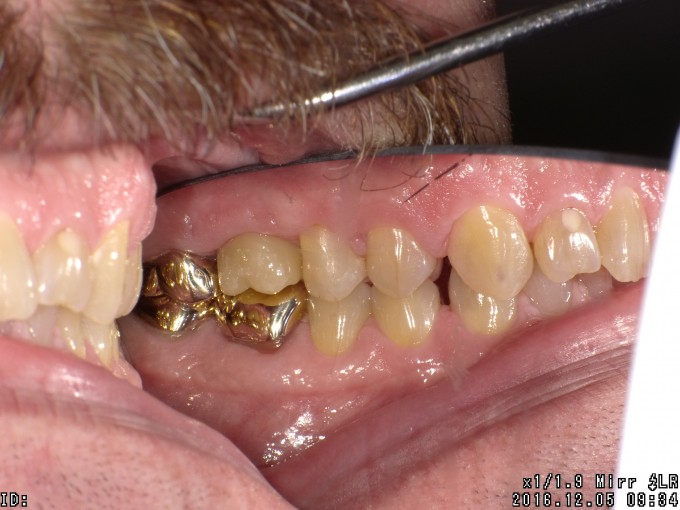
I have been doing all my single stage surgeries with custom healing abutments since Enamic became available. It has been a learning process and took some time to incorporate the digital workflow for the implant procedure. It takes us about 30 minute longer but saves more time from final Imaging. For posterior teeth I can make the final crown from the initial impression. For anteriors you have to evaluate to see if you need to re image. I posted this for discussion, I love this workflow. This custom healing abutment and crown had an emergence profile that I felt was too broad. Love to hear how others would shape the gingival portion.


Preach it brother!!! Extra time on the front end saves you a ton of time on the backend. Very nice documentation and workflow.
Very nice....is there anyway to reuse that tibase like you can reuse healing abutments?
Im going to practice on a posterior but not sure its worth it if its another $150 for a tibase and block compared to a stock healing abutment. (In the posterior region)
Nice work and beautifully documented. It makes such a difference to control the healing and create that proper emergence. Way to take it to the next level!
Trey
Nice job Robert, and very nicely documented. You mentioned you felt it was a little overcontoured.... I like where it emerges to give an anatomically shaped restoration in it B-L and M-D dimension... so without changing where it emerges, I'd probably make it a little less convex to where the baseline is without making it a mushroom...
Mark

Im going to practice on a posterior but not sure its worth it if its another $150 for a tibase and block compared to a stock healing abutment. (In the posterior region)
could this be done using a non cerec ti base that you design the screw access hole - for example using this ti base ($39 with a final screw and wax up sleeve)
http://www.dess-usa.com/ti-bases/
and a regular block with no hole in it ...or is this too much work and too much of a workaround?
Keith you "could" do that.... but you'd be missing the benefits of designing the custom restoration from the time of healing to restoration. The 150 is worth it for the predictability of outcome and efficiency of time. Robert showed just a perfect workflow from planning, to surgery, to restoration. In my view, esp for posteriors, if you are going to do use some type of non-cerec component, either a contour healer (which Trey White came up with), or a robust stock healing abutment, and then finesse the tissue later....
Mark

Thanks for the comments. I wish I was the one who came up with this workflow....
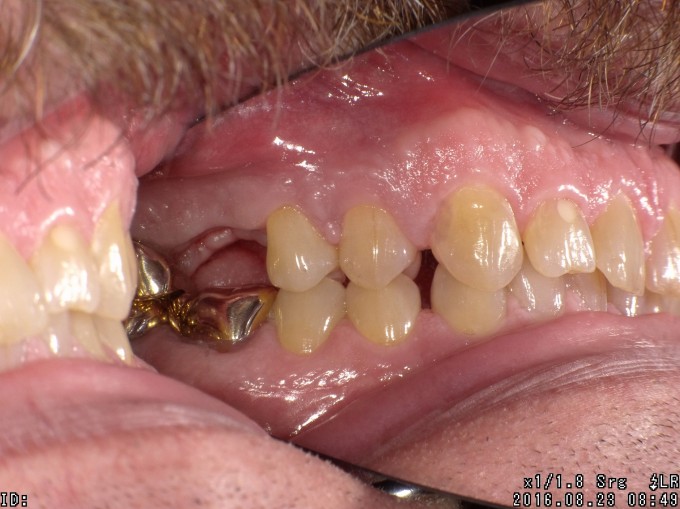
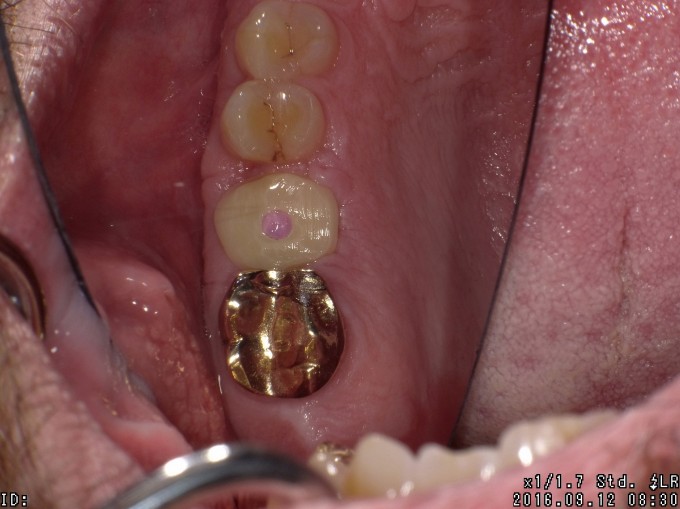
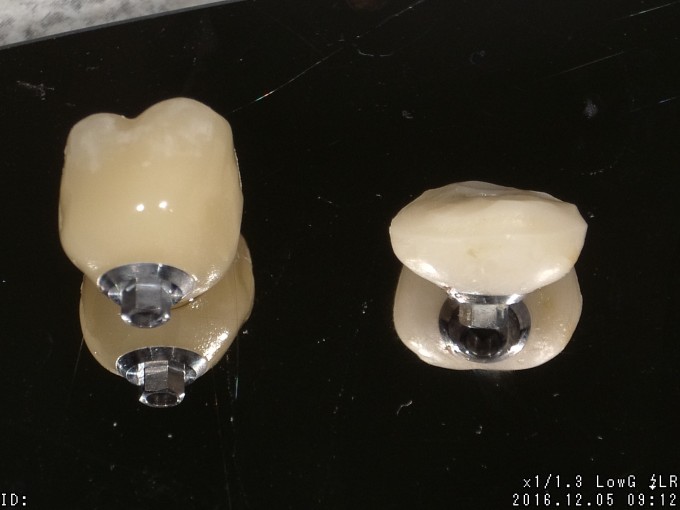
Like Sam said we reuse the tibases for the custom healing abutments and use a new tibase for each final crown. I have changed the emergence to be more concave as I thought the first few I did were too large gingivally.
If you do not want to do this because of cost you have to understand that in the long run there is less chair time and a great fitting crown with excellent gingival countours. When it was ready to restore I just re-opened the file and unsplit the case and milled it. Seating took 5 minutes. I unscrewed the healing collar and screwed in the crown. Chair time is expensive.
