
CEREC and Photoshop

Since I presented Photoshop Elements last fall in Vegas, several people expressed a lot of interest, but they wanted to know how I use this process clinically. I thought i would post a case that I worked up today using this process for a mockup...
To learn more how to incorporate this method into your practice, visit here to sign up for Level 4 - Mastering Multiple Anteriors With CEREC
To learn more about this case visit https://www.cerecdoctors.com/discussion-boards/view/id/38082
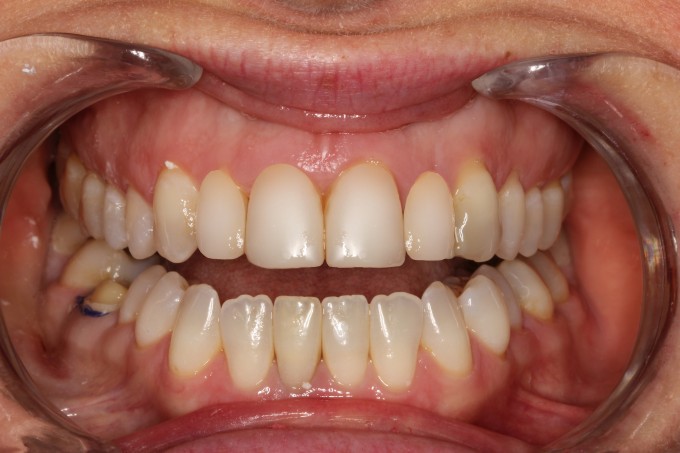
This lady wanted to improve the overall esthetics of her front teeth. The position of her teeth is definitely off and we discussed orthodontics as an initial option. Finances really prevented her from doing this extra step, so we needed to find out what exactly we could accomplish just with restorative dentistry...
Here is her preop... she has composite bondings on tooth #8 and #9 and a 2-wing Maryland Bridge from 9=11. The metal wing on the lingual of #9 is debonded and loose and has been for awhile.

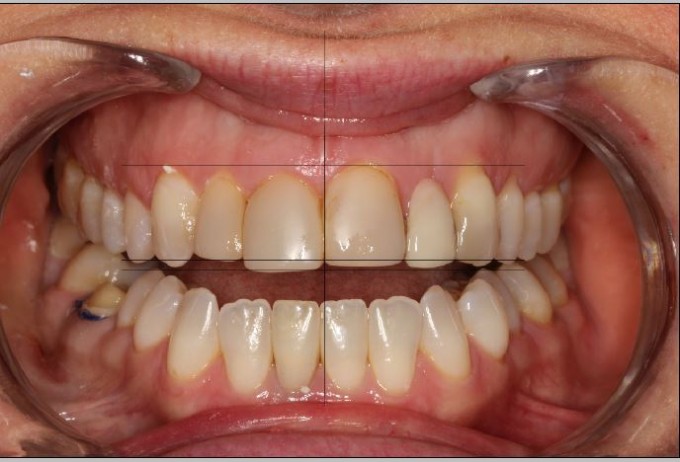
By using Photoshop, I developed a very quick plan for a mockup. This is useful because it shows you where ideal length should be... a couple things that I looked at were the following:
- Higher gingival margin on #9.... This had to be the margin for tooth #8 as well since grafting was not an option for her (she does have a high smile line)
- The pontic of the Maryland bridge was long... need to determine exactly how long this was with Photoshop
- I decided I had to use the final incisal length of #8 as a benchmark.... so how much do I need to add to tooth #9
- Tooth #7 has a distal inclination... how much did I have to add to the distal incisal area to get correct inclination...
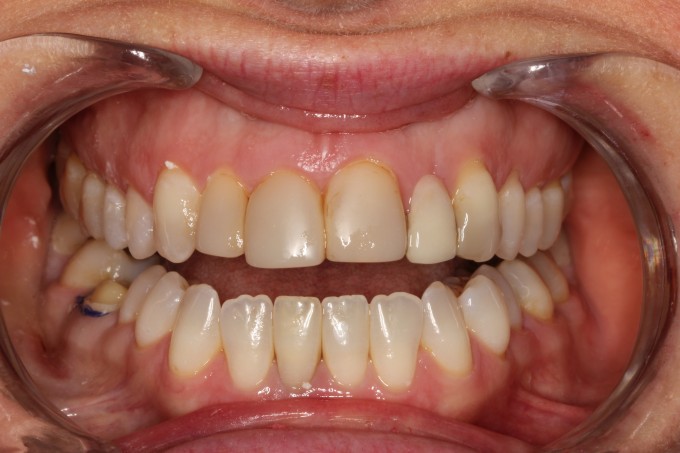
So I took this plan to the mouth and did a quick mockup with composite on what I wanted to do. I also cut off the wing on tooth #9 and added resin to get a better contour on the mesial. Here was the final composite mockup.

I then took this back to Photoshop to see how the proportions would look like with a gingivectomy on #8 when we do the finals and we get this before and after:
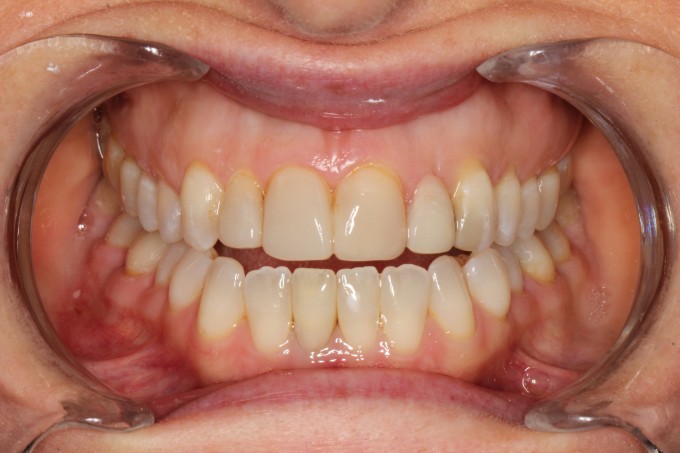
We both thought that these proportions and shape would work for her (centrals a little too long and narrow and we can correct for that with width slightly)... and we will proceed to the final restorations of veneers on 7,8,9 and a one wing Maryland bridge off #11 in a couple months.
Hopefully this helps everyone understand how this Photoshop technique works clinically. It took me about 2.5 hours to do this entire workup (digitally and clinically) + a crown on tooth #30.
