CEREC Custom Healing Abutments with Telio CAD Abutment Block

There has been a lot of anticipation for the various abutment blocks that are set to arrive on the market sometime soon. The Telio CAD abutment block was the first one discussed and likely to be the first on on the market. Those that were at the recent seminar in Scottsdale got to see Dr. Mike Skramstad fabricate a custom healing abutment out of a 14L Enamic block. The Telio CAD does not come in a 14L block only 16L. This leads to some difficulty in designing a custom healing abutment since you can not split the file and make a short little stubby abutment. What has to happen is fabrication of a full contour crown and then modify the design to make a custom healing abutment. Let's walk through a case that does shows exactly how to do this.
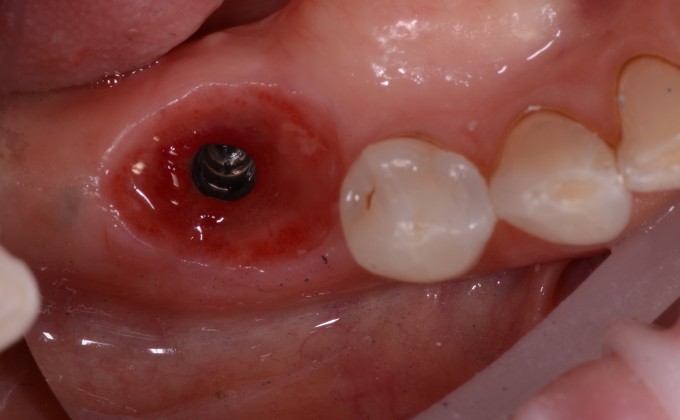
The patient had both lower first molars extracted due to fracture of the teeth. The sites were grafted and allowed to heal. The day of surgery we planned on placing custom healing abutments with the Telio CAD abutment block.

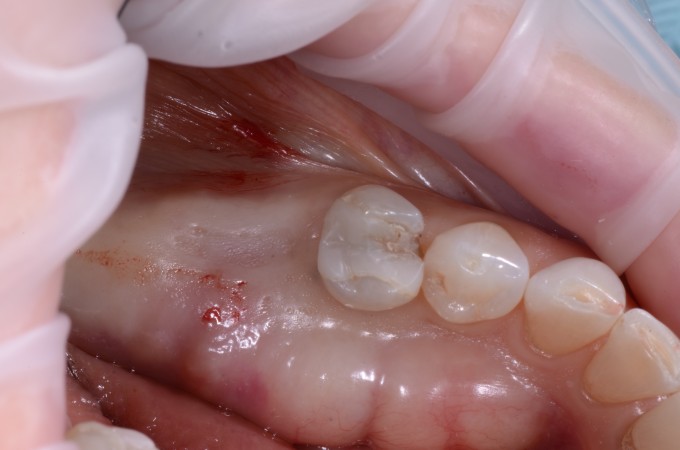
The sites are imaged prior to surgery in the Gingiva Mask folder (although your really don't need it in this type of case) and copied into the Lower Arch folder. Then the area where the implant will go is cut out. The opposing and Buccal Bite images are also taken at this time. The implants are then placed.
Once the implants are in place the ScanPosts are placed and the image is picked up in the premolar region and the area that was cut out is now filled in with the ScanPost present. Then a full contour crown is design as you would normally do to restore the area. Once you have the design done save the case as a separate file. This way you already have the final restoration done for the day of insertion after integration.
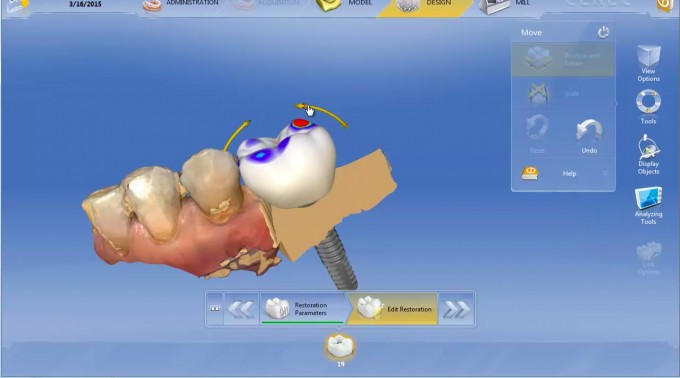
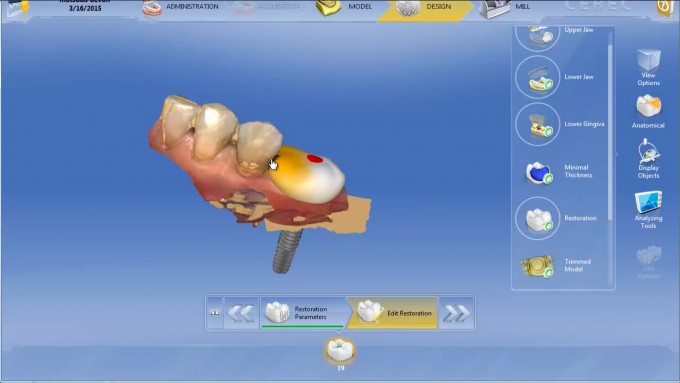
After the crown is made then level the plane of occlusion. For this I use the Shape 2-Directional Anatomical and grab the central groove. Bring the central groove up until the plane of occlusion is even.
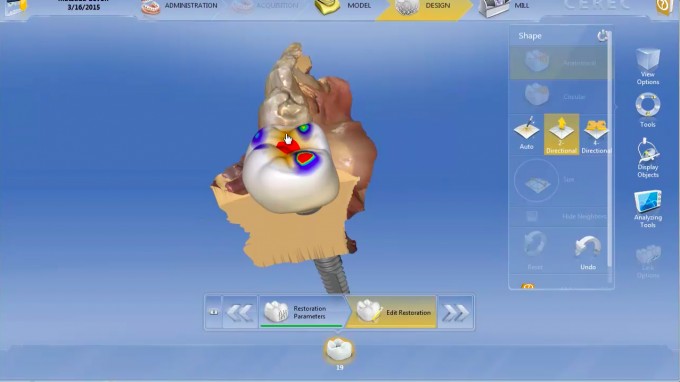
After you have leveled the plane of occlusion use the Smooth Tool to make it almost completely flat. You could do the leveling and smoothing at the same time with the Smooth Tool. I just find it a little fast this way.

Now all you have to do is get it out of occlusion. Again I use the Anatomical 2-Direction Shape Tool to grab the whole restoration and shrink it.

I then run the Smooth Tool to get rid of any ripples or overhangs that might be present. If you are worried about drifting of the teeth you can bring the mesial and distal into contact using the Shape Tool. In this case it is not really necessary but the picture below shows how.
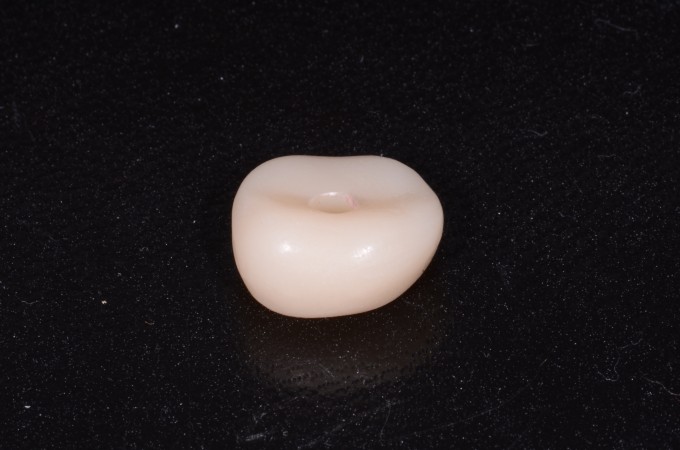
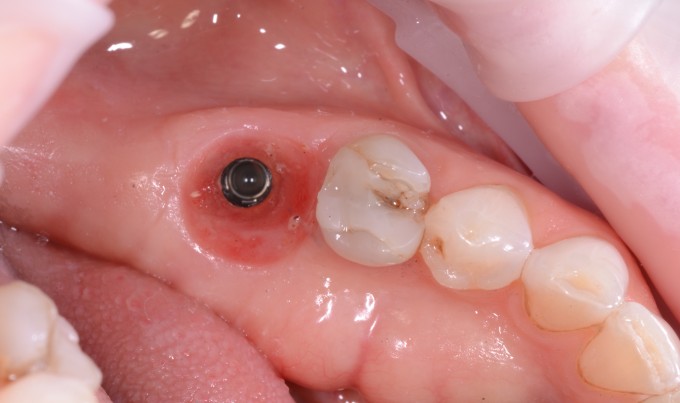
Now you have your final abutment. If you need to you can make it with the TiBase sticking up and then just trim the TiBase down. I have a few shortened TiBase that keep just for use as temporary TiBases for this type of situation.

Once milled out you have a small flat topped abutment with the gingival contours of your final restoration.
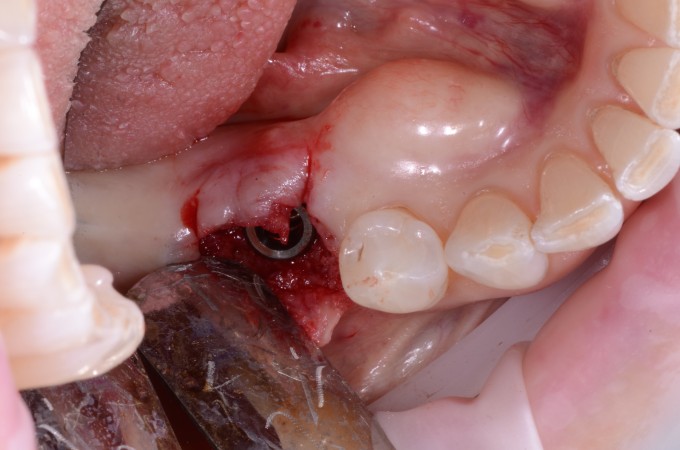
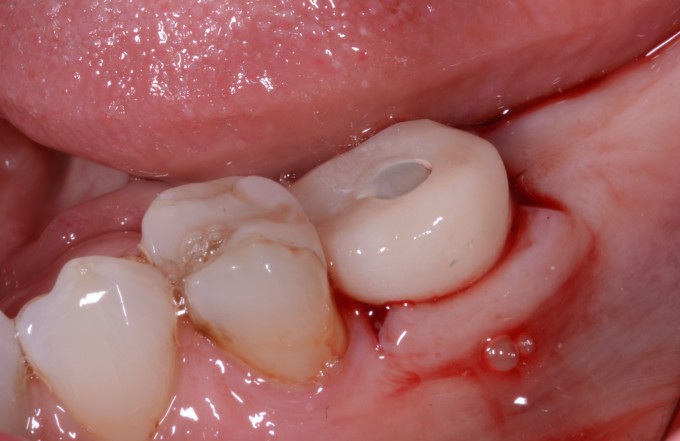
This is then put on the TiBase and seated on the implant. The access is closed and the tissue allowed to heal around the temporary healing abutment.
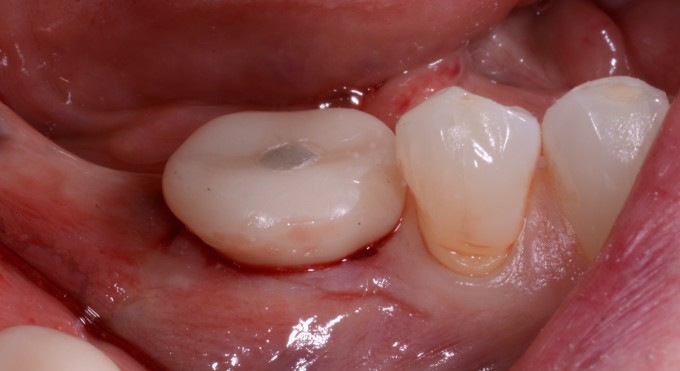
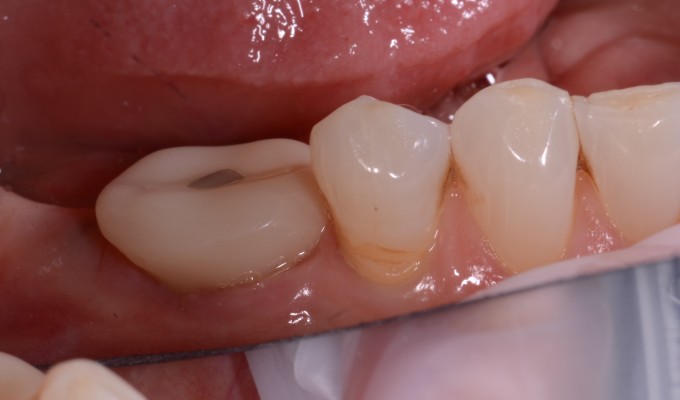
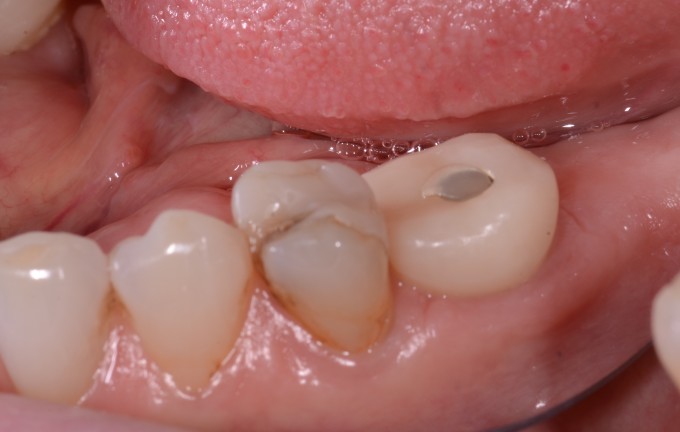
Once the healing has occurred the tissue is perfectly formed and ready for the final restoration.
To learn more about this visit https://www.cerecdoctors.com/discussion-boards/view/id/38576