
CERECGuide Fabrication - Part 4

The next step in CERECGuide fabrication is getting the information in the Galileo’s/XG3D scan and then transferring that to the CEREC AC unit. First lets take a look at what you need in the Galileo’s software to fabricate the CERECGuide.
Once you have the CBCT scan with the radiographic marker and stent in the patients mouth you will then open the Galaxis software. Place the implant the same as you normally would. Once you have the implant placement finalized you will need to tell the software where the markers are. Go to the Implant Tab and then select the sleeve option under the Implant Tab.
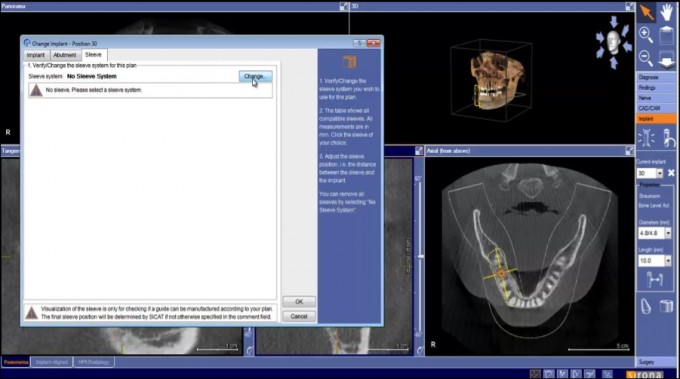
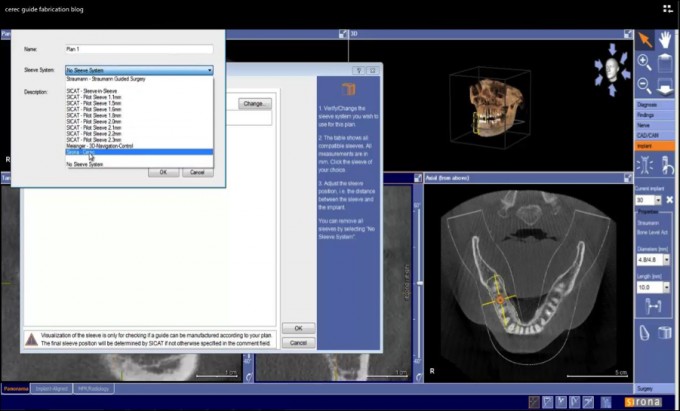
Once you are in this menu, select the Sirona Sleeve. It doesn’t matter which implant system you are using the sleeve is still the Sirona Sleeve. This tells the software you are utilizing the CERECguide system.
Once you have selected the Sirona Sleeve you need to tell the Galaxis software where the reference markers are in the CT scan.
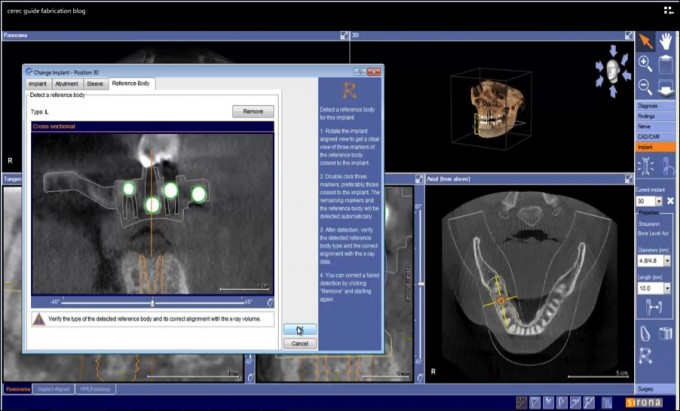
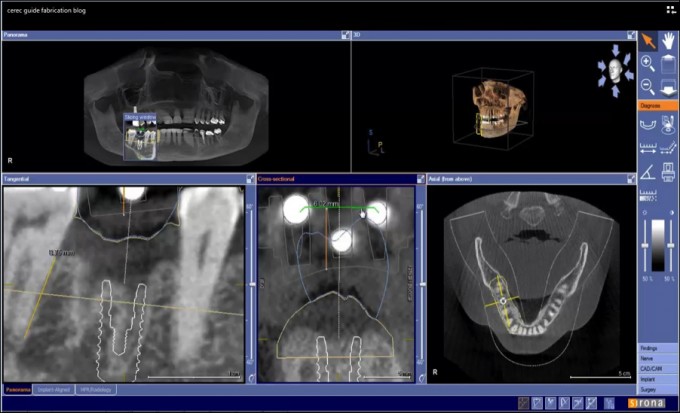
Once you have three good markers indicated it will then set the rest of them. Hit OK and the reference body will then displayed in the CT scan over your implant placement. Now that you have the sleeve selected you will need to input what is called the D2 measurement. This measurement is the length of your drill minus 1mm. You want to make sure that you use a long enough drill that your milled guide insert is at least 5mm thick. If it isn’t, you will get an error message. This can be measured with the distance tool in the Galaxis software.
Once you have all of this done, you can then export the design through the Surgery Tab. Select the tab that has the big R on it. This stands for the Registered Reference body that you have selected.

This will automatically create a folder on your :C drive called Third Party Exports. The exported file will be in the folder with the patients name on it and a date/time stamp. This way if you have multiple designs on the same patient you will be able to tell which is which. This file is then imported directly into the CEREC software. You have to use the size 20 burs to mill the guide insert. It will open in the Mill Preview stage and you will be ready to mill.
